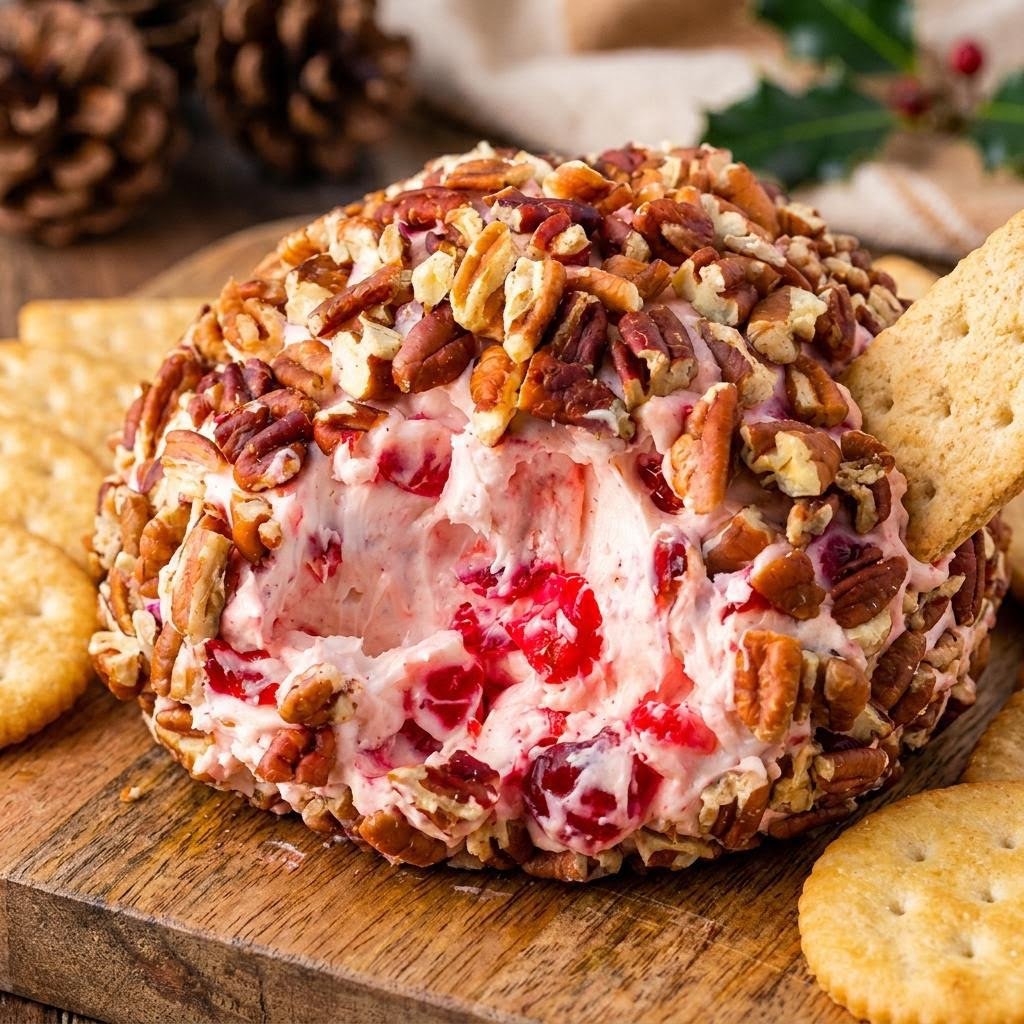
If you’re looking for an easy, delicious, and beautiful dessert to serve during the holiday season, this Christmas Cherry Cheese Ball is just what you need! Creamy, sweet, and filled with delicious cherry flavor, this festive no-bake dessert is guaranteed to become a favorite at Christmas parties, family gatherings, and holiday celebrations.
Made with softened cream cheese, powdered sugar, sweet maraschino cherries, vanilla extract, and crunchy pecans, this delightful dessert combines the flavors of a creamy cheesecake with the fun presentation of a traditional cheese ball.
Unlike savory cheese balls, which are usually served with crackers and herbs, this sweet Christmas version is a delicious dessert that pairs perfectly with graham crackers, vanilla wafers, shortbread cookies, and fresh fruit.
The beautiful pink-tinted filling, colorful cherry pieces, and crunchy pecan coating make this dessert look just as wonderful as it tastes. You can place it in the center of a festive serving platter and surround it with your favorite cookies and dipping treats for a Christmas dessert presentation everyone will love.
One of the best things about this Christmas Cherry Cheese Ball recipe is how easy it is to prepare. There is no baking, no complicated cooking technique, and no special equipment required. Simply mix the ingredients, shape the creamy mixture into a ball, refrigerate until firm, and coat with chopped pecans.
It’s also a wonderful make-ahead dessert. You can prepare it the day before your Christmas celebration, allowing the flavors to blend while saving valuable time in the kitchen.
Whether you’re hosting a holiday party, attending a Christmas potluck, preparing a dessert buffet, or simply looking for something sweet to share with family and friends, this Christmas Cherry Cheese Ball is a delicious choice.
Ingredients
Here are the simple ingredients you’ll need to make this creamy and delicious Christmas Cherry Cheese Ball.
For the Cherry Cream Cheese Filling
- 16 ounces (450 g) full-fat cream cheese, softened to room temperature.
- ½ cup (115 g) unsalted butter, softened.
- 1 ½ cups (180 g) powdered sugar, sifted.
- 1 teaspoon pure vanilla extract.
- 1 cup (approximately 150 g) maraschino cherries, drained and finely chopped.
- 2 tablespoons maraschino cherry juice, optional.
- ½ teaspoon almond extract, optional, for extra flavor.
- ½ cup (60 g) finely chopped pecans, optional, for extra crunch.
For the Pecan Coating
- 1 cup (110 g) finely chopped pecans.
- ¼ cup (30 g) finely chopped walnuts, optional.
- 2 tablespoons shredded sweetened coconut, optional.
- 2 tablespoons finely chopped maraschino cherries, thoroughly dried, optional, for decoration.
For Serving
- Graham crackers.
- Vanilla wafer cookies.
- Shortbread cookies.
- Butter crackers.
- Pretzel sticks.
- Apple slices.
- Fresh strawberries.
- Pear slices.
Ingredient Notes
Cream Cheese: Full-fat cream cheese is the best choice because it creates a rich, smooth, and creamy cheesecake-like texture. Let it soften at room temperature before mixing.
Butter: Softened unsalted butter adds richness and helps create a smooth filling. Avoid melting the butter because melted butter can make the mixture too soft.
Powdered Sugar: Powdered sugar sweetens the filling and helps give the cheese ball its thick, smooth consistency.
Maraschino Cherries: These sweet cherries provide the signature cherry flavor and beautiful pink color. Drain them thoroughly and pat them dry before chopping.
Vanilla Extract: A little vanilla enhances the sweetness and creates a delicious cheesecake-inspired flavor.
Almond Extract: This ingredient is optional, but almond extract pairs beautifully with cherries and gives the dessert a classic bakery-style flavor.
Pecans: Finely chopped pecans create a crunchy outside coating that contrasts wonderfully with the soft, creamy filling.
Preparation
Follow these simple steps to make your homemade Christmas Cherry Cheese Ball.
Step 1: Prepare the Maraschino Cherries
Begin by draining the maraschino cherries using a fine-mesh strainer.
This is an important step because excess cherry juice can make the cream cheese mixture too soft and difficult to shape.
Place the drained cherries on a layer of paper towels and gently pat them dry.
Once they are dry, chop the cherries into small pieces using a sharp knife.
For the best texture, chop them finely so they distribute evenly throughout the creamy filling.
Set aside a small amount of chopped cherries if you would like to use them as an additional decoration.
Step 2: Make the Creamy Cheese Mixture
In a large mixing bowl, add the softened cream cheese and unsalted butter.
Using an electric hand mixer, beat the ingredients on medium speed until the mixture becomes smooth, fluffy, and completely combined.
This should take approximately 2–3 minutes.
Add the vanilla extract and optional almond extract.
Mix again until the flavors are evenly incorporated.
Gradually add the sifted powdered sugar, approximately half a cup at a time.
Continue mixing on low speed until all the powdered sugar has been incorporated.
Scrape down the sides of the bowl with a spatula to make sure everything is evenly mixed.
The mixture should be thick, creamy, and smooth.
Step 3: Add the Cherries
Add the finely chopped maraschino cherries to the cream cheese mixture.
Using a spatula, gently fold the cherries into the filling until they are evenly distributed.
If you want a slightly stronger cherry flavor, add up to 1–2 tablespoons of reserved cherry juice.
However, avoid adding too much liquid because it can make the mixture too soft.
For additional texture, you can also fold in half a cup of finely chopped pecans.
Continue mixing gently until everything is evenly combined.
At this point, the filling should have a beautiful light pink appearance with little pieces of red cherry throughout.
Step 4: Chill and Shape the Cheese Ball
Cover the mixing bowl with plastic wrap and refrigerate the mixture for approximately 1–2 hours, or until firm enough to handle.
Once chilled, place a large piece of plastic wrap on your work surface.
Scoop the cream cheese mixture onto the center of the plastic wrap.
Gather the edges of the plastic wrap and gently shape the mixture into a round ball.
Use your hands to smooth the surface and create an even shape.
Twist the plastic wrap closed around the cheese ball and return it to the refrigerator for another 1–2 hours.
For the best results, allow the cheese ball to become thoroughly chilled and firm before adding the pecan coating.
Step 5: Prepare the Pecan Coating
While the cheese ball is chilling, prepare the coating.
Place the finely chopped pecans in a shallow bowl or on a large plate.
If desired, add finely chopped walnuts or shredded coconut for additional flavor and texture.
Mix everything together until evenly combined.
Make sure the pecans are chopped into small pieces so they stick easily to the outside of the cheese ball.
Remove the chilled cheese ball from the refrigerator and carefully unwrap it.
Place it in the center of the chopped pecans.
Gently roll the cheese ball through the pecans, pressing lightly with your hands so the coating adheres to every side.
Continue until the entire surface is covered with a generous layer of crunchy pecans.
Step 6: Decorate and Serve
Transfer the finished Christmas Cherry Cheese Ball to a festive serving plate.
For an extra beautiful holiday presentation, decorate the top with a few small pieces of chopped maraschino cherries or a light sprinkle of powdered sugar.
You can also add a few whole cherries around the serving plate for a colorful Christmas-inspired appearance.
Arrange graham crackers, vanilla wafers, shortbread cookies, and fresh fruit around the cheese ball.
Refrigerate until ready to serve.
When serving, provide a small dessert knife or spreader so guests can easily scoop the creamy cherry filling onto their favorite cookies.
Your delicious Christmas Cherry Cheese Ball is ready to enjoy!
Variations
One of the best things about this Christmas Cherry Cheese Ball recipe is how easy it is to customize. You can experiment with different ingredients and coatings to create a dessert that suits your taste.
1. Chocolate Cherry Cheese Ball
For chocolate lovers, add ½ cup of mini chocolate chips to the cream cheese mixture. You can also roll the finished cheese ball in mini chocolate chips instead of pecans.
The combination of chocolate and cherries creates a delicious dessert inspired by classic chocolate-covered cherries.
2. Cherry Almond Cheese Ball
Add ½ teaspoon of almond extract to the filling and replace some of the pecans with finely chopped almonds.
Cherry and almond are a wonderful flavor combination that gives this dessert a delicious bakery-style taste.
3. Coconut Cherry Cheese Ball
Replace the pecan coating with shredded sweetened coconut.
The white coconut creates a beautiful snowy appearance that is perfect for Christmas dessert tables.
4. Chocolate-Covered Cherry Cheese Ball
Fold mini chocolate chips into the filling and drizzle melted dark chocolate over the finished cheese ball.
This variation is especially delicious when served with chocolate wafer cookies or graham crackers.
5. Cherry Pecan Cheesecake Ball
Add a little extra vanilla extract and ½ cup of finely chopped pecans to the filling.
Coat the outside with additional toasted pecans for a richer nutty flavor and extra crunch.
6. Festive Christmas Cherry Cheese Ball
For a colorful holiday version, decorate the top with chopped red and green candied cherries.
You can also mix a small amount of green-colored shredded coconut into the pecan coating for a beautiful Christmas-inspired presentation.
7. Cherry Cranberry Cheese Ball
Add ¼ cup of finely chopped dried cranberries to the filling.
The cranberries provide a slightly tart flavor that balances the sweetness of the cherries and powdered sugar.
COOKING Notes
- Always use softened cream cheese for a smooth, lump-free filling.
- Make sure the butter is softened but not melted.
- Drain the maraschino cherries thoroughly before chopping.
- Pat the cherries dry with paper towels to remove excess moisture.
- Add powdered sugar gradually to avoid lumps.
- Do not add too much cherry juice because excess liquid can prevent the cheese ball from becoming firm.
- Refrigerate the mixture before shaping to make it easier to handle.
- Chill the shaped cheese ball again before adding the pecan coating.
- Finely chopped pecans stick better than large pecan pieces.
- Press the pecans gently into the surface to ensure an even coating.
- For a stronger flavor, prepare the cheese ball a day ahead and refrigerate overnight.
- Keep the finished dessert refrigerated until serving because it contains cream cheese and butter.

Christmas Cherry Cheese Ball – A Creamy, Sweet, and Festive Holiday Treat
- Total Time: 3 hours 20 minutes
Description
this Christmas Cherry Cheese Ball is just what you need! Creamy, sweet, and filled with delicious cherry flavor, this festive no-bake dessert is guaranteed to become a favorite at Christmas parties, family gatherings, and holiday celebrations.
Ingredients
For the Cherry Cream Cheese Filling
- 16 ounces (450 g) full-fat cream cheese, softened to room temperature.
- ½ cup (115 g) unsalted butter, softened.
- 1 ½ cups (180 g) powdered sugar, sifted.
- 1 teaspoon pure vanilla extract.
- 1 cup (approximately 150 g) maraschino cherries, drained and finely chopped.
- 2 tablespoons maraschino cherry juice, optional.
- ½ teaspoon almond extract, optional, for extra flavor.
- ½ cup (60 g) finely chopped pecans, optional, for extra crunch.
For the Pecan Coating
- 1 cup (110 g) finely chopped pecans.
- ¼ cup (30 g) finely chopped walnuts, optional.
- 2 tablespoons shredded sweetened coconut, optional.
- 2 tablespoons finely chopped maraschino cherries, thoroughly dried, optional, for decoration.
For Serving
- Graham crackers.
- Vanilla wafer cookies.
- Shortbread cookies.
- Butter crackers.
- Pretzel sticks.
- Apple slices.
- Fresh strawberries.
- Pear slices.
Instructions
Begin by draining the maraschino cherries using a fine-mesh strainer.
This is an important step because excess cherry juice can make the cream cheese mixture too soft and difficult to shape.
Place the drained cherries on a layer of paper towels and gently pat them dry.
Once they are dry, chop the cherries into small pieces using a sharp knife.
For the best texture, chop them finely so they distribute evenly throughout the creamy filling.
Set aside a small amount of chopped cherries if you would like to use them as an additional decoration.
Step 2: Make the Creamy Cheese Mixture
In a large mixing bowl, add the softened cream cheese and unsalted butter.
Using an electric hand mixer, beat the ingredients on medium speed until the mixture becomes smooth, fluffy, and completely combined.
This should take approximately 2–3 minutes.
Add the vanilla extract and optional almond extract.
Mix again until the flavors are evenly incorporated.
Gradually add the sifted powdered sugar, approximately half a cup at a time.
Continue mixing on low speed until all the powdered sugar has been incorporated.
Scrape down the sides of the bowl with a spatula to make sure everything is evenly mixed.
The mixture should be thick, creamy, and smooth.
Step 3: Add the Cherries
Add the finely chopped maraschino cherries to the cream cheese mixture.
Using a spatula, gently fold the cherries into the filling until they are evenly distributed.
If you want a slightly stronger cherry flavor, add up to 1–2 tablespoons of reserved cherry juice.
However, avoid adding too much liquid because it can make the mixture too soft.
For additional texture, you can also fold in half a cup of finely chopped pecans.
Continue mixing gently until everything is evenly combined.
At this point, the filling should have a beautiful light pink appearance with little pieces of red cherry throughout.
Step 4: Chill and Shape the Cheese Ball
Cover the mixing bowl with plastic wrap and refrigerate the mixture for approximately 1–2 hours, or until firm enough to handle.
Once chilled, place a large piece of plastic wrap on your work surface.
Scoop the cream cheese mixture onto the center of the plastic wrap.
Gather the edges of the plastic wrap and gently shape the mixture into a round ball.
Use your hands to smooth the surface and create an even shape.
Twist the plastic wrap closed around the cheese ball and return it to the refrigerator for another 1–2 hours.
For the best results, allow the cheese ball to become thoroughly chilled and firm before adding the pecan coating.
Step 5: Prepare the Pecan Coating
While the cheese ball is chilling, prepare the coating.
Place the finely chopped pecans in a shallow bowl or on a large plate.
If desired, add finely chopped walnuts or shredded coconut for additional flavor and texture.
Mix everything together until evenly combined.
Make sure the pecans are chopped into small pieces so they stick easily to the outside of the cheese ball.
Remove the chilled cheese ball from the refrigerator and carefully unwrap it.
Place it in the center of the chopped pecans.
Gently roll the cheese ball through the pecans, pressing lightly with your hands so the coating adheres to every side.
Continue until the entire surface is covered with a generous layer of crunchy pecans.
Step 6: Decorate and Serve
Transfer the finished Christmas Cherry Cheese Ball to a festive serving plate.
For an extra beautiful holiday presentation, decorate the top with a few small pieces of chopped maraschino cherries or a light sprinkle of powdered sugar.
You can also add a few whole cherries around the serving plate for a colorful Christmas-inspired appearance.
Arrange graham crackers, vanilla wafers, shortbread cookies, and fresh fruit around the cheese ball.
Refrigerate until ready to serve.
When serving, provide a small dessert knife or spreader so guests can easily scoop the creamy cherry filling onto their favorite cookies.
Your delicious Christmas Cherry Cheese Ball is ready to enjoy!
Notes
- Always use softened cream cheese for a smooth, lump-free filling.
- Make sure the butter is softened but not melted.
- Drain the maraschino cherries thoroughly before chopping.
- Pat the cherries dry with paper towels to remove excess moisture.
- Add powdered sugar gradually to avoid lumps.
- Do not add too much cherry juice because excess liquid can prevent the cheese ball from becoming firm.
- Refrigerate the mixture before shaping to make it easier to handle.
- Chill the shaped cheese ball again before adding the pecan coating.
- Finely chopped pecans stick better than large pecan pieces.
- Press the pecans gently into the surface to ensure an even coating.
- For a stronger flavor, prepare the cheese ball a day ahead and refrigerate overnight.
- Keep the finished dessert refrigerated until serving because it contains cream cheese and butter.
- Prep Time: 20 minutes
- Chilling Time: 3 hours
Nutrition
- Calories: 285 kcal
- Sugar: 15 g
- Sodium: 155 mg
- Protein: 4 g
Serving Suggestions
This Christmas Cherry Cheese Ball is a wonderful addition to any holiday dessert table. Its creamy texture and sweet cherry flavor make it easy to pair with many different dipping options.
Here are some delicious ways to serve it.
Graham Crackers: Their slightly sweet, crunchy texture makes them one of the best choices for scooping up the creamy filling.
Vanilla Wafers: These little cookies pair beautifully with the cherry and vanilla flavors.
Shortbread Cookies: Their buttery flavor complements the rich cream cheese filling.
Fresh Strawberries: Serve sliced strawberries alongside the cheese ball for a refreshing fruity option.
Apple Slices: Crisp apple slices provide a delicious contrast to the soft, sweet filling.
Pretzel Sticks: If you enjoy sweet-and-salty combinations, pretzels are a wonderful choice.
Christmas Dessert Platters: Arrange the cheese ball in the center of a large platter surrounded by cookies, crackers, strawberries, and other holiday treats.
Holiday Parties: Serve it in a decorative Christmas bowl or on a festive serving board with a small dessert spreader.
Homemade Christmas Gifts: You can prepare the cheese ball in a decorative container, keep it refrigerated, and give it as a homemade holiday treat with a package of cookies for dipping.
Tips for the Perfect Christmas Cherry Cheese Ball
Want your Christmas Cherry Cheese Ball to turn out perfectly every time? Follow these helpful tips.
1. Use Full-Fat Cream Cheese
Full-fat cream cheese creates the richest flavor and firmest texture. Reduced-fat varieties may make the mixture softer.
2. Dry the Cherries Thoroughly
This is one of the most important steps. Excess cherry juice can make the filling runny and prevent the cheese ball from holding its shape.
3. Don’t Skip the Chilling Time
Refrigerating the mixture allows the butter and cream cheese to firm up, making shaping much easier.
4. Add Powdered Sugar Gradually
Adding powdered sugar little by little helps create a smooth filling without lumps.
5. Chop the Pecans Finely
Small pecan pieces create a beautiful coating and stick more easily to the outside.
6. Shape with Plastic Wrap
Using plastic wrap makes it easier to form a smooth, round cheese ball without getting the mixture all over your hands.
7. Make It the Day Before
Preparing this dessert ahead of time allows the flavors to blend together and makes holiday entertaining much easier.
8. Keep It Chilled
Cream cheese desserts should not be left at room temperature for extended periods. Serve the cheese ball chilled and return leftovers to the refrigerator promptly.
Storage Instructions
Refrigerator: Store the Christmas Cherry Cheese Ball in an airtight container in the refrigerator for approximately 3–4 days. For the best texture and flavor, keep it chilled until serving.
Freezer: The uncoated cheese ball can be frozen in a freezer-safe airtight container for up to 1 month for best quality. Thaw it overnight in the refrigerator before adding the pecan coating.
Freezing the fully decorated version is less recommended because the texture of the cream cheese and the appearance of the pecans may change after thawing.
Make-Ahead Instructions: Prepare the filling and shape the cheese ball up to one day ahead. Keep it tightly wrapped in plastic wrap in the refrigerator. Add the pecan coating shortly before serving for the freshest appearance.
Prep Time, Cooking Time, and Total Time
| Category | Time |
|---|---|
| Prep Time | 20 minutes |
| Cooking Time | 0 minutes |
| Chilling Time | 3 hours |
| Total Time | 3 hours 20 minutes |
Estimated Yield: 10–12 servings.
Difficulty: Easy.
Recipe Type: No-Bake Dessert.
Best Occasion: Christmas parties, holiday gatherings, and family celebrations.
Nutritional Information
The following nutritional information is estimated per serving, assuming the recipe makes approximately 12 servings without counting additional crackers, cookies, or fruit.
| Nutrient | Amount |
|---|---|
| Calories | 285 kcal |
| Protein | 4 g |
| Total Fat | 23 g |
| Saturated Fat | 11 g |
| Carbohydrates | 17 g |
| Sugar | 15 g |
| Sodium | 155 mg |
| Fiber | 1 g |
Note: Nutritional values are estimates and may vary depending on the brands of cream cheese, butter, cherries, powdered sugar, and pecans used.
Frequently Asked Questions (FAQs)
1. Can I make Christmas Cherry Cheese Ball ahead of time?
Absolutely! This is an excellent make-ahead dessert. You can prepare the cheese ball one day before your Christmas party and keep it covered in the refrigerator. For the freshest appearance, add the pecan coating shortly before serving.
2. Do I need to bake this Christmas Cherry Cheese Ball?
No! This recipe is completely no-bake. Simply mix the ingredients, chill the filling, shape it into a ball, and coat it with chopped pecans.
3. Can I use fresh cherries instead of maraschino cherries?
Maraschino cherries are recommended because they provide a sweeter flavor and beautiful red color. Fresh cherries can be used, but they contain more moisture and have a different flavor. Remove the pits, chop them finely, and drain them thoroughly before adding them.
4. Why is my cherry cheese ball too soft?
The mixture may be too soft because the cream cheese or butter was too warm, the cherries contained excess liquid, or the mixture needs more chilling time.
Refrigerate it for another 1–2 hours before shaping. If necessary, gradually mix in a little additional powdered sugar.
5. Can I use walnuts instead of pecans?
Yes! Walnuts are an excellent substitute for pecans. You can also use chopped almonds or pistachios for a different flavor and texture.
6. What can I serve with a Christmas Cherry Cheese Ball?
Graham crackers, vanilla wafers, shortbread cookies, pretzels, apple slices, and fresh strawberries are all delicious choices.
7. Can I make this recipe without nuts?
Yes! If you prefer a nut-free version, replace the pecan coating with shredded coconut, crushed vanilla wafers, or mini chocolate chips. Always check ingredient labels for potential nut cross-contact if serving someone with an allergy.
8. How long does Christmas Cherry Cheese Ball last in the refrigerator?
When stored in an airtight container, it should keep for approximately 3–4 days in the refrigerator.
9. Can I freeze Christmas Cherry Cheese Ball?
Yes. For the best results, freeze the uncoated cheese ball in an airtight freezer-safe container for up to 1 month. Thaw it overnight in the refrigerator and add the pecan coating before serving.
10. Can I use low-fat cream cheese?
Yes, but full-fat cream cheese is recommended because it provides a richer flavor and firmer texture. Low-fat cream cheese may produce a softer filling.
11. How do I make the cheese ball pink?
The finely chopped maraschino cherries naturally add a light pink color. If you prefer a brighter pink appearance, add one or two drops of red or pink food coloring and mix until the desired color is reached.
12. Can I add chocolate chips to the filling?
Definitely! Mini chocolate chips are a delicious addition. Add approximately ½ cup to the filling for a wonderful chocolate-and-cherry combination.
13. What is the best way to shape a cheese ball?
Chill the mixture first, then place it on plastic wrap. Gather the edges and gently shape the mixture into a ball. This technique makes shaping much easier and keeps your hands clean.
14. Can I use this recipe as a dessert dip instead of a cheese ball?
Yes! Simply skip the shaping and pecan coating. Transfer the creamy cherry mixture into a serving bowl, sprinkle chopped pecans over the top, and serve with graham crackers, cookies, or fruit.
15. Is Christmas Cherry Cheese Ball a dessert or an appetizer?
This particular version is a sweet dessert cheese ball rather than a savory appetizer. Its cream cheese, powdered sugar, and cherry filling make it perfect for serving with cookies, fruit, and sweet crackers.
Conclusion
This Christmas Cherry Cheese Ball is the perfect no-bake holiday dessert for anyone who loves creamy cheesecake flavors and sweet cherries. With its smooth cream cheese filling, juicy cherry pieces, hint of vanilla, and crunchy pecan coating, every bite is a delicious combination of flavors and textures.
Whether you’re preparing a festive Christmas dessert table, hosting a family gathering, attending a holiday potluck, or simply looking for an easy homemade treat, this recipe is sure to impress.
The best part is how simple it is to make. You don’t need an oven, complicated ingredients, or hours of preparation. Just mix, chill, shape, coat, and serve!
Prepare it ahead of time, arrange it on a beautiful holiday platter, and surround it with graham crackers, vanilla wafers, and fresh fruit for a dessert everyone will love.
Make this Christmas Cherry Cheese Ball part of your holiday traditions, share it with your family and friends, and enjoy a sweet little taste of Christmas in every bite! 🎄🍒
