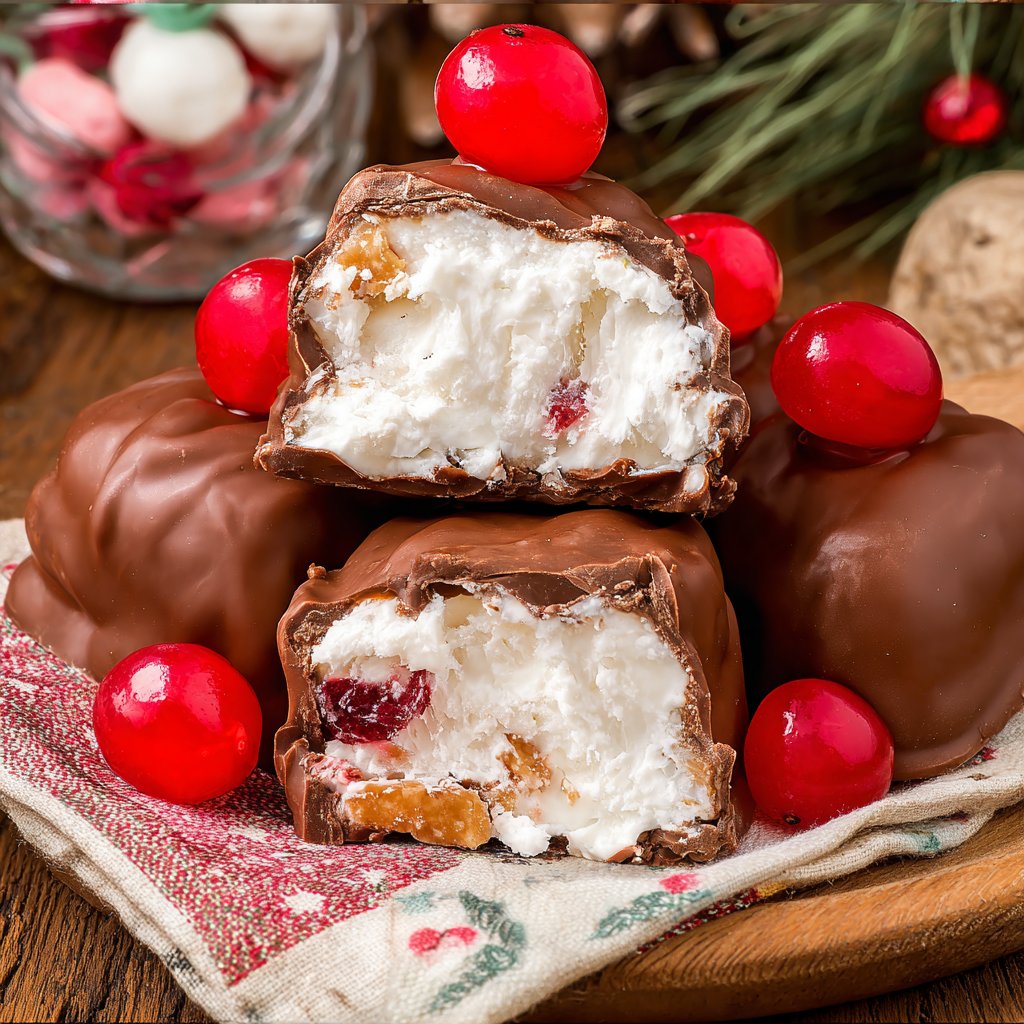
Martha Washington Candy is a delicious old-fashioned homemade treat made with a creamy coconut and pecan filling wrapped in a smooth chocolate coating. Every bite combines sweet shredded coconut, crunchy pecans, buttery richness, and decadent chocolate for a candy that tastes like something straight from a traditional candy shop. Best of all, this classic dessert requires no baking and uses simple ingredients you can find at almost any American grocery store.
These chocolate-covered candies are especially popular during Christmas, when homemade sweets become part of family traditions, cookie exchanges, and festive dessert trays. Their attractive appearance makes them perfect for gifting, while their rich flavor makes them hard to resist once the first batch is ready.
The secret to delicious Martha Washington Candy is creating a filling that is sweet, moist, and firm enough to roll into neat little balls. Sweetened condensed milk and butter help bring the ingredients together, while powdered sugar provides structure. Shredded coconut adds a chewy texture, and chopped pecans provide a satisfying crunch. After chilling, the filling is dipped into melted chocolate and refrigerated until the coating becomes firm.
Whether you are preparing holiday treats, filling a homemade candy box, or searching for a nostalgic dessert to add to your family recipe books, this recipe is a wonderful choice. You can make it ahead, customize the chocolate coating, and prepare a generous batch without spending hours in the kitchen.
Why You’ll Love This Recipe
- No oven required: This is an easy no-bake candy recipe, making it perfect when your oven is busy with holiday meals.
- Classic flavor combination: Coconut, pecans, and chocolate create a rich, sweet, and slightly nutty treat.
- Perfect for gifting: Arrange the candies in decorative paper liners and package them in food-safe tins or gift boxes.
- Easy to prepare ahead: The filling can be chilled in advance, and the finished candies store well in the refrigerator.
- Customizable: Use milk chocolate, semisweet chocolate, or dark chocolate to create your preferred flavor.
- Great for holiday gatherings: These candies look beautiful beside fudge, cookies, chocolate pretzels, and other homemade sweets.
Ingredients for Martha Washington Candy
This recipe makes approximately 40–50 candies, depending on the size of each piece.
For the Filling
- 1 can (14 ounces) sweetened condensed milk
- 1/2 cup unsalted butter, softened
- 1 teaspoon vanilla extract
- 1 pound powdered sugar, approximately 3 3/4 to 4 cups
- 3 cups sweetened shredded coconut
- 2 cups finely chopped pecans
For the Chocolate Coating
- 24 ounces semisweet chocolate chips or chocolate melting wafers
- 1–2 tablespoons coconut oil or shortening, optional
Ingredient Tips
Sweetened condensed milk: This creates a creamy filling and helps bind the ingredients together. Do not substitute evaporated milk, which has a much thinner consistency.
Powdered sugar: Add it gradually to achieve a thick, workable filling. Depending on your coconut and the way ingredients are measured, you may not need every last spoonful.
Shredded coconut: Sweetened shredded coconut gives the candy its traditional sweetness and chewy texture.
Pecans: Finely chopped pecans distribute evenly through the filling and make the balls easier to shape.
Chocolate: Semisweet chocolate provides a balanced coating, while milk chocolate produces a sweeter finish. Melting wafers are convenient because they are designed for dipping.
Coconut oil: A small amount can help thin thick chocolate, but add it gradually to avoid making the coating too soft.
Preparation: How to Make Martha Washington Candy
Step 1: Mix the Creamy Filling
Place the softened butter in a large mixing bowl. Add the sweetened condensed milk and vanilla extract, then stir until smooth.
Gradually add the powdered sugar, mixing thoroughly after each addition. A sturdy spatula or hand mixer on low speed can help combine the ingredients without creating a cloud of powdered sugar.
Once the mixture is smooth and thick, fold in the shredded coconut and chopped pecans. Stir until everything is evenly distributed, scraping the bottom and sides of the bowl as needed.
The filling should be sticky but thick enough to hold together when pressed. If it seems soft, do not immediately add a large amount of extra sugar. Refrigeration will help the butter firm up and improve the consistency.
Step 2: Chill the Filling
Cover the bowl and refrigerate the mixture for approximately 1–2 hours, or until firm enough to handle.
This step is important because warm filling can stick to your hands and become difficult to shape. Chilling also helps the ingredients settle together, making it easier to create uniform candy balls.
If you are preparing the recipe for a holiday gathering, you can make the filling the day before. Keep it covered in the refrigerator until you are ready to shape the candies.
Step 3: Roll into Small Balls
Line a baking sheet with parchment paper. Use a small cookie scoop or tablespoon to portion the chilled filling into evenly sized pieces.
Roll each portion gently between your palms to create a smooth ball approximately 1 inch in diameter. Place the balls on the prepared baking sheet, leaving a little space between each one.
When all the filling has been shaped, refrigerate the tray for another 30–45 minutes. The balls should be firm before dipping, which helps prevent them from breaking apart in the melted chocolate.
If the kitchen is warm, work in small batches and keep the remaining balls refrigerated until needed.
Step 4: Melt the Chocolate
Place the chocolate chips or melting wafers in a dry, microwave-safe bowl. Microwave for 20–30 seconds at a time, stirring thoroughly after each interval until the chocolate is almost completely melted.
Stir until the remaining chocolate melts from the residual heat. If the mixture is too thick for dipping, add a small amount of coconut oil or shortening and stir until smooth.
You can also use a double boiler. Place the chocolate in a heatproof bowl over a saucepan of gently simmering water, ensuring the bottom of the bowl does not touch the water. Stir until melted.
Keep all water and steam away from the chocolate because moisture can cause it to seize. Dry kitchenware and simple cooking tools make this step easier and help produce a smooth coating.
Step 5: Dip and Set the Candies
Remove a few chilled balls from the refrigerator at a time. Place one ball into the melted chocolate and turn it gently with a fork until completely coated.
Lift the candy out and allow excess chocolate to drip back into the bowl. Gently tap the fork against the edge of the bowl, then transfer the candy to the parchment-lined tray.
Repeat with the remaining balls. If desired, sprinkle finely chopped pecans over the tops before the chocolate sets, or drizzle the finished candies with a little contrasting chocolate for decoration.
Refrigerate the candies for approximately 20–30 minutes, or until the coating is firm. Once set, transfer them to an airtight container and keep refrigerated until serving.
Variations to Try
Dark Chocolate Martha Washington Candy
Replace semisweet chocolate with dark chocolate for a richer coating and a less sweet finish. Dark chocolate complements the sweet coconut filling particularly well.
Milk Chocolate Coconut Pecan Candy
Use milk chocolate melting wafers for a sweeter, creamier candy. This version is ideal for people who prefer traditional candy-shop flavors.
White Chocolate Martha Washington Candy
Dip the chilled balls in melted white chocolate for a sweeter variation. Decorate with finely chopped pecans or a light drizzle of semisweet chocolate.
Festive Christmas Candy
Add a small sprinkle of red and green decorations or finely chopped pecans to the chocolate coating before it sets. Arrange the finished candies in festive paper liners for a beautiful Christmas dessert platter.
Almond Coconut Candy
Replace some or all of the pecans with finely chopped almonds. This creates a slightly different nutty flavor while keeping the chewy coconut center.
Bite-Sized Candy Balls
Shape the filling into smaller balls for parties and candy exchanges. Smaller pieces are easy to serve and allow guests to sample several different holiday treats.
Cooking Notes
- Chill thoroughly: Cold filling is easier to shape and less likely to fall apart during dipping.
- Use finely chopped nuts: Large pecan pieces can make the balls uneven and difficult to coat.
- Melt chocolate slowly: Short heating intervals help prevent scorching.
- Keep utensils dry: Even a little moisture can cause melted chocolate to become grainy.
- Avoid overheating the chocolate: Stirring between intervals helps distribute the heat evenly.
- Use parchment paper: It prevents sticking and makes it easier to remove the finished candies.
- Work in batches: Keeping most of the candy balls refrigerated helps them remain firm.
- Adjust the filling carefully: Add powdered sugar in small increments if the mixture is too soft after chilling.
Serving Suggestions
Martha Washington Candy is delicious on its own, but it also works beautifully as part of a larger dessert spread.
- Christmas dessert trays: Serve with fudge, sugar cookies, peanut butter balls, and chocolate-covered pretzels.
- Homemade gifts: Place the candies in a food-safe tin or gift box lined with parchment paper.
- Cookie exchanges: Arrange individual pieces in small paper liners for easy serving.
- Coffee and tea: Serve one or two candies alongside hot coffee, black tea, or hot chocolate.
- Holiday parties: Add them to a dessert platter with brownies, truffles, and other bite-sized sweets.
- Family gatherings: Prepare the candies in advance so you can spend less time preparing dessert on the day of the event.
If you make homemade sweets every holiday season, consider keeping coconut, pecans, chocolate, and condensed milk on hand. Buying these pantry staples during grocery deals can make it more affordable to prepare several batches for gifting.
Tips for the Best Results
Use softened butter. Butter should be soft enough to mix easily but not melted. Melted butter can make the filling greasy.
Measure the ingredients carefully. Too much powdered sugar may create a dry filling, while too little may leave the mixture too sticky.
Use a cookie scoop. Consistent portions help the candies look professional and ensure they chill evenly.
Keep the chocolate smooth. If the coating becomes too thick, warm it gently and stir. Add coconut oil a little at a time if needed.
Let the excess chocolate drip off. This helps prevent thick pools of chocolate around the bottom of each candy.
Allow the coating to set completely. Refrigerate the finished candies until the chocolate is firm before stacking or packaging them.
Plan ahead for special occasions. You can make the filling in advance, roll the balls later, and finish the chocolate coating when convenient.
Prep Time, Cooking Time, and Total Time
- Prep Time: 30 minutes
- Chilling Time: 2 hours
- Cooking Time: 0 minutes
- Chocolate Setting Time: 20–30 minutes
- Total Time: Approximately 2 hours 50 minutes
- Yield: 40–50 candies
These times are estimates. Actual preparation time depends on how quickly you shape and dip the candies.
Nutritional Information
Estimated values per candy, assuming approximately 45 pieces:
- Calories: 180
- Protein: 2 grams
- Sodium: 35 milligrams
Actual nutrition will vary depending on the chocolate, the amount of powdered sugar used, the size of each candy, and the final yield.
Frequently Asked Questions
What is Martha Washington Candy made of?
Martha Washington Candy is generally made with shredded coconut, chopped pecans, butter, powdered sugar, sweetened condensed milk, vanilla, and a chocolate coating.
Is Martha Washington Candy a no-bake recipe?
Yes. The filling is mixed, chilled, shaped into balls, and dipped in melted chocolate. No oven is required.
Why is my candy filling too sticky?
The filling may need more time in the refrigerator. Chill it thoroughly before shaping. If it remains too soft, add a small amount of powdered sugar and chill again.
Why are my candy balls breaking during dipping?
The filling may be too warm or insufficiently chilled. Refrigerate the shaped balls until firm, then dip only a few at a time while keeping the remaining pieces cold.
Can I use white chocolate?
Yes. White chocolate creates a sweeter coating that pairs well with the coconut and pecans. Melt it gently and stir frequently to avoid overheating.
Can I make Martha Washington Candy ahead of time?
Absolutely. Prepare the candies a few days before serving and keep them in an airtight container in the refrigerator. This makes them convenient for Christmas parties, family gatherings, and homemade gifts.
How should I store Martha Washington Candy?
Because the filling contains butter and sweetened condensed milk, store the candies in an airtight container in the refrigerator. Separate layers with parchment paper to help protect the chocolate coating. For best quality, enjoy them within approximately 1–2 weeks.
Can I freeze Martha Washington Candy?
Yes. Freeze the candies in a freezer-safe airtight container, separating the layers with parchment paper. They generally retain good quality for about 2–3 months. Thaw them in the refrigerator while covered to reduce condensation.
Can I make this candy without pecans?
Yes. You can omit the pecans or replace them with finely chopped almonds or another suitable nut. The texture will be different, but the coconut filling will still be delicious. If preparing candy for people with allergies, check all ingredient labels and prevent cross-contact.
Why is it called Martha Washington Candy?
The name is associated with traditional American homemade candy recipes, particularly holiday collections. Its exact historical origin is uncertain, so a direct connection to Martha Washington should not be assumed.
Conclusion
Martha Washington Candy is a timeless homemade treat featuring a sweet coconut pecan center and a rich chocolate shell. It is easy to prepare, requires no baking, and makes a beautiful addition to Christmas dessert trays, candy exchanges, and homemade gift boxes.
With familiar ingredients and a little chilling time, you can create a generous batch of candies that look attractive and taste delicious. Try semisweet chocolate for a balanced flavor, milk chocolate for extra sweetness, or white chocolate for a festive variation.
Make these classic chocolate-covered candies ahead of your next gathering and keep them chilled until serving. Their creamy coconut filling, crunchy pecans, and smooth chocolate coating make Martha Washington Candy a wonderful addition to any collection of old-fashioned homemade sweets.
Print
Martha Washington Candy
Ingredients
- 1 can (14 ounces) sweetened condensed milk
- 1/2 cup unsalted butter, softened
- 1 teaspoon vanilla extract
- 1 pound powdered sugar, approximately 3 3/4 to 4 cups
- 3 cups sweetened shredded coconut
- 2 cups finely chopped pecans
For the Chocolate Coating
- 24 ounces semisweet chocolate chips or chocolate melting wafers
- 1–2 tablespoons coconut oil or shortening, optional
Instructions
Place the softened butter in a large mixing bowl. Add the sweetened condensed milk and vanilla extract, then stir until smooth.
Gradually add the powdered sugar, mixing thoroughly after each addition. A sturdy spatula or hand mixer on low speed can help combine the ingredients without creating a cloud of powdered sugar.
Once the mixture is smooth and thick, fold in the shredded coconut and chopped pecans. Stir until everything is evenly distributed, scraping the bottom and sides of the bowl as needed.
The filling should be sticky but thick enough to hold together when pressed. If it seems soft, do not immediately add a large amount of extra sugar. Refrigeration will help the butter firm up and improve the consistency.
Step 2: Chill the Filling
Cover the bowl and refrigerate the mixture for approximately 1–2 hours, or until firm enough to handle.
This step is important because warm filling can stick to your hands and become difficult to shape. Chilling also helps the ingredients settle together, making it easier to create uniform candy balls.
If you are preparing the recipe for a holiday gathering, you can make the filling the day before. Keep it covered in the refrigerator until you are ready to shape the candies.
Step 3: Roll into Small Balls
Line a baking sheet with parchment paper. Use a small cookie scoop or tablespoon to portion the chilled filling into evenly sized pieces.
Roll each portion gently between your palms to create a smooth ball approximately 1 inch in diameter. Place the balls on the prepared baking sheet, leaving a little space between each one.
When all the filling has been shaped, refrigerate the tray for another 30–45 minutes. The balls should be firm before dipping, which helps prevent them from breaking apart in the melted chocolate.
If the kitchen is warm, work in small batches and keep the remaining balls refrigerated until needed.
Step 4: Melt the Chocolate
Place the chocolate chips or melting wafers in a dry, microwave-safe bowl. Microwave for 20–30 seconds at a time, stirring thoroughly after each interval until the chocolate is almost completely melted.
Stir until the remaining chocolate melts from the residual heat. If the mixture is too thick for dipping, add a small amount of coconut oil or shortening and stir until smooth.
You can also use a double boiler. Place the chocolate in a heatproof bowl over a saucepan of gently simmering water, ensuring the bottom of the bowl does not touch the water. Stir until melted.
Keep all water and steam away from the chocolate because moisture can cause it to seize. Dry kitchenware and simple cooking tools make this step easier and help produce a smooth coating.
Step 5: Dip and Set the Candies
Remove a few chilled balls from the refrigerator at a time. Place one ball into the melted chocolate and turn it gently with a fork until completely coated.
Lift the candy out and allow excess chocolate to drip back into the bowl. Gently tap the fork against the edge of the bowl, then transfer the candy to the parchment-lined tray.
Repeat with the remaining balls. If desired, sprinkle finely chopped pecans over the tops before the chocolate sets, or drizzle the finished candies with a little contrasting chocolate for decoration.
Refrigerate the candies for approximately 20–30 minutes, or until the coating is firm. Once set, transfer them to an airtight container and keep refrigerated until serving.
Notes
- Chill thoroughly: Cold filling is easier to shape and less likely to fall apart during dipping.
- Use finely chopped nuts: Large pecan pieces can make the balls uneven and difficult to coat.
- Melt chocolate slowly: Short heating intervals help prevent scorching.
- Keep utensils dry: Even a little moisture can cause melted chocolate to become grainy.
- Avoid overheating the chocolate: Stirring between intervals helps distribute the heat evenly.
- Use parchment paper: It prevents sticking and makes it easier to remove the finished candies.
- Work in batches: Keeping most of the candy balls refrigerated helps them remain firm.
- Adjust the filling carefully: Add powdered sugar in small increments if the mixture is too soft after chilling.
