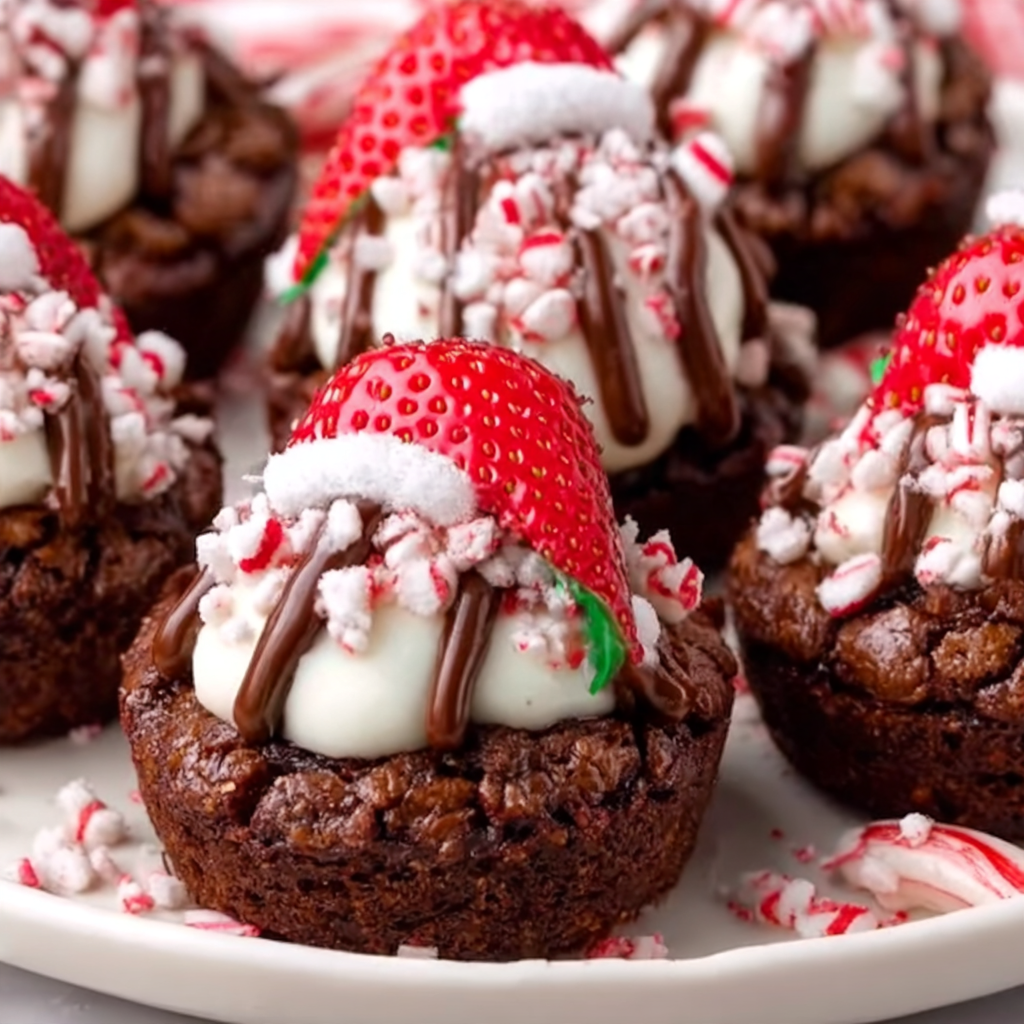
These Hot Cocoa Marshmallow Cookie Cups are the ultimate cozy Christmas treat! Imagine soft, chocolatey cookie cups filled with creamy chocolate ganache and topped with fluffy marshmallows, just like your favorite mug of hot cocoa transformed into an adorable bite-sized dessert.
Each little cookie cup has a rich chocolate flavor, a tender cookie base, and a sweet marshmallow topping that makes every bite feel like a warm holiday hug. They’re perfect for Christmas parties, cookie exchanges, winter gatherings, holiday dessert boards, and cozy evenings with a cup of hot chocolate.
The best part? These festive treats are surprisingly easy to make with simple ingredients. Bake the chocolate cookie cups in a mini muffin pan, fill them with smooth chocolate, and finish with marshmallows and a little chocolate drizzle.
If you’re looking for a Christmas cookie recipe that looks adorable and tastes like a classic winter favorite, these Hot Cocoa Marshmallow Cookie Cups are sure to become a holiday tradition!
Why You’ll Love These Hot Cocoa Marshmallow Cookie Cups
- Inspired by hot chocolate: Chocolate cookie cups, creamy filling, and marshmallows recreate the flavors of a cozy mug of cocoa.
- Perfect bite-sized desserts: Their small size makes them easy to serve at Christmas parties and holiday gatherings.
- Rich chocolate flavor: Cocoa powder and chocolate ganache create a delicious chocolate combination.
- Adorable presentation: Mini marshmallows and chocolate drizzle make these cookie cups look like tiny cups of hot cocoa.
- Great for cookie exchanges: They’re easy to arrange in gift boxes and holiday dessert trays.
- Make-ahead friendly: Bake the cookie cups in advance and fill them closer to serving time.
Ingredients
For the Chocolate Cookie Cups
- ½ cup unsalted butter, softened
- ½ cup granulated sugar
- ¼ cup packed light brown sugar
- 1 large egg
- 1 teaspoon vanilla extract
- 1 ¼ cups all-purpose flour
- ¼ cup unsweetened cocoa powder
- ½ teaspoon baking soda
- ¼ teaspoon salt
For the Chocolate Filling
- ¾ cup semisweet chocolate chips
- ⅓ cup heavy whipping cream
- ½ teaspoon vanilla extract
For the Marshmallow Topping
- 1 cup mini marshmallows
- 2 tablespoons mini chocolate chips, optional
- 2 tablespoons melted chocolate, for drizzling
- 2 tablespoons crushed peppermint candies, optional
Ingredient Notes and Substitutions
Unsalted Butter: Softened butter creates tender cookie cups with a rich flavor. Avoid melting it because melted butter can make the dough too soft and affect the shape.
Granulated Sugar: This adds sweetness and helps create the cookie’s texture.
Brown Sugar: Brown sugar adds moisture and a slight caramel flavor, helping the cookie cups stay soft in the center.
Egg: One large egg binds the dough and gives the cookie cups structure.
Vanilla Extract: Vanilla enhances the chocolate flavor and adds warmth.
All-Purpose Flour: Flour provides structure. Measure it carefully to prevent dry, crumbly cookie cups.
Unsweetened Cocoa Powder: Cocoa powder gives the cookie cups their rich chocolate flavor and deep brown color. Natural or Dutch-process cocoa can be used, although the flavor will vary slightly.
Semisweet Chocolate Chips: These melt into a smooth, rich filling that resembles the chocolatey part of hot cocoa.
Heavy Whipping Cream: Heavy cream combines with chocolate to create a creamy ganache. Use full-fat heavy cream for the best consistency.
Mini Marshmallows: Mini marshmallows create the classic hot chocolate topping. They fit perfectly inside the little cookie cups.
Crushed Peppermint: Optional peppermint pieces add a festive crunch and a refreshing holiday flavor.
How to Make Hot Cocoa Marshmallow Cookie Cups
Step 1: Prepare the Oven and Mini Muffin Pan
Preheat your oven to 350°F (175°C).
Lightly grease a 24-cup mini muffin pan with nonstick cooking spray or butter.
Make sure the inside of each cavity is coated so the cookie cups release easily after baking.
Step 2: Cream the Butter and Sugars
In a large mixing bowl, beat the softened butter, granulated sugar, and brown sugar together using an electric mixer.
Continue mixing for approximately 2 minutes, until the mixture looks light and fluffy.
Scrape down the sides of the bowl as needed.
Step 3: Add the Egg and Vanilla
Add the egg and vanilla extract.
Beat until fully combined and smooth. Avoid overmixing once the egg has been incorporated.
Step 4: Mix the Dry Ingredients
In a separate bowl, whisk together the flour, cocoa powder, baking soda, and salt.
Gradually add the dry ingredients to the butter mixture.
Mix on low speed until a soft chocolate dough forms. Stop mixing as soon as no dry flour remains.
Step 5: Fill the Mini Muffin Pan
Divide the dough into 24 equal portions, approximately 1 tablespoon each.
Roll each portion into a small ball and place it inside a greased mini muffin cavity.
Press each dough ball gently into the bottom of the cavity. Avoid pressing it too thin because the dough will spread slightly while baking.
Step 6: Bake the Cookie Cups
Bake for approximately 10 to 12 minutes, or until the edges are set and the centers look slightly soft.
Remove the pan from the oven.
While the cookies are still warm, use the rounded end of a small wooden spoon or a clean measuring spoon to gently press down the center of each cookie.
This creates a little well for the chocolate filling.
If the centers puff up during baking, gently press them again while the cookies are warm.
Step 7: Cool the Cookie Cups
Allow the cookie cups to cool in the muffin pan for approximately 10 minutes.
Carefully loosen the edges with a small silicone spatula or butter knife, then transfer them to a wire rack.
Let them cool completely before adding the chocolate filling.
Step 8: Prepare the Chocolate Ganache
Place the semisweet chocolate chips in a heatproof bowl.
Heat the heavy cream in a small saucepan over medium-low heat until steaming and just beginning to bubble around the edges. Do not let it boil vigorously.
Pour the hot cream over the chocolate chips and let it sit for 2 minutes.
Stir gently from the center outward until the chocolate melts and the mixture becomes smooth and glossy.
Add the vanilla extract and stir again.
Allow the ganache to cool for a few minutes until it thickens slightly but remains easy to spoon.
Step 9: Fill the Cookie Cups
Spoon approximately 1 to 1½ teaspoons of chocolate ganache into the center of each cooled cookie cup.
Fill each well without overflowing the edges.
Allow the chocolate to settle slightly before adding the marshmallows.
Step 10: Add the Marshmallows
Place 3 to 4 mini marshmallows on top of the chocolate filling in each cookie cup.
Gently press them into the ganache so they stay in place.
For an extra festive appearance, add a few mini chocolate chips or a tiny sprinkle of crushed peppermint.
Step 11: Add the Chocolate Drizzle
Melt the remaining chocolate in a microwave-safe bowl using short 15- to 20-second intervals, stirring between each interval.
Drizzle a little melted chocolate over the marshmallows using a spoon or piping bag.
Allow the chocolate to set before serving.
Step 12: Serve and Enjoy
Arrange the finished cookie cups on a festive serving platter.
For a beautiful Christmas presentation, add a little crushed peppermint around the platter and serve alongside mugs of hot cocoa.
Your Hot Cocoa Marshmallow Cookie Cups are ready to enjoy!
Helpful Cooking Notes
- Use softened butter: Softened butter creates a better cookie dough consistency than melted butter.
- Measure flour carefully: Too much flour can make the cookie cups dry and crumbly.
- Grease the muffin pan: This helps the cookies release without breaking.
- Create the centers while warm: The cookie cups are easier to shape before they cool completely.
- Cool before filling: Warm cookie cups can melt the ganache and make the marshmallows sticky.
- Use good-quality chocolate: Chocolate chips or chopped baking chocolate create a smoother filling.
- Don’t overheat the cream: Hot cream is enough to melt the chocolate. Boiling it aggressively can affect the ganache.
- Let the ganache thicken slightly: A thicker filling helps keep the marshmallows in place.
- Add peppermint sparingly: Too much crushed peppermint can overpower the chocolate flavor.
Delicious Variations
1. Peppermint Hot Cocoa Cookie Cups
Add ¼ teaspoon of peppermint extract to the chocolate ganache. Finish with crushed peppermint candies for a refreshing Christmas flavor.
2. White Chocolate Marshmallow Cookie Cups
Replace the semisweet chocolate filling with white chocolate ganache. Use white chocolate chips and warm heavy cream to create a smooth, creamy center.
3. Double Chocolate Cookie Cups
Add ¼ cup mini chocolate chips to the cookie dough for extra chocolate flavor and little chocolate pieces throughout the cookie base.
4. Salted Caramel Hot Cocoa Cups
Add ½ teaspoon of thick caramel sauce to the center of each cookie cup before adding the chocolate ganache. Finish with a tiny pinch of flaky sea salt.
5. S’mores Cookie Cups
Replace the chocolate cookie base with a graham cracker cookie dough, then fill with chocolate ganache and top with mini marshmallows.
6. Mocha Marshmallow Cookie Cups
Add 1 teaspoon of instant espresso powder to the dry ingredients. The coffee flavor enhances the chocolate without making the cookie cups taste strongly of coffee.
7. Peanut Butter Hot Cocoa Cups
Add a small amount of creamy peanut butter to the chocolate filling. Stir until smooth and finish with mini marshmallows.
Serving Suggestions
These Hot Cocoa Marshmallow Cookie Cups are wonderful on a Christmas dessert table, especially when served alongside other chocolate and peppermint treats.
Try serving them with:
- Homemade hot chocolate.
- Christmas sugar cookies.
- Peppermint bark.
- Chocolate truffles.
- Mini brownies.
- Gingerbread cookies.
- Chocolate-covered pretzels.
- Vanilla cupcakes.
- Fresh strawberries.
For a cozy winter dessert board, arrange the cookie cups in the center and surround them with peppermint candies, marshmallow pieces, chocolate squares, and Christmas cookies.
They also look beautiful in small paper candy cups, making them easy to serve at parties and holiday gatherings.
Tips for the Best Hot Cocoa Marshmallow Cookie Cups
- Make even dough portions: Use a small cookie scoop so all 24 cookie cups are similar in size.
- Don’t overbake: The centers should remain slightly soft when removed from the oven.
- Press the centers gently: A small rounded measuring spoon creates neat wells without cracking the cookies.
- Cool completely before filling: This prevents the chocolate ganache from becoming too runny.
- Use mini marshmallows: Their small size makes them easier to arrange inside the cookie cups.
- Keep the ganache thick enough: Let it cool briefly before spooning it into the cookie centers.
- Drizzle after decorating: This creates a pretty finishing touch and helps the marshmallows look like a miniature hot cocoa topping.
- Avoid overfilling: Leave enough room for the marshmallows and chocolate drizzle.
Storage Instructions
Store the finished cookie cups in a single layer in an airtight container in the refrigerator for up to 4 days because the ganache contains heavy cream.
For the best texture, allow them to sit at room temperature for approximately 10 minutes before serving.
If you prefer to keep the cookie cups crisp, store the unfilled cookie bases separately in an airtight container at room temperature for up to 3 days. Prepare the ganache and decorate closer to serving time.
Do not leave the finished treats at room temperature for more than 2 hours, or more than 1 hour when the temperature is above 90°F.
Can You Freeze Hot Cocoa Marshmallow Cookie Cups?
Yes! The plain baked cookie cups freeze well.
Allow them to cool completely, then place them in a freezer-safe airtight container with parchment paper between layers. Freeze for up to 2 months for the best quality.
Thaw the cookie cups at room temperature while covered. Prepare fresh chocolate ganache and add the marshmallows after thawing.
Freezing the fully assembled treats is not recommended because the marshmallows can become sticky or change texture after thawing.
Make-Ahead Instructions
These cookie cups are perfect for preparing ahead of Christmas celebrations.
Up to 2 days ahead: Bake the chocolate cookie cups, cool completely, and store in an airtight container.
One day ahead: Prepare the chocolate ganache and refrigerate it in a covered container. When ready to use, warm it gently until it becomes spoonable.
Before serving: Fill the cookie cups with ganache, add mini marshmallows, and finish with chocolate drizzle.
This simple method saves time while keeping the cookie cups looking fresh and delicious.
Recipe Details
- Prep Time: 25 minutes
- Cook Time: 12 minutes
- Cooling and Decorating Time: 30 minutes
- Total Time: 1 hour 7 minutes
- Yield: 24 mini cookie cups
- Servings: 24
Nutritional Information
Approximate nutritional information per cookie cup, based on 24 servings:
- Calories: 185
- Protein: 2g
- Carbohydrates: 25g
- Fat: 9g
- Saturated Fat: 5g
- Sodium: 95mg
- Fiber: 1g
- Sugar: 17g
Actual nutritional values may vary depending on the chocolate, marshmallows, and other ingredient brands used.
Frequently Asked Questions
1. Can I make Hot Cocoa Marshmallow Cookie Cups ahead of time?
Yes! Bake the cookie cups up to 2 days ahead and store them in an airtight container. Prepare the ganache and add the marshmallows closer to serving time for the freshest appearance.
2. Why did my cookie cups lose their shape?
The dough may have been too soft, or the muffin pan cavities may not have been greased properly. Chill the dough for 15 to 20 minutes if it feels very soft before baking. Also, press the centers while the cookies are still warm.
3. Can I use store-bought cookie dough?
Yes! Chocolate cookie dough can be used as a shortcut. Divide it into small portions, place it in a greased mini muffin pan, and follow the package baking instructions, checking for doneness.
4. Can I use marshmallow fluff instead of mini marshmallows?
Absolutely! Add a small spoonful of marshmallow fluff on top of the ganache. It creates a soft, creamy topping, although it will look different from the traditional mini marshmallow decoration.
5. How do I keep the marshmallows from sliding off?
Allow the chocolate ganache to cool until slightly thickened before adding the marshmallows. Gently press them into the filling so they stay in place.
6. Can I make these cookie cups without cocoa powder?
Yes. Replace the chocolate cookie dough with a vanilla sugar cookie dough. Keep the chocolate ganache and marshmallow topping for a delicious vanilla-and-chocolate version.
7. What chocolate is best for the filling?
Semisweet chocolate chips are a great choice because they balance the sweetness of the cookie and marshmallows. Dark chocolate can also be used for a richer flavor.
8. Can I make these in a regular muffin pan?
Yes, but the portions will be larger and the baking time will need to increase. Start checking around 14 to 18 minutes, depending on the dough amount and pan size.
9. How do I make the cookie cups look like little mugs of hot cocoa?
Fill each cookie cup with chocolate ganache, arrange mini marshmallows on top, and add a little chocolate drizzle. You can also attach a small curved piece of pretzel to the outside as a decorative mug handle using melted chocolate.
10. Do these cookie cups need refrigeration?
Yes. The chocolate ganache contains heavy cream, so store the finished cookie cups in an airtight container in the refrigerator. Keep them chilled until serving.
Conclusion
These Hot Cocoa Marshmallow Cookie Cups are the perfect combination of rich chocolate cookies, creamy ganache, and fluffy marshmallows. Every little bite tastes like a cozy cup of hot chocolate, making them an irresistible addition to your Christmas dessert table.
They’re easy to prepare, adorable to serve, and perfect for sharing with friends and family. Whether you’re hosting a holiday party, planning a Christmas cookie exchange, or simply craving a festive chocolate treat, these little cookie cups are sure to become a seasonal favorite!
Print
HOT COCOA MARSHMALLOW COOKIE CUPS
Ingredients
For the Chocolate Cookie Cups
- ½ cup unsalted butter, softened
- ½ cup granulated sugar
- ¼ cup packed light brown sugar
- 1 large egg
- 1 teaspoon vanilla extract
- 1 ¼ cups all-purpose flour
- ¼ cup unsweetened cocoa powder
- ½ teaspoon baking soda
- ¼ teaspoon salt
For the Chocolate Filling
- ¾ cup semisweet chocolate chips
- ⅓ cup heavy whipping cream
- ½ teaspoon vanilla extract
For the Marshmallow Topping
- 1 cup mini marshmallows
- 2 tablespoons mini chocolate chips, optional
- 2 tablespoons melted chocolate, for drizzling
- 2 tablespoons crushed peppermint candies, optional
Instructions
Preheat your oven to 350°F (175°C).
Lightly grease a 24-cup mini muffin pan with nonstick cooking spray or butter.
Make sure the inside of each cavity is coated so the cookie cups release easily after baking.
Step 2: Cream the Butter and Sugars
In a large mixing bowl, beat the softened butter, granulated sugar, and brown sugar together using an electric mixer.
Continue mixing for approximately 2 minutes, until the mixture looks light and fluffy.
Scrape down the sides of the bowl as needed.
Step 3: Add the Egg and Vanilla
Add the egg and vanilla extract.
Beat until fully combined and smooth. Avoid overmixing once the egg has been incorporated.
Step 4: Mix the Dry Ingredients
In a separate bowl, whisk together the flour, cocoa powder, baking soda, and salt.
Gradually add the dry ingredients to the butter mixture.
Mix on low speed until a soft chocolate dough forms. Stop mixing as soon as no dry flour remains.
Step 5: Fill the Mini Muffin Pan
Divide the dough into 24 equal portions, approximately 1 tablespoon each.
Roll each portion into a small ball and place it inside a greased mini muffin cavity.
Press each dough ball gently into the bottom of the cavity. Avoid pressing it too thin because the dough will spread slightly while baking.
Step 6: Bake the Cookie Cups
Bake for approximately 10 to 12 minutes, or until the edges are set and the centers look slightly soft.
Remove the pan from the oven.
While the cookies are still warm, use the rounded end of a small wooden spoon or a clean measuring spoon to gently press down the center of each cookie.
This creates a little well for the chocolate filling.
If the centers puff up during baking, gently press them again while the cookies are warm.
Step 7: Cool the Cookie Cups
Allow the cookie cups to cool in the muffin pan for approximately 10 minutes.
Carefully loosen the edges with a small silicone spatula or butter knife, then transfer them to a wire rack.
Let them cool completely before adding the chocolate filling.
Step 8: Prepare the Chocolate Ganache
Place the semisweet chocolate chips in a heatproof bowl.
Heat the heavy cream in a small saucepan over medium-low heat until steaming and just beginning to bubble around the edges. Do not let it boil vigorously.
Pour the hot cream over the chocolate chips and let it sit for 2 minutes.
Stir gently from the center outward until the chocolate melts and the mixture becomes smooth and glossy.
Add the vanilla extract and stir again.
Allow the ganache to cool for a few minutes until it thickens slightly but remains easy to spoon.
Step 9: Fill the Cookie Cups
Spoon approximately 1 to 1½ teaspoons of chocolate ganache into the center of each cooled cookie cup.
Fill each well without overflowing the edges.
Allow the chocolate to settle slightly before adding the marshmallows.
Step 10: Add the Marshmallows
Place 3 to 4 mini marshmallows on top of the chocolate filling in each cookie cup.
Gently press them into the ganache so they stay in place.
For an extra festive appearance, add a few mini chocolate chips or a tiny sprinkle of crushed peppermint.
Step 11: Add the Chocolate Drizzle
Melt the remaining chocolate in a microwave-safe bowl using short 15- to 20-second intervals, stirring between each interval.
Drizzle a little melted chocolate over the marshmallows using a spoon or piping bag.
Allow the chocolate to set before serving.
Step 12: Serve and Enjoy
Arrange the finished cookie cups on a festive serving platter.
For a beautiful Christmas presentation, add a little crushed peppermint around the platter and serve alongside mugs of hot cocoa.
Your Hot Cocoa Marshmallow Cookie Cups are ready to enjoy!
Notes
- Use softened butter: Softened butter creates a better cookie dough consistency than melted butter.
- Measure flour carefully: Too much flour can make the cookie cups dry and crumbly.
- Grease the muffin pan: This helps the cookies release without breaking.
- Create the centers while warm: The cookie cups are easier to shape before they cool completely.
- Cool before filling: Warm cookie cups can melt the ganache and make the marshmallows sticky.
- Use good-quality chocolate: Chocolate chips or chopped baking chocolate create a smoother filling.
- Don’t overheat the cream: Hot cream is enough to melt the chocolate. Boiling it aggressively can affect the ganache.
- Let the ganache thicken slightly: A thicker filling helps keep the marshmallows in place.
- Add peppermint sparingly: Too much crushed peppermint can overpower the chocolate flavor.
