There is something special about homemade dinner rolls served warm from the oven. Their golden tops, tender centers, and buttery flavor can make even the simplest meal feel comforting and memorable. Grandma’s Easy No Yeast Dinner Rolls are perfect when you want homemade bread without the time-consuming process of preparing yeast dough, waiting for it to rise, and shaping it after several hours.
This easy no yeast dinner rolls recipe uses simple pantry ingredients to create soft, tender rolls without commercial yeast or a lengthy rising period. Whether you need a quick side dish for a family dinner, warm bread for a holiday meal, or something homemade to serve alongside a bowl of soup, these rolls are a wonderful option.
Traditional yeast dinner rolls rely on yeast fermentation to develop their flavor, structure, and airy texture. This recipe takes a different approach by using baking powder as the leavening agent. Baking powder releases gas when it reacts with moisture and heat, helping the dough rise during baking. The result is a quick bread roll with a delicate crumb and a lightly golden exterior.
One of the biggest advantages of Grandma’s Easy No Yeast Dinner Rolls is their convenience. You do not need to activate yeast, knead the dough extensively, or wait for the dough to double in size. Simply combine the ingredients, shape the rolls, and bake them until they are lightly golden.
These homemade rolls are especially useful on busy weeknights when you want to serve fresh bread but do not have hours to spare. They are also a practical choice when you discover that you have run out of yeast or simply prefer a quicker baking method.
The flavor is mild and buttery, making these rolls versatile enough to accompany roasted chicken, beef stew, vegetable soup, pasta, mashed potatoes, and many other meals. You can brush the tops with melted butter after baking for extra richness or sprinkle them with herbs to create a savory variation.
Although no yeast dinner rolls have a slightly different texture from traditional yeast bread, they can still be deliciously tender when prepared correctly. The secret is to measure the flour carefully, avoid overmixing, use fresh baking powder, and bake the rolls just until they are done.
If you love old-fashioned homemade bread and simple family recipes, these quick dinner rolls deserve a place in your kitchen. They bring the comforting feeling of grandma’s cooking to your table with less preparation and no rising time.
Ingredients
This recipe makes approximately 8 small to medium dinner rolls. The ingredients are simple, affordable, and easy to find in most kitchens.
Main ingredients
- 2 cups (250 g) all-purpose flour: Provides the structure for the rolls. Measure carefully to avoid making the dough too dry.
- 1 tablespoon baking powder: Acts as the leavening agent and helps the rolls rise without yeast.
- 1 tablespoon granulated sugar: Adds a subtle sweetness and helps improve the flavor and browning.
- 1/2 teaspoon salt: Balances the flavor and prevents the rolls from tasting bland.
- 3 tablespoons (42 g) cold unsalted butter: Adds richness and tenderness. Cut it into small cubes before mixing.
- 3/4 cup (180 ml) milk: Brings the dough together and helps create a soft crumb. You may need a little more or less depending on your flour.
- 1 large egg, optional: Adds richness and structure. If you use an egg, slightly reduce the milk if the dough becomes too sticky.
- 1 tablespoon melted butter for brushing: Gives the baked rolls a glossy appearance and buttery flavor.
Optional ingredients for extra flavor
- 1/2 teaspoon garlic powder for savory rolls
- 1 teaspoon dried parsley or Italian seasoning
- 1/4 cup shredded cheddar cheese
- 1 teaspoon honey instead of some or all of the sugar
- A pinch of black pepper for a savory variation
The optional ingredients can be adjusted to suit your meal. For a classic grandma-style dinner roll, keep the seasoning simple and finish the rolls with melted butter.
Preparation: How to Make Grandma’s Easy No Yeast Dinner Rolls
Step 1: Preheat the oven and prepare your baking pan
Preheat your oven to 375°F (190°C). Lightly grease a baking sheet or line it with parchment paper.
You can also use a round baking dish if you prefer the rolls to sit close together. When the rolls touch during baking, their sides tend to stay soft, while rolls baked separately develop more golden edges.
Prepare your ingredients before mixing the dough. Measure the flour, baking powder, sugar, and salt. Cut the butter into small cubes and measure the milk.
Having everything ready makes the process easier because baking powder begins working once it comes into contact with moisture.
Step 2: Combine the dry ingredients
In a large mixing bowl, whisk together the all-purpose flour, baking powder, sugar, and salt.
Whisking distributes the baking powder evenly throughout the flour, helping the rolls rise more consistently. It also breaks up small lumps and prevents concentrated pockets of salt or leavening.
Make sure your baking powder is fresh. Old baking powder can lose its effectiveness, resulting in dense rolls that do not rise properly.
If you want to make savory dinner rolls, you can add garlic powder, dried herbs, or black pepper at this stage.
Step 3: Cut the butter into the flour
Add the cold butter cubes to the dry ingredients.
Using your fingertips, a pastry cutter, or two forks, work the butter into the flour until the mixture resembles coarse crumbs. Small pieces of butter are perfectly fine.
The butter adds flavor and tenderness to the finished rolls. Keeping it cold helps create a softer texture rather than a greasy dough.
Avoid melting the butter before mixing it into the flour. Cold butter is easier to distribute and helps prevent the dough from becoming overly soft.
If you are short on time, you can use a pastry cutter to incorporate the butter more quickly.
Step 4: Add the milk and form the dough
Gradually pour the milk into the flour mixture, stirring gently with a wooden spoon or spatula.
If you are using the optional egg, whisk it separately and add it with the milk. Begin with the recommended amount of liquid, then add a small splash more only if the dough appears too dry.
Mix just until the ingredients come together into a soft dough. It should be slightly tacky but not excessively wet.
Avoid vigorous mixing or kneading. Unlike traditional yeast bread, this quick dough does not require extensive kneading, and overworking it can develop too much gluten, making the rolls tough.
If the dough feels extremely sticky, sprinkle a small amount of flour over your hands and work surface rather than adding large quantities of flour directly to the bowl.
Step 5: Shape the dinner rolls
Lightly flour your work surface and turn the dough out onto it.
Gently bring the dough together and divide it into 8 equal portions. You can use a kitchen scale for evenly sized rolls or divide the dough by eye.
Roll each portion gently between your hands to form a ball. Avoid compressing the dough too firmly because this can make the finished rolls dense.
Place the dough balls on the prepared baking sheet, leaving a little space between them if you want golden sides. For softer pull-apart rolls, arrange them closer together in a greased baking dish.
If the dough begins sticking to your hands, dust your fingers lightly with flour. Use only as much flour as necessary to keep the dough manageable.
Once shaped, the rolls can go straight into the oven. There is no yeast-based rising period required.
Step 6: Bake until lightly golden
Place the baking sheet in the preheated oven and bake for approximately 15–20 minutes, depending on the size of the rolls and your oven.
The tops should become lightly golden, and the rolls should feel set rather than wet or doughy. If you have made larger rolls, they may need a few additional minutes.
Avoid overbaking because quick bread rolls can become dry if left in the oven too long.
If the tops are browning too quickly before the centers are cooked, reduce the oven temperature slightly and continue baking until done.
For food safety, make sure the centers are fully baked, especially if you have included an egg. If you are uncertain, check the center of a roll by breaking it open after a brief cooling period.
Step 7: Brush with melted butter
Remove the rolls from the oven and place the pan on a heatproof surface.
While the rolls are still warm, brush the tops generously with melted butter. This adds flavor, gives the rolls an attractive finish, and helps keep the crust pleasantly tender.
For extra flavor, mix a small amount of garlic powder or chopped parsley into the melted butter before brushing.
If you prefer a slightly crisp top, leave the rolls unbrushed or use only a thin layer of butter.
Step 8: Cool slightly and serve warm
Allow the rolls to rest for approximately 5 minutes before serving. This gives the interior time to settle and makes the rolls easier to handle.
Serve them warm alongside your favorite meal. You can also split them open and spread them with additional butter, honey, jam, or your favorite savory spread.
These rolls are best enjoyed fresh from the oven, when the centers are soft and the buttery flavor is at its peak.
Variations
One of the best things about homemade no yeast dinner rolls is how easy they are to customize. With a few simple changes, you can create different flavors for breakfast, lunch, dinner, or special occasions.
1. Garlic Butter No Yeast Rolls
Add 1/2 teaspoon garlic powder to the dry ingredients. After baking, brush the rolls with melted butter mixed with a little minced garlic and chopped parsley.
These savory rolls are delicious with pasta, roasted chicken, tomato soup, and other comforting meals.
2. Cheddar Cheese Dinner Rolls
Add approximately 1/2 cup shredded cheddar cheese to the dry ingredients before adding the milk.
Cheddar gives the rolls a richer flavor and a slightly cheesy interior. You can sprinkle a little extra cheese over the tops during the last few minutes of baking.
3. Honey Butter Rolls
Replace the granulated sugar with 1 tablespoon honey, or use a little honey in addition to the sugar.
Brush the warm rolls with melted butter and a small drizzle of honey for a lightly sweet finish. These rolls pair particularly well with roasted vegetables, ham, and holiday dinners.
4. Herb Dinner Rolls
Add dried rosemary, thyme, parsley, or Italian seasoning to the flour mixture.
Herbs create a fragrant, savory roll that works beautifully with soups, stews, pasta, and roasted meats.
5. Whole Wheat No Yeast Rolls
Replace up to half of the all-purpose flour with whole wheat flour. You may need to add a little extra milk because whole wheat flour absorbs more liquid.
The resulting rolls will have a nuttier flavor and a slightly denser texture. For the softest result, avoid replacing all the all-purpose flour unless you are using a recipe specifically formulated for whole wheat.
6. Buttermilk Dinner Rolls
Use buttermilk instead of regular milk for a subtle tang and tender crumb.
Because buttermilk is acidic, use a recipe formulated with the appropriate leavening balance for the best rise. A tested version may include baking soda in addition to baking powder.
7. Sweet Breakfast Rolls
Add a little extra sugar and vanilla extract to create a mildly sweet roll. Serve with butter, jam, or honey.
These are not traditional yeast-based sweet rolls, but they make a convenient alternative when you want something quick for breakfast.
8. Parmesan Herb Rolls
Mix grated Parmesan cheese and dried Italian herbs into the flour mixture. Brush the finished rolls with melted butter and sprinkle a little additional Parmesan over the top.
This variation is especially good alongside pasta, lasagna, and creamy vegetable soups.
9. Dairy-Free No Yeast Rolls
Use a suitable unsweetened plant-based milk and a dairy-free butter substitute. Choose products designed for baking and check the ingredient labels carefully.
The flavor and texture may vary depending on the substitute, so adjust the liquid gradually until the dough reaches the correct consistency.
10. Mini Dinner Rolls
Divide the dough into 12–16 smaller portions rather than 8. Bake for a shorter period and begin checking for doneness early.
Mini rolls are perfect for holiday tables, dinner parties, and small sandwiches.
Cooking Note
For the best Grandma’s Easy No Yeast Dinner Rolls, remember that this recipe produces quick bread rolls rather than traditional yeast bread.
The texture will be tender and slightly more biscuit-like than the airy, stretchy crumb of a yeast-raised dinner roll. This is normal for a quick dough made with baking powder.
Measure the flour carefully. Too much flour is one of the most common reasons homemade rolls turn out dry or heavy. Spoon flour into the measuring cup and level it rather than packing it down.
Use fresh baking powder. Since baking powder provides the lift, its freshness has a major impact on the finished result.
Do not overmix. Stir only until the dough comes together. Excessive mixing can make the rolls tough.
Add liquid gradually. Flour absorbs moisture differently depending on the brand, humidity, and measuring method. The dough should be soft and manageable, not dry or soupy.
Bake immediately after shaping. Baking powder starts reacting when it is moistened, so you do not need a long resting period.
Brush with butter after baking. This simple step improves flavor and gives the rolls a softer, more appealing finish.
Serving Suggestions
Grandma’s Easy No Yeast Dinner Rolls are versatile enough to serve with many meals. Their mild, buttery flavor makes them an excellent addition to everyday dinners and special occasions.
- With homemade soup: Serve alongside tomato soup, chicken noodle soup, vegetable soup, or creamy potato soup.
- With beef stew: Use the soft rolls to soak up the rich broth and gravy.
- With roasted chicken: Pair the rolls with roasted chicken, green beans, and mashed potatoes.
- With holiday meals: Add them to Thanksgiving, Christmas, Easter, or Sunday dinner menus.
- With pasta: Serve them alongside spaghetti, baked ziti, lasagna, or creamy Alfredo dishes.
- With breakfast: Split a roll and serve it with butter, honey, or fruit jam.
- With barbecue: Pair the rolls with pulled pork, grilled chicken, or barbecue beef.
- As mini sandwiches: Make smaller rolls and fill them with ham, turkey, cheese, or leftover roasted meat.
For a simple presentation, arrange the warm rolls in a cloth-lined basket and serve them with softened butter. You can also offer honey butter, garlic butter, or herb butter so everyone can choose their favorite topping.
Tips for Perfect No Yeast Dinner Rolls
- Use fresh baking powder. This helps the rolls rise properly in the oven.
- Measure flour accurately. Excess flour can make the dough dry and heavy.
- Keep the butter cold. Cold butter helps create a tender texture.
- Avoid overmixing. Mix only until the dough comes together.
- Do not knead excessively. A gentle touch helps prevent tough rolls.
- Adjust the milk gradually. Add small amounts as needed to achieve a soft dough.
- Use lightly floured hands. This makes shaping easier without adding too much extra flour.
- Make the portions even. Uniform rolls bake more consistently.
- Do not wait for the dough to double. This recipe does not rely on yeast fermentation.
- Preheat the oven fully. Proper oven temperature helps the baking powder work effectively.
- Check the rolls early. Smaller rolls may bake faster than larger ones.
- Avoid overbaking. Remove the rolls when the centers are cooked and the tops are lightly golden.
- Brush with butter while warm. This creates a flavorful, tender finish.
- Serve fresh if possible. Quick bread rolls are usually at their best on the day they are baked.
- Reheat gently. Warm leftovers in a low oven, covered loosely with foil to prevent them from drying out.
- Customize the flavor. Add cheese, herbs, garlic, or honey to suit the meal.
- Do not add too much extra flour while shaping. Too much flour can make the rolls dense.
- Use parchment paper. It helps prevent sticking and simplifies cleanup.
Prep Time, Cooking Time, and Total Time
- Prep Time: 10–15 minutes
- Cooking Time: 15–20 minutes
- Resting Time: 5 minutes
- Total Time: Approximately 30–40 minutes
These times are estimates for a batch of 8 rolls. Smaller rolls may bake more quickly, while larger rolls may require additional time.
Nutritional Information
The following nutritional values are approximate estimates for one roll, assuming the recipe makes 8 rolls and includes the listed butter and milk but excludes the optional egg and additional flavorings.
- Calories: Approximately 180–220
- Protein: Approximately 4–5 g
- Sodium: Approximately 250–350 mg
Calories
Most of the calories come from flour, butter, and milk. The exact amount depends on the size of each roll and whether you add cheese, sugar, or extra butter.
Protein
Flour and milk contribute most of the protein in the basic recipe. Adding an egg or cheese may increase the protein content slightly.
Sodium
Sodium mainly comes from the salt and baking powder. The exact amount depends on the brand of baking powder and the amount of salt used.
These nutritional figures are estimates, not laboratory-tested values. For more accurate information, calculate the nutrition using your exact ingredients and serving size.
Frequently Asked Questions
1. Can you make dinner rolls without yeast?
Yes. Baking powder can be used as the leavening agent in quick dinner rolls. These rolls do not require yeast activation or a lengthy rising period.
The texture is generally more tender and biscuit-like than traditional yeast rolls, but they are a convenient option when you want homemade bread quickly.
2. Why did my no yeast dinner rolls turn out dense?
Dense rolls can result from too much flour, old baking powder, or excessive mixing. Measure the flour carefully, check that your baking powder is fresh, and stir the dough only until the ingredients come together.
Also make sure your oven is fully preheated before baking.
3. Do no yeast dinner rolls need to rise?
No. These rolls do not need a yeast-based rising period. Once the dough is mixed and shaped, it can go directly into the oven.
A brief rest while the oven finishes preheating is fine, but a long rise is unnecessary.
4. Can I make these rolls with self-rising flour?
Self-rising flour already contains leavening and salt, so the recipe would need adjustments. Using self-rising flour together with the full amount of baking powder and salt may produce an undesirable result.
For predictable results, use all-purpose flour and follow the recipe as written.
5. Can I use water instead of milk?
Water can be used if necessary, but the rolls may have a less rich flavor and a slightly different texture. Milk contributes protein, fat, and natural sugars that improve the flavor and browning.
For a dairy-free option, unsweetened plant-based milk is often a better substitute.
6. Can I make the dough ahead of time?
These rolls are best mixed and baked immediately because baking powder begins reacting when it comes into contact with moisture.
For the freshest results, measure the dry ingredients ahead of time and store them separately. Add the liquid ingredients shortly before baking.
7. How do I store leftover dinner rolls?
Allow the rolls to cool completely, then place them in an airtight container. Store them at room temperature for about 1–2 days for best quality.
Because quick rolls can dry out more quickly than yeast-based bread, seal them well and avoid leaving them uncovered.
8. Can I freeze no yeast dinner rolls?
Yes. Cool the baked rolls completely, place them in a freezer-safe bag or container, and freeze for up to approximately 2 months for best quality.
Thaw them at room temperature and warm them gently in the oven before serving.
9. How can I make the rolls softer?
Avoid adding too much flour and do not overbake them. Brushing the tops with melted butter after baking also helps create a softer finish.
Using milk instead of water contributes to a richer texture.
10. Can I add cheese to this recipe?
Yes. Add approximately 1/2 cup of shredded cheddar or another firm cheese to the dry ingredients. You can also add a little garlic powder or dried herbs for additional flavor.
Cheese adds moisture and fat, so avoid adding excessive extra liquid.
11. Can I make these rolls without eggs?
Yes. The basic recipe does not require an egg. Simply omit the optional egg and use the specified milk amount, adjusting slightly if necessary to create a soft dough.
12. Why are my rolls dry and crumbly?
Dry, crumbly dough often contains too much flour or too little liquid. Add milk gradually until the dough comes together.
Dry rolls after baking may also be the result of overbaking. Begin checking for doneness toward the early end of the recommended baking time.
13. Can I make these rolls sweet?
Yes. Add a little extra sugar or honey and serve the rolls with butter, jam, or honey. You can also add a small amount of cinnamon for a breakfast-style variation.
Avoid adding too much sugar because it can affect the dough’s texture and browning.
14. What is the best temperature for baking no yeast dinner rolls?
A temperature of 375°F (190°C) works well for this recipe. It allows the rolls to cook through while developing lightly golden tops.
Ovens vary, so check the rolls as they approach the end of the estimated baking time.
15. Can I use this dough to make biscuits?
The dough has some similarities to quick biscuit dough, but the shape and handling may differ. You can gently pat it out and cut it into rounds, although the texture will depend on the ingredient ratios and how much the dough is worked.
For classic flaky biscuits, use a recipe developed specifically for that purpose.
16. How do I reheat leftover rolls?
Wrap the rolls loosely in foil and warm them in an oven set to approximately 300°F (150°C) for 5–10 minutes, checking frequently.
For a quick option, microwave one roll briefly under a slightly damp paper towel. Avoid overheating, as this can make it tough.
Conclusion
Grandma’s Easy No Yeast Dinner Rolls are a simple and comforting solution when you want fresh homemade bread without waiting for yeast dough to rise. Made with familiar pantry ingredients and ready in approximately half an hour, these rolls are ideal for busy weeknights, family meals, holiday dinners, and last-minute gatherings.
Their tender centers, lightly golden tops, and buttery finish make them a versatile addition to almost any menu. Serve them alongside soup, stew, roasted chicken, pasta, or mashed potatoes, or enjoy them on their own with a little butter and honey.
The key to success is simple: measure the flour carefully, use fresh baking powder, mix gently, and avoid overbaking. With these easy techniques, you can prepare a batch of warm rolls whenever the craving strikes.
Although they have a different texture from traditional yeast-raised dinner rolls, their convenience and homemade flavor make them worth keeping in your recipe collection.
If you are looking for an easy dinner rolls recipe without yeast, this old-fashioned quick bread method is a wonderful place to start. Prepare a batch, brush the tops with melted butter, and bring the comforting taste of homemade bread to your table in less time.
Print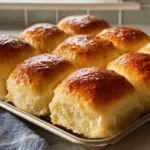
Grandma’s Easy No Yeast Dinner Rolls – Soft, Buttery Homemade Rolls Without Yeast
- Total Time: Approximately 30–40 minutes
Description
This easy no yeast dinner rolls recipe uses simple pantry ingredients to create soft, tender rolls without commercial yeast or a lengthy rising period. Whether you need a quick side dish for a family dinner, warm bread for a holiday meal, or something homemade to serve alongside a bowl of soup, these rolls are a wonderful option.
Ingredients
Main ingredients
- 2 cups (250 g) all-purpose flour: Provides the structure for the rolls. Measure carefully to avoid making the dough too dry.
- 1 tablespoon baking powder: Acts as the leavening agent and helps the rolls rise without yeast.
- 1 tablespoon granulated sugar: Adds a subtle sweetness and helps improve the flavor and browning.
- 1/2 teaspoon salt: Balances the flavor and prevents the rolls from tasting bland.
- 3 tablespoons (42 g) cold unsalted butter: Adds richness and tenderness. Cut it into small cubes before mixing.
- 3/4 cup (180 ml) milk: Brings the dough together and helps create a soft crumb. You may need a little more or less depending on your flour.
- 1 large egg, optional: Adds richness and structure. If you use an egg, slightly reduce the milk if the dough becomes too sticky.
- 1 tablespoon melted butter for brushing: Gives the baked rolls a glossy appearance and buttery flavor.
Optional ingredients for extra flavor
- 1/2 teaspoon garlic powder for savory rolls
- 1 teaspoon dried parsley or Italian seasoning
- 1/4 cup shredded cheddar cheese
- 1 teaspoon honey instead of some or all of the sugar
- A pinch of black pepper for a savory variation
Instructions
Preheat your oven to 375°F (190°C). Lightly grease a baking sheet or line it with parchment paper.
You can also use a round baking dish if you prefer the rolls to sit close together. When the rolls touch during baking, their sides tend to stay soft, while rolls baked separately develop more golden edges.
Prepare your ingredients before mixing the dough. Measure the flour, baking powder, sugar, and salt. Cut the butter into small cubes and measure the milk.
Having everything ready makes the process easier because baking powder begins working once it comes into contact with moisture.
Step 2: Combine the dry ingredients
In a large mixing bowl, whisk together the all-purpose flour, baking powder, sugar, and salt.
Whisking distributes the baking powder evenly throughout the flour, helping the rolls rise more consistently. It also breaks up small lumps and prevents concentrated pockets of salt or leavening.
Make sure your baking powder is fresh. Old baking powder can lose its effectiveness, resulting in dense rolls that do not rise properly.
If you want to make savory dinner rolls, you can add garlic powder, dried herbs, or black pepper at this stage.
Step 3: Cut the butter into the flour
Add the cold butter cubes to the dry ingredients.
Using your fingertips, a pastry cutter, or two forks, work the butter into the flour until the mixture resembles coarse crumbs. Small pieces of butter are perfectly fine.
The butter adds flavor and tenderness to the finished rolls. Keeping it cold helps create a softer texture rather than a greasy dough.
Avoid melting the butter before mixing it into the flour. Cold butter is easier to distribute and helps prevent the dough from becoming overly soft.
If you are short on time, you can use a pastry cutter to incorporate the butter more quickly.
Step 4: Add the milk and form the dough
Gradually pour the milk into the flour mixture, stirring gently with a wooden spoon or spatula.
If you are using the optional egg, whisk it separately and add it with the milk. Begin with the recommended amount of liquid, then add a small splash more only if the dough appears too dry.
Mix just until the ingredients come together into a soft dough. It should be slightly tacky but not excessively wet.
Avoid vigorous mixing or kneading. Unlike traditional yeast bread, this quick dough does not require extensive kneading, and overworking it can develop too much gluten, making the rolls tough.
If the dough feels extremely sticky, sprinkle a small amount of flour over your hands and work surface rather than adding large quantities of flour directly to the bowl.
Step 5: Shape the dinner rolls
Lightly flour your work surface and turn the dough out onto it.
Gently bring the dough together and divide it into 8 equal portions. You can use a kitchen scale for evenly sized rolls or divide the dough by eye.
Roll each portion gently between your hands to form a ball. Avoid compressing the dough too firmly because this can make the finished rolls dense.
Place the dough balls on the prepared baking sheet, leaving a little space between them if you want golden sides. For softer pull-apart rolls, arrange them closer together in a greased baking dish.
If the dough begins sticking to your hands, dust your fingers lightly with flour. Use only as much flour as necessary to keep the dough manageable.
Once shaped, the rolls can go straight into the oven. There is no yeast-based rising period required.
Step 6: Bake until lightly golden
Place the baking sheet in the preheated oven and bake for approximately 15–20 minutes, depending on the size of the rolls and your oven.
The tops should become lightly golden, and the rolls should feel set rather than wet or doughy. If you have made larger rolls, they may need a few additional minutes.
Avoid overbaking because quick bread rolls can become dry if left in the oven too long.
If the tops are browning too quickly before the centers are cooked, reduce the oven temperature slightly and continue baking until done.
For food safety, make sure the centers are fully baked, especially if you have included an egg. If you are uncertain, check the center of a roll by breaking it open after a brief cooling period.
Step 7: Brush with melted butter
Remove the rolls from the oven and place the pan on a heatproof surface.
While the rolls are still warm, brush the tops generously with melted butter. This adds flavor, gives the rolls an attractive finish, and helps keep the crust pleasantly tender.
For extra flavor, mix a small amount of garlic powder or chopped parsley into the melted butter before brushing.
If you prefer a slightly crisp top, leave the rolls unbrushed or use only a thin layer of butter.
Step 8: Cool slightly and serve warm
Allow the rolls to rest for approximately 5 minutes before serving. This gives the interior time to settle and makes the rolls easier to handle.
Serve them warm alongside your favorite meal. You can also split them open and spread them with additional butter, honey, jam, or your favorite savory spread.
These rolls are best enjoyed fresh from the oven, when the centers are soft and the buttery flavor is at its peak.
Notes
For the best Grandma’s Easy No Yeast Dinner Rolls, remember that this recipe produces quick bread rolls rather than traditional yeast bread.
The texture will be tender and slightly more biscuit-like than the airy, stretchy crumb of a yeast-raised dinner roll. This is normal for a quick dough made with baking powder.
Measure the flour carefully. Too much flour is one of the most common reasons homemade rolls turn out dry or heavy. Spoon flour into the measuring cup and level it rather than packing it down.
Use fresh baking powder. Since baking powder provides the lift, its freshness has a major impact on the finished result.
Do not overmix. Stir only until the dough comes together. Excessive mixing can make the rolls tough.
Add liquid gradually. Flour absorbs moisture differently depending on the brand, humidity, and measuring method. The dough should be soft and manageable, not dry or soupy.
Bake immediately after shaping. Baking powder starts reacting when it is moistened, so you do not need a long resting period.
Brush with butter after baking. This simple step improves flavor and gives the rolls a softer, more appealing finish.
- Prep Time: 10–15 minutes
- Resting Time: 5 minutes
- Cook Time: 15–20 minutes
Nutrition
- Calories: 180–220
- Sodium: 250–350 mg
- Protein: 4–5 g
