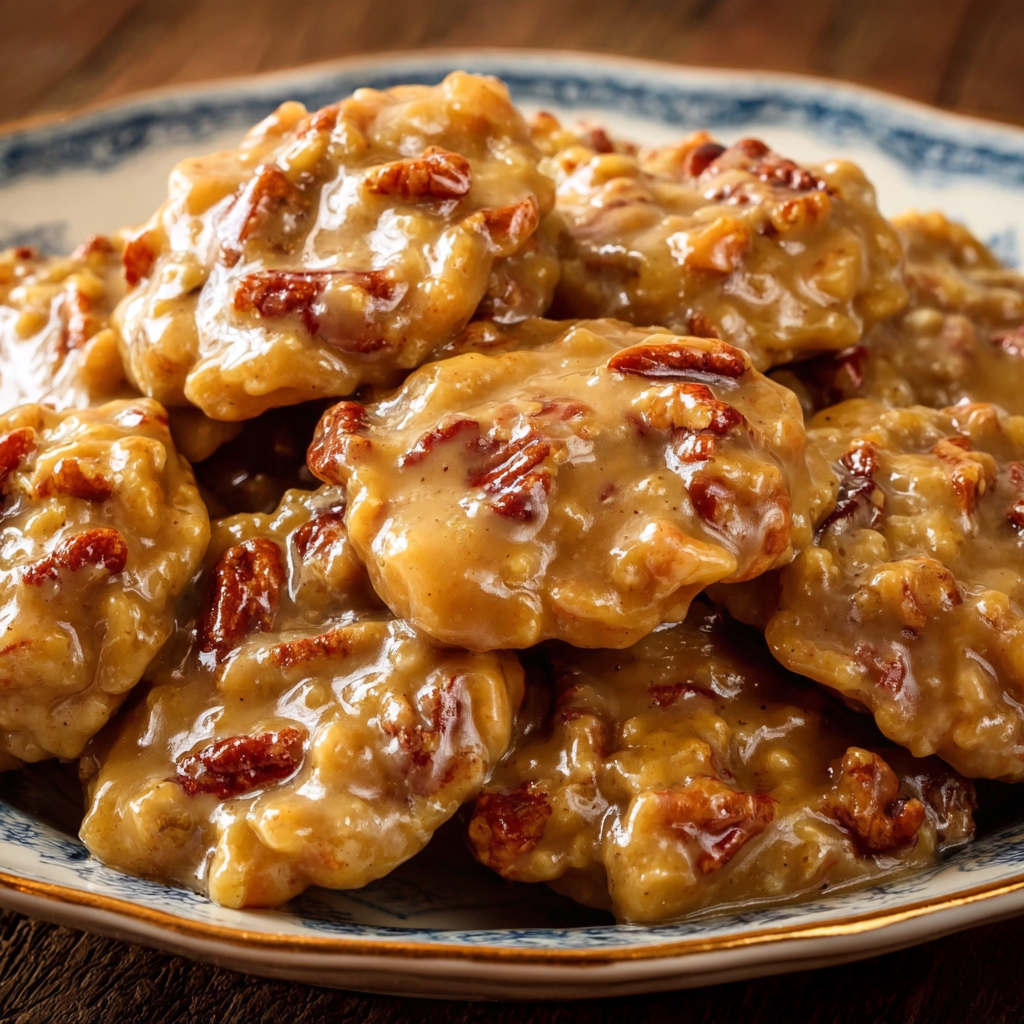
Creole Pecan Pralines are a beloved Southern candy made with toasted pecans, butter, sugar, and rich evaporated milk. These sweet, buttery treats have a wonderful combination of nutty crunch and creamy, melt-in-your-mouth texture. With their beautiful golden-brown color and irresistible caramel aroma, they bring the flavors of traditional New Orleans confectionery right into your home kitchen.
Pralines are especially associated with Louisiana, where French culinary traditions blended with local ingredients and cooking techniques to create distinctive regional sweets. Creole-style pecan pralines are known for their rich flavor and creamy consistency, making them a favorite for holiday dessert trays, homemade gifts, and special family gatherings.
The beauty of this recipe is that you only need a handful of everyday ingredients to create something that feels truly special. Pecans provide the signature nutty flavor, brown and granulated sugars create sweetness, evaporated milk adds richness, and butter brings everything together. A little vanilla enhances the flavor, while careful cooking helps the candy develop its characteristic texture.
Although pralines require attention while cooking, you do not need professional candy-making equipment. A heavy-bottomed saucepan, a reliable candy thermometer, and a little preparation can make the process much easier. Once the mixture reaches the correct temperature and thickens, it is spooned onto parchment paper and allowed to set into individual candies.
Whether you are preparing a batch for Christmas, creating edible gifts, or adding a traditional Southern dessert to your recipe collection, Creole Pecan Pralines are a wonderful choice. Their rich flavor, rustic appearance, and satisfying pecan crunch make them a timeless homemade treat.
Why You’ll Love These Creole Pecan Pralines
- Classic Southern flavor: Buttery sugar, toasted pecans, and vanilla create a traditional praline taste.
- Simple ingredients: You can find everything you need in most American grocery stores.
- Perfect for gifting: These candies look beautiful in food-safe gift boxes and decorative tins.
- Great for holidays: Add them to Christmas candy trays, Thanksgiving dessert spreads, or family celebrations.
- A satisfying texture: Properly prepared pralines have a creamy, slightly crumbly finish with crunchy pecans.
- Easy to customize: Adjust the pecan pieces, add a hint of cinnamon, or experiment with different vanilla flavors.
- Make-ahead friendly: Once completely set, the candies can be stored in an airtight container until serving.
Ingredients for Creole Pecan Pralines
This recipe makes approximately 18–24 pralines, depending on the size of each candy.
Ingredients
- 2 cups pecan halves or coarsely chopped pecans
- 1 cup granulated sugar
- 1 cup packed light brown sugar
- 1/2 cup evaporated milk
- 4 tablespoons unsalted butter
- 1 teaspoon vanilla extract
- 1/8 teaspoon salt
Ingredient Notes
Pecans: Fresh pecans are essential because they provide the main flavor and texture. Pecan halves create a rustic appearance, while chopped pecans make smaller, more evenly distributed bites.
Granulated sugar: This contributes to the structure of the candy and balances the molasses flavor of brown sugar.
Brown sugar: Brown sugar adds warmth and a deeper caramel-like flavor. Light brown sugar produces a classic taste, while dark brown sugar creates a more pronounced molasses note.
Evaporated milk: This adds richness and helps create the creamy praline texture. Do not confuse it with sweetened condensed milk, which contains added sugar and would change the recipe significantly.
Butter: Butter provides a smooth, rich flavor and contributes to the candy’s texture.
Vanilla extract: Vanilla rounds out the caramel and pecan flavors. Add it after removing the pan from the heat.
Salt: A small amount balances the sweetness and makes the pecans taste even richer.
Essential Equipment
Before beginning, gather the following kitchen tools:
- A heavy-bottomed saucepan
- A candy thermometer
- A heat-resistant spatula or wooden spoon
- Parchment paper or a silicone baking mat
- A large baking sheet or tray
- Measuring cups and spoons
- A small spoon or cookie scoop
A heavy-bottomed saucepan helps distribute heat more evenly and reduces the risk of scorching the sugar mixture. A candy thermometer is particularly useful because pralines can change texture if the syrup is cooked too little or too much.
Line the baking sheet before you begin cooking. Once the mixture reaches the right consistency, it can start setting quickly, so having everything ready makes the final step easier.
Preparation: How to Make Creole Pecan Pralines
Step 1: Prepare the Pecans and Baking Tray
Line a large baking sheet with parchment paper or a silicone baking mat. Make sure the tray is placed on a level, heat-safe surface where the pralines can cool undisturbed.
If you want a deeper nutty flavor, toast the pecans in a dry skillet over medium-low heat for approximately 3–5 minutes, stirring frequently. You can also toast them in a 350°F oven for about 5–7 minutes.
Watch the pecans closely because they can burn quickly. Once fragrant, transfer them to a plate and allow them to cool.
Leave the pecans whole for a traditional rustic appearance, or chop them coarsely for smaller, easier-to-eat candies. Measure the remaining ingredients before turning on the stove.
Step 2: Combine the Sugars, Milk, Butter, and Salt
Place the granulated sugar, brown sugar, evaporated milk, butter, and salt in a heavy-bottomed saucepan.
Set the pan over medium heat and stir gently until the butter melts and the sugars begin dissolving. Continue stirring carefully to prevent the mixture from sticking to the bottom.
Once the mixture reaches a steady boil, stop stirring continuously and attach the candy thermometer to the side of the saucepan. Make sure the thermometer tip sits in the mixture without touching the bottom of the pan.
Keep the heat steady and watch the temperature closely. If the mixture begins boiling too aggressively, reduce the heat slightly.
Step 3: Cook the Praline Mixture
Continue cooking until the mixture reaches approximately 236–240°F, generally the soft-ball stage for this style of candy. The exact temperature needed can vary with the recipe, humidity, and desired texture, so use the thermometer as a guide and watch the consistency carefully.
Avoid scraping crystallized sugar from the sides of the saucepan back into the mixture. This can encourage unwanted crystallization and affect the finished texture.
As the mixture cooks, it will thicken and develop a deeper caramel aroma. Do not leave the saucepan unattended because hot sugar can rise quickly and cause serious burns.
When the target temperature is reached, remove the saucepan from the heat and let the bubbling settle briefly.
Step 4: Add the Pecans and Vanilla
Add the prepared pecans and vanilla extract to the hot mixture. Stir thoroughly until the nuts are evenly coated.
Continue stirring as the mixture begins to cool and thicken. In many praline recipes, this cooling and stirring stage is essential for developing the characteristic creamy, slightly grainy finish.
The mixture should gradually become thicker and lose some of its glossy appearance. When it begins holding its shape on a spoon, it is ready to portion.
If the mixture remains very thin, give it a little more time to cool while stirring. If it becomes too firm before you finish spooning it out, the pralines may develop rough shapes, so work efficiently once the texture is right.
Step 5: Spoon and Set the Pralines
Using a tablespoon or small cookie scoop, drop portions of the mixture onto the prepared parchment paper. Leave space between each mound so the candies do not touch.
Work quickly but carefully, as the mixture will continue to set as it cools. If the pralines look rustic and irregular, that is part of their traditional homemade appeal.
Allow the candies to cool at room temperature until firm. Depending on their size and the room conditions, this may take approximately 30–60 minutes.
Once fully set, gently lift the pralines from the parchment paper and transfer them to an airtight container. Keep them in a cool, dry place away from direct sunlight and humidity.
Tips for Perfect Creole Pecan Pralines
Use a candy thermometer. Temperature is one of the most important factors in candy-making. Cooking the mixture too little may leave the pralines sticky, while cooking it too much can make them hard or crumbly.
Prepare everything before cooking. Have the tray lined, the pecans measured, and the vanilla ready before the sugar mixture reaches its target temperature.
Toast the pecans carefully. Light toasting deepens the nutty flavor, but burnt pecans can make the whole batch taste bitter.
Choose the right saucepan. A heavy-bottomed pan provides more even heating and helps prevent scorching.
Watch the cooling stage. Stirring as the mixture cools helps develop the texture associated with traditional pralines.
Work quickly when portioning. The mixture can set rapidly, so do not wait too long once it is thick enough to spoon.
Keep moisture away from the candy. Humidity can affect the final texture and make pralines sticky.
Handle hot sugar carefully. Never taste the hot mixture or touch it with your fingers. Melted sugar can cause serious burns.
Common Problems and How to Fix Them
Why Are My Pralines Too Soft?
The mixture may not have reached a high enough temperature, or it may not have cooled sufficiently before portioning. Use a candy thermometer and allow the finished pralines to cool completely before storing them.
Why Did My Pralines Turn Out Hard?
The sugar mixture may have been cooked too hot or for too long. Use medium heat, monitor the thermometer closely, and remove the pan from the heat as soon as the target temperature is reached.
Why Are My Pralines Grainy?
Some graininess is characteristic of traditional pralines, but excessive crystallization can create an unpleasantly sandy texture. Avoid scraping sugar crystals from the sides of the pan into the mixture, and follow the stirring and cooling process carefully.
Why Won’t My Pralines Set?
Humidity, an incorrect syrup temperature, or insufficient cooling can prevent the candies from setting properly. Allow them to cool completely in a dry room. If they remain very soft, the mixture may need a more carefully controlled cooking temperature next time.
Why Did My Pralines Become Too Thick Before I Could Spoon Them?
The mixture may have cooled too much before portioning. Prepare the tray and all ingredients before cooking, then begin spooning as soon as the mixture thickens enough to hold its shape.
Delicious Variations to Try
Classic New Orleans-Style Pecan Pralines
Use pecan halves and light brown sugar for a traditional flavor and rustic appearance. Keep the vanilla simple so the buttery pecans remain the main attraction.
Dark Brown Sugar Pralines
Replace the light brown sugar with dark brown sugar for a stronger molasses flavor. The result is deeper in color and has a richer caramel note.
Vanilla Bean Pecan Pralines
Replace the vanilla extract with a small amount of vanilla bean paste. The tiny vanilla specks give the candy a beautiful appearance and a more pronounced vanilla aroma.
Cinnamon Pecan Pralines
Add a small pinch of ground cinnamon to the sugar mixture for a warm flavor that works particularly well during the fall and winter holidays.
Chocolate Drizzled Pralines
After the pralines have cooled and set, drizzle them with melted semisweet chocolate. Allow the chocolate to firm before stacking or packaging the candies.
Sea Salt Pecan Pralines
Sprinkle a tiny amount of flaky sea salt over the candies immediately after spooning them onto the tray. The salt adds contrast to the sweetness and complements the toasted pecans.
Serving Suggestions
Creole Pecan Pralines are delicious on their own, but they can also be served in several appealing ways.
- Christmas candy trays: Arrange them with fudge, divinity, chocolate truffles, and peanut butter candies.
- Homemade gift boxes: Place individual pralines in paper candy cups inside a food-safe box or tin.
- Coffee breaks: Serve one with hot coffee, espresso, or black tea.
- Holiday dessert tables: Add them to a platter of cookies, brownies, and other bite-sized sweets.
- Southern-inspired dessert spreads: Serve them with pecan pie, bread pudding, or vanilla ice cream.
- Party favors: Wrap fully cooled candies individually in food-safe packaging for guests to take home.
For a polished presentation, use small paper liners and arrange the candies in a single layer. This helps protect their shape and makes serving easier.
Storage and Make-Ahead Tips
Allow the pralines to cool completely before placing them in a container. Trapping warmth can create condensation, which may soften the candies.
Store the pralines in an airtight container in a cool, dry place. For best texture, enjoy them within approximately 5–7 days, although storage life can vary with the recipe and humidity.
If stacking the candies, place parchment paper between layers to reduce sticking. Avoid storing them in a damp environment, and keep them away from direct sunlight or heat sources.
Pralines are best made when the weather is relatively dry. On humid days, they may take longer to set or become sticky more quickly. If you are preparing them for a special event, make a small test batch first if you are unfamiliar with your kitchen’s conditions.
Prep Time, Cooking Time, and Total Time
- Prep Time: 15 minutes
- Cooking Time: 15–20 minutes
- Cooling and Setting Time: 30–60 minutes
- Total Time: Approximately 1 hour to 1 hour 35 minutes
- Yield: 18–24 pralines
These times are estimates. Cooking time depends on the saucepan, stove, and starting temperature of the ingredients, while setting time depends on the size of the candies and the humidity in the room.
Nutritional Information
Estimated values per praline, assuming a yield of approximately 20 candies:
- Calories: 190
- Protein: 2 grams
- Sodium: 35 milligrams
Actual nutritional values depend on the size of each candy, the amount of sugar mixture that remains in the pan, and the pecans used. These figures are estimates rather than laboratory-verified values.
Frequently Asked Questions
What are Creole Pecan Pralines made of?
Creole Pecan Pralines are typically made with pecans, sugar, brown sugar, evaporated milk, butter, and vanilla. The ingredients are cooked together to create a thick candy mixture that is spooned into individual portions and allowed to set.
What is the difference between pralines and pecan brittle?
Pralines are generally creamy or slightly crumbly, while pecan brittle is typically hard, glassy, and crunchy. The ingredients and cooking temperatures differ, giving each candy its distinctive texture.
Why are pralines associated with New Orleans?
Pralines are part of Louisiana’s culinary heritage, influenced by French confectionery traditions and adapted with locally abundant pecans. They became a recognizable regional sweet, particularly in New Orleans.
Do I need a candy thermometer to make pralines?
A candy thermometer is strongly recommended because the syrup temperature affects the texture. Experienced candy-makers sometimes use traditional visual or water tests, but a thermometer provides a more consistent starting point.
Can I use sweetened condensed milk instead of evaporated milk?
Not as a direct substitution. Sweetened condensed milk contains additional sugar and is much thicker, so it can significantly change the sweetness and texture. Use evaporated milk for the recipe as written.
Why are my pralines sticky?
High humidity, an incorrect cooking temperature, or storing the candies before they are completely cool can make pralines sticky. Let them set in a dry environment and store them in an airtight container after they have cooled.
Can I make pralines without pecans?
Pecans are the defining ingredient in this recipe, but you can experiment with chopped almonds or walnuts. The flavor and texture will be different from traditional pecan pralines.
Can I make Creole Pecan Pralines ahead of time?
Yes. Prepare them a few days before serving, allow them to cool completely, and store them in an airtight container in a cool, dry place. Avoid making them too far in advance if your kitchen is particularly humid.
Can pralines be frozen?
Freezing is possible, but condensation during thawing may affect the texture. For the best result, store pralines in a sealed freezer-safe container, separate layers with parchment paper, and thaw while still covered. Their texture may change slightly after freezing.
How can I prevent the pralines from becoming grainy?
Avoid introducing sugar crystals from the sides of the pan into the syrup. Use the ingredients in the recommended proportions and follow the cooking and cooling steps carefully. Some fine graininess is normal in traditional pralines, but large sugar crystals usually indicate unwanted crystallization.
Conclusion
Creole Pecan Pralines are a classic Southern candy that combines toasted pecans, buttery sweetness, and a rich caramel-like flavor in every bite. With a few simple ingredients and careful attention to the cooking temperature, you can make a homemade treat that is perfect for holiday dessert trays, special gatherings, and edible gifts.
The most important steps are preparing your ingredients in advance, cooking the syrup carefully, and stirring the mixture as it cools to develop the proper texture. Once the pralines are spooned onto parchment paper and allowed to set, they become beautiful little candies with a traditional homemade appearance.
Add this recipe to your collection of Southern sweets and enjoy the delicious combination of pecans, butter, and sugar whenever you want a taste of classic Creole-inspired candy.
Print
Creole Pecan Pralines
Ingredients
- 2 cups pecan halves or coarsely chopped pecans
- 1 cup granulated sugar
- 1 cup packed light brown sugar
- 1/2 cup evaporated milk
- 4 tablespoons unsalted butter
- 1 teaspoon vanilla extract
- 1/8 teaspoon salt
Instructions
Line a large baking sheet with parchment paper or a silicone baking mat. Make sure the tray is placed on a level, heat-safe surface where the pralines can cool undisturbed.
If you want a deeper nutty flavor, toast the pecans in a dry skillet over medium-low heat for approximately 3–5 minutes, stirring frequently. You can also toast them in a 350°F oven for about 5–7 minutes.
Watch the pecans closely because they can burn quickly. Once fragrant, transfer them to a plate and allow them to cool.
Leave the pecans whole for a traditional rustic appearance, or chop them coarsely for smaller, easier-to-eat candies. Measure the remaining ingredients before turning on the stove.
Step 2: Combine the Sugars, Milk, Butter, and Salt
Place the granulated sugar, brown sugar, evaporated milk, butter, and salt in a heavy-bottomed saucepan.
Set the pan over medium heat and stir gently until the butter melts and the sugars begin dissolving. Continue stirring carefully to prevent the mixture from sticking to the bottom.
Once the mixture reaches a steady boil, stop stirring continuously and attach the candy thermometer to the side of the saucepan. Make sure the thermometer tip sits in the mixture without touching the bottom of the pan.
Keep the heat steady and watch the temperature closely. If the mixture begins boiling too aggressively, reduce the heat slightly.
Step 3: Cook the Praline Mixture
Continue cooking until the mixture reaches approximately 236–240°F, generally the soft-ball stage for this style of candy. The exact temperature needed can vary with the recipe, humidity, and desired texture, so use the thermometer as a guide and watch the consistency carefully.
Avoid scraping crystallized sugar from the sides of the saucepan back into the mixture. This can encourage unwanted crystallization and affect the finished texture.
As the mixture cooks, it will thicken and develop a deeper caramel aroma. Do not leave the saucepan unattended because hot sugar can rise quickly and cause serious burns.
When the target temperature is reached, remove the saucepan from the heat and let the bubbling settle briefly.
Step 4: Add the Pecans and Vanilla
Add the prepared pecans and vanilla extract to the hot mixture. Stir thoroughly until the nuts are evenly coated.
Continue stirring as the mixture begins to cool and thicken. In many praline recipes, this cooling and stirring stage is essential for developing the characteristic creamy, slightly grainy finish.
The mixture should gradually become thicker and lose some of its glossy appearance. When it begins holding its shape on a spoon, it is ready to portion.
If the mixture remains very thin, give it a little more time to cool while stirring. If it becomes too firm before you finish spooning it out, the pralines may develop rough shapes, so work efficiently once the texture is right.
Step 5: Spoon and Set the Pralines
Using a tablespoon or small cookie scoop, drop portions of the mixture onto the prepared parchment paper. Leave space between each mound so the candies do not touch.
Work quickly but carefully, as the mixture will continue to set as it cools. If the pralines look rustic and irregular, that is part of their traditional homemade appeal.
Allow the candies to cool at room temperature until firm. Depending on their size and the room conditions, this may take approximately 30–60 minutes.
Once fully set, gently lift the pralines from the parchment paper and transfer them to an airtight container. Keep them in a cool, dry place away from direct sunlight and humidity.
