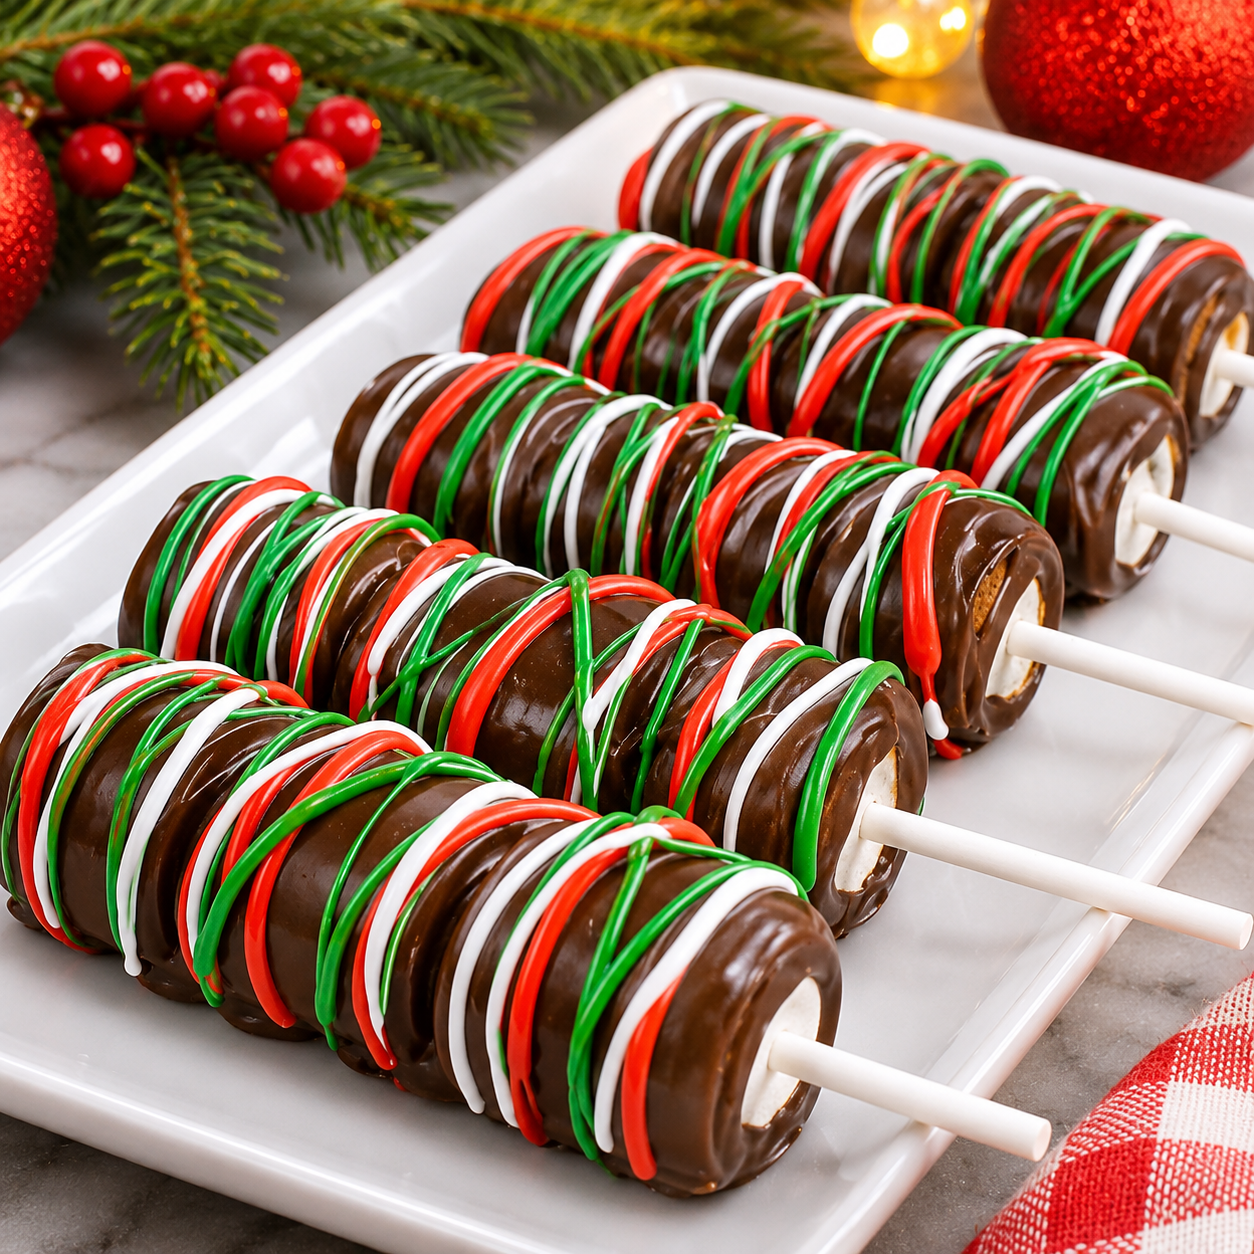
Make your holiday dessert table extra cheerful with these adorable Christmas Marshmallow Pops! Soft, fluffy marshmallows are dipped in smooth melted chocolate, decorated with festive sprinkles, and served on sticks to create a simple treat that looks as delightful as it tastes. With their colorful Christmas decorations and sweet chocolate coating, these little pops are perfect for holiday parties, family gatherings, school celebrations, and homemade Christmas gift boxes.
The best part? You don’t need to turn on the oven or spend hours preparing them. Just add marshmallows to sticks, dip them in melted chocolate, and decorate with your favorite Christmas colors. You can make them with white chocolate, milk chocolate, or a combination of both to create a beautiful variety of holiday designs.
Whether you decorate them with red and green sprinkles, crushed peppermint candies, mini chocolate chips, or little candy stars, these Christmas Marshmallow Pops are easy enough for beginners and fun for the whole family. They’re also a wonderful activity to enjoy with children during the holiday season.
If you’re looking for a quick, budget-friendly, and festive no-bake Christmas dessert, these marshmallow pops deserve a place on your holiday treat list!
Why You’ll Love These Christmas Marshmallow Pops
- No oven required: A simple no-bake dessert that comes together with just a few ingredients.
- Quick and easy: Perfect when you need a festive treat without spending hours in the kitchen.
- Beautiful presentation: Red, green, white, and chocolate decorations make them look perfect for Christmas.
- Kid-friendly activity: Children can help decorate the pops with sprinkles and candy.
- Easy to customize: Use different chocolates, toppings, and colors to create several designs.
- Great for gifting: Wrap them individually for Christmas party favors or homemade holiday gift boxes.
Ingredients
For the Marshmallow Pops
- 24 large marshmallows
- 12 oz milk chocolate melting wafers
- 12 oz white chocolate melting wafers
- 12–24 lollipop sticks or sturdy paper treat sticks
- 1 teaspoon vanilla extract, optional, for flavoring white chocolate only if the product instructions allow it
For Christmas Decorations
- ½ cup red and green Christmas sprinkles
- ¼ cup crushed peppermint candies
- ¼ cup mini chocolate chips
- 2 tablespoons white sugar pearls
- 2 tablespoons red and green mini candy pieces
- 2 tablespoons festive sanding sugar
Optional Decoration Ideas
- Red and green candy melts
- Extra melted white chocolate for drizzling
- Small edible star sprinkles
- Crushed chocolate sandwich cookies
- Coconut flakes for a snowy effect
Ingredient Notes and Substitutions
Large marshmallows: Standard large marshmallows are ideal because they provide enough surface area for dipping and decorating. Mini marshmallows can also be used in clusters, but they are more difficult to handle individually.
Chocolate melting wafers: These are designed to melt smoothly and set firmly, making them especially convenient for chocolate-covered treats. Follow the package instructions for melting.
White chocolate wafers: White chocolate creates a beautiful snowy finish and provides a neutral base for colorful Christmas sprinkles.
Lollipop sticks: Paper treat sticks or standard lollipop sticks both work. Choose sturdy sticks that can support the marshmallows without bending.
Christmas sprinkles: Use a mixture of red, green, white, and gold decorations to create a festive look.
Crushed peppermint: This adds a refreshing mint flavor and a little crunch. Sprinkle it over the chocolate before the coating sets.
Chocolate chips: You can use regular chocolate chips, but they may be thicker and may not set as firmly as melting wafers. If using them, follow a suitable melting method and avoid adding water or other liquids.
How to Make Christmas Marshmallow Pops
Step 1: Prepare the Marshmallows and Sticks
Arrange the large marshmallows on a clean work surface.
Gently insert one lollipop stick into the center of each marshmallow, pushing it about halfway through. Avoid pushing too far, as the stick may come through the opposite side.
If a marshmallow feels too soft, handle it gently to prevent tearing. Place the prepared marshmallow pops on a parchment-lined baking sheet.
Step 2: Melt the Chocolate
Place the milk chocolate melting wafers in a microwave-safe bowl.
Microwave in 20–30-second intervals, stirring thoroughly after each interval until the chocolate is smooth. Avoid overheating because chocolate can become thick or grainy.
Repeat the process in a separate bowl with the white chocolate melting wafers.
If your melting wafers become too thick, use only a manufacturer-recommended thinning product or a compatible shortening if the package instructions allow it. Do not add water or fruit juice.
Step 3: Dip the Marshmallow Pops
Hold one marshmallow pop by the stick and dip it into the melted chocolate.
Turn it gently until the marshmallow is completely covered. Lift it out and allow the excess chocolate to drip back into the bowl.
For a clean finish, gently tap the stick against the edge of the bowl while rotating the marshmallow.
Repeat with the remaining marshmallows, using milk chocolate for some and white chocolate for others.
Place each coated pop upright in a foam block or pop stand, or lay it carefully on parchment paper if you don’t mind a flat spot on one side.
Step 4: Add Christmas Decorations
While the chocolate coating is still wet, decorate the marshmallow pops with Christmas sprinkles, mini candy pieces, sugar pearls, or crushed peppermint.
For a snowy design, cover white chocolate pops with white sugar pearls and a light sprinkle of coconut flakes.
For a classic Christmas design, use milk chocolate pops topped with red and green sprinkles.
You can also drizzle a little melted white chocolate over the milk chocolate pops, or drizzle melted milk chocolate over the white chocolate pops, to create a pretty striped pattern.
Work with a few pops at a time so the chocolate doesn’t set before you add the decorations.
Step 5: Let the Chocolate Set
Once all the marshmallow pops are decorated, place the tray in the refrigerator for approximately 15–20 minutes, or until the chocolate coating is firm.
If you used a pop stand, make sure the pops are stable and not touching one another.
Once set, arrange them in a festive serving container or wrap them individually for holiday gifts.
Your beautiful Christmas Marshmallow Pops are ready to enjoy!
Helpful Cooking Notes
Use dry equipment: Even a small amount of water can cause melted chocolate to seize. Make sure bowls, spoons, and other utensils are completely dry.
Do not overheat the chocolate: Melt slowly and stir frequently to keep the coating smooth.
Work in small batches: Decorate several pops at a time rather than dipping all of them before adding sprinkles.
Keep the marshmallows at room temperature before dipping: Very cold marshmallows can encourage condensation, which may affect the chocolate coating.
Use a pop stand: A foam block or dedicated pop stand helps the chocolate set without leaving a flat surface.
Avoid overcrowding: Leave enough space between the pops so their chocolate coatings do not touch.
Choose the right coating: Melting wafers are usually easier for beginners because they are designed to melt and set without the tempering process required by some couverture chocolates.
Variations
White Chocolate Christmas Marshmallow Pops
Dip all the marshmallows in white chocolate and decorate them with red, green, and gold sprinkles. Add a few sugar pearls for an elegant snowy appearance.
Chocolate Peppermint Marshmallow Pops
Dip the marshmallows in milk or dark chocolate, then sprinkle crushed peppermint candies over the coating. The combination of chocolate and peppermint is perfect for the holiday season.
Grinch-Inspired Marshmallow Pops
Use green candy melts or appropriately colored white chocolate coating. Add a small red heart sprinkle to create a playful Grinch-inspired holiday design.
Snowman Marshmallow Pops
Dip the marshmallows in white chocolate and decorate with tiny chocolate pieces for eyes and buttons. Use a small orange candy piece for the nose.
Reindeer Marshmallow Pops
Cover the marshmallows in milk chocolate. Add candy eyes, a small red candy nose, and tiny pretzel pieces for antlers while the coating is still soft.
Christmas Sprinkle Marshmallow Pops
Use a mixture of red, green, white, and gold sprinkles to cover the entire chocolate coating. This is one of the easiest ways to create colorful holiday pops.
Double Chocolate Marshmallow Pops
Dip the marshmallows in milk chocolate, allow the first layer to set, and drizzle white chocolate over the top for a beautiful two-tone finish.
Serving Suggestions
Christmas Marshmallow Pops are perfect for serving in a variety of festive ways.
- Christmas dessert table: Arrange them in a decorated stand alongside cookies, brownies, and fudge.
- Hot chocolate station: Serve them with warm hot chocolate as a sweet marshmallow treat.
- Holiday party favors: Wrap individual pops in clear treat bags and tie them with red or green ribbon.
- Christmas movie night: Add them to a snack platter with popcorn, cookies, and chocolate candies.
- Homemade gift boxes: Place a few individually wrapped pops in a festive box with other homemade sweets.
- Kids’ Christmas party: Set up a decorating station with different sprinkles and let children personalize their own pops.
For a beautiful display, arrange the pops in a tall glass or decorative container filled with wrapped candies or another stable food-safe support. Use different chocolate coatings and sprinkle combinations to create a colorful Christmas arrangement.
Tips for the Best Christmas Marshmallow Pops
- Use fresh marshmallows: Fresh marshmallows are soft and easier to insert onto sticks.
- Insert sticks gently: Push each stick into the center without piercing the opposite side.
- Melt chocolate slowly: Short microwave intervals help prevent overheating.
- Let excess chocolate drip off: This prevents thick puddles from forming around the marshmallows.
- Decorate before the coating sets: Sprinkles stick best when the chocolate is still wet.
- Use contrasting colors: White chocolate with red and green decorations creates a classic Christmas look.
- Keep the coating smooth: Use melting wafers for an easy-to-work-with finish.
- Allow enough setting time: Make sure the chocolate is completely firm before wrapping or stacking the pops.
- Avoid touching the coating: Handle the pops by their sticks to keep fingerprints off the chocolate.
Storage Instructions
Once the chocolate has completely set, arrange the marshmallow pops in a single layer in an airtight container.
Store them in a cool, dry place away from direct sunlight and heat, following the storage guidance on your chocolate coating package. Avoid humid conditions, which can affect the appearance and texture of the chocolate.
For longer storage, refrigerate the pops in an airtight container. Let them warm slightly while still covered before serving to help minimize condensation on the chocolate.
For the best texture, enjoy them within 5–7 days. Discard any pops that show signs of moisture damage or spoilage.
Freezing Instructions
Freezing is possible, but it is not the best option for these marshmallow pops. Marshmallows can change texture after freezing and thawing, and condensation may affect the chocolate coating.
For the freshest appearance and texture, prepare them close to the day you plan to serve them.
If you choose to freeze them, place the fully set pops in a freezer-safe airtight container with parchment paper between layers. Freeze for up to 1 month for best quality. Thaw them in the refrigerator while still covered, then allow them to come closer to room temperature before opening the container.
Make-Ahead Instructions
Christmas Marshmallow Pops are easy to prepare ahead of a holiday party.
One day ahead: Prepare and decorate the pops, allow the chocolate to set completely, and store them in an airtight container in a cool, dry place if the coating package permits.
A few days ahead: You can prepare the pops and refrigerate them in an airtight container. Keep them away from strong-smelling foods and avoid repeated temperature changes.
Before serving: Arrange the pops in a decorative stand or serving container. Add any extra decorations to the table for a colorful presentation.
For homemade gifts, wrap each pop individually only after the chocolate coating has completely set.
Recipe Details
- Prep Time: 20 minutes
- Melting and Dipping Time: 20 minutes
- Chilling Time: 20 minutes
- Total Time: 1 hour
- Yield: 24 marshmallow pops
- Serving Size: 2 pops
Nutritional Information
Estimated nutrition per serving of 2 marshmallow pops:
- Calories: 185
- Protein: 1g
- Carbohydrates: 34g
- Fat: 5g
- Saturated Fat: 3g
- Cholesterol: 0mg
- Sodium: 45mg
- Fiber: 1g
- Sugar: 27g
Nutritional values are estimates and will vary depending on the chocolate coating, marshmallow brand, and decorations used.
Frequently Asked Questions
Can I use regular chocolate chips instead of melting wafers?
Yes. Chocolate chips can be used, but they are often thicker and may not set as firmly as melting wafers. Melt them gently and use a suitable chocolate thinning product only if needed and recommended for that chocolate.
How do I keep marshmallows from sliding off the sticks?
Insert the sticks gently into the center of each marshmallow, pushing them about halfway through. Avoid using marshmallows that are overly soft or sticky.
How do I make the chocolate coating smooth?
Use melting wafers, melt them slowly, and stir frequently. Make sure all equipment is dry and avoid overheating the chocolate.
Can I make Christmas Marshmallow Pops without sticks?
Absolutely! You can dip whole marshmallows using a fork or dipping tool and place them on parchment paper to set. They will look more like chocolate-covered marshmallow bites.
Can I use only white chocolate?
Yes! White chocolate creates a beautiful snowy finish. Decorate it with colorful Christmas sprinkles, crushed peppermint, or tiny candy pieces.
How long do Christmas Marshmallow Pops take to set?
They generally take around 15–20 minutes in the refrigerator, depending on the thickness of the chocolate coating. Make sure the coating is completely firm before wrapping.
Can kids help make these marshmallow pops?
Yes! Children can insert decorations, add sprinkles, and help arrange finished pops. Adults should handle the hot melted chocolate and supervise children when using sticks and small candies.
Can I make these marshmallow pops for a Christmas party?
Definitely! They are easy to prepare in batches, simple to serve, and look lovely on a holiday dessert table. You can also wrap them individually as party favors.
What are the best decorations for Christmas Marshmallow Pops?
Red and green sprinkles, crushed peppermint, mini candy pieces, white sugar pearls, and edible stars are all excellent choices. Use a combination of colors and textures to make each pop look festive.
Can I make different designs with one batch?
Yes! Divide the melted chocolate into different bowls and decorate each group differently. You can make snowmen, reindeer, snowy white pops, and classic Christmas sprinkle pops using the same basic recipe.
Conclusion
These Christmas Marshmallow Pops are a simple, colorful, and delicious way to bring holiday cheer to your dessert table. With fluffy marshmallows, smooth chocolate coatings, and festive decorations, they are an easy no-bake treat that everyone can enjoy.
Whether you’re making them for a Christmas party, preparing homemade gifts, or spending a fun afternoon decorating sweets with your family, these adorable pops are sure to become a holiday favorite. Choose your favorite chocolate, add plenty of Christmas sprinkles, and enjoy a little extra sweetness this season!
Print
Christmas Marshmallow Pops – Easy No-Bake Holiday Treats
Ingredients
For the Marshmallow Pops
- 24 large marshmallows
- 12 oz milk chocolate melting wafers
- 12 oz white chocolate melting wafers
- 12–24 lollipop sticks or sturdy paper treat sticks
- 1 teaspoon vanilla extract, optional, for flavoring white chocolate only if the product instructions allow it
For Christmas Decorations
- ½ cup red and green Christmas sprinkles
- ¼ cup crushed peppermint candies
- ¼ cup mini chocolate chips
- 2 tablespoons white sugar pearls
- 2 tablespoons red and green mini candy pieces
- 2 tablespoons festive sanding sugar
Optional Decoration Ideas
- Red and green candy melts
- Extra melted white chocolate for drizzling
- Small edible star sprinkles
- Crushed chocolate sandwich cookies
- Coconut flakes for a snowy effect
Instructions
Arrange the large marshmallows on a clean work surface.
Gently insert one lollipop stick into the center of each marshmallow, pushing it about halfway through. Avoid pushing too far, as the stick may come through the opposite side.
If a marshmallow feels too soft, handle it gently to prevent tearing. Place the prepared marshmallow pops on a parchment-lined baking sheet.
Step 2: Melt the Chocolate
Place the milk chocolate melting wafers in a microwave-safe bowl.
Microwave in 20–30-second intervals, stirring thoroughly after each interval until the chocolate is smooth. Avoid overheating because chocolate can become thick or grainy.
Repeat the process in a separate bowl with the white chocolate melting wafers.
If your melting wafers become too thick, use only a manufacturer-recommended thinning product or a compatible shortening if the package instructions allow it. Do not add water or fruit juice.
Step 3: Dip the Marshmallow Pops
Hold one marshmallow pop by the stick and dip it into the melted chocolate.
Turn it gently until the marshmallow is completely covered. Lift it out and allow the excess chocolate to drip back into the bowl.
For a clean finish, gently tap the stick against the edge of the bowl while rotating the marshmallow.
Repeat with the remaining marshmallows, using milk chocolate for some and white chocolate for others.
Place each coated pop upright in a foam block or pop stand, or lay it carefully on parchment paper if you don’t mind a flat spot on one side.
Step 4: Add Christmas Decorations
While the chocolate coating is still wet, decorate the marshmallow pops with Christmas sprinkles, mini candy pieces, sugar pearls, or crushed peppermint.
For a snowy design, cover white chocolate pops with white sugar pearls and a light sprinkle of coconut flakes.
For a classic Christmas design, use milk chocolate pops topped with red and green sprinkles.
You can also drizzle a little melted white chocolate over the milk chocolate pops, or drizzle melted milk chocolate over the white chocolate pops, to create a pretty striped pattern.
Work with a few pops at a time so the chocolate doesn’t set before you add the decorations.
Step 5: Let the Chocolate Set
Once all the marshmallow pops are decorated, place the tray in the refrigerator for approximately 15–20 minutes, or until the chocolate coating is firm.
If you used a pop stand, make sure the pops are stable and not touching one another.
Once set, arrange them in a festive serving container or wrap them individually for holiday gifts.
Your beautiful Christmas Marshmallow Pops are ready to enjoy!
Notes
Use dry equipment: Even a small amount of water can cause melted chocolate to seize. Make sure bowls, spoons, and other utensils are completely dry.
Do not overheat the chocolate: Melt slowly and stir frequently to keep the coating smooth.
Work in small batches: Decorate several pops at a time rather than dipping all of them before adding sprinkles.
Keep the marshmallows at room temperature before dipping: Very cold marshmallows can encourage condensation, which may affect the chocolate coating.
Use a pop stand: A foam block or dedicated pop stand helps the chocolate set without leaving a flat surface.
Avoid overcrowding: Leave enough space between the pops so their chocolate coatings do not touch.
Choose the right coating: Melting wafers are usually easier for beginners because they are designed to melt and set without the tempering process required by some couverture chocolates.
