If you’re looking for a festive, delicious, and beautiful dessert to add to your holiday baking list, these Christmas Cherry Mash Bars are a must-try! Combining a sweet and creamy cherry filling with a rich chocolate topping and crunchy roasted peanuts, these homemade dessert bars are inspired by the classic old-fashioned Cherry Mash candy.
Every bite delivers the perfect balance of flavors and textures. The soft pink cherry center is sweet, smooth, and full of delicious cherry flavor, while the chocolate topping adds a rich cocoa taste. A generous layer of crunchy peanuts brings a satisfying contrast that makes these bars even more irresistible.
What makes Christmas Cherry Mash Bars especially wonderful is their festive appearance. The beautiful pink cherry filling paired with the chocolate and peanut topping creates a dessert that looks gorgeous on Christmas cookie trays, holiday dessert tables, and homemade candy gift boxes.
You don’t need complicated baking techniques or professional candy-making equipment to prepare this recipe. With simple ingredients, easy preparation steps, and a little chilling time, you can make a batch of delicious homemade cherry bars right in your kitchen.
These bars are perfect for Christmas parties, cookie exchanges, family gatherings, potlucks, and holiday celebrations. They also make wonderful homemade gifts when cut into neat squares and packed in decorative boxes or festive tins.
Whether you grew up enjoying old-fashioned cherry candy or you’re discovering this delicious combination for the first time, these Christmas Cherry Mash Bars are guaranteed to become a holiday favorite.
Ingredients
Here are the ingredients you need to make these delicious Christmas Cherry Mash Bars.
For the Cherry Filling
1. Unsalted Butter (½ cup)
Butter creates a rich, smooth texture and helps bring the filling together. Use softened butter so it blends easily with the other ingredients.
2. Granulated Sugar (2 cups)
Sugar provides sweetness and structure to the cherry layer. It helps create the classic candy-like texture of traditional cherry mash bars.
3. Evaporated Milk (⅓ cup)
Evaporated milk adds creaminess and helps create a smooth filling. It is thicker and richer than regular milk, making it a great ingredient for homemade candy.
4. Marshmallow Creme (1 cup)
Marshmallow creme gives the cherry filling a soft, fluffy, and slightly chewy texture. It also helps hold the ingredients together.
5. Maraschino Cherries (½ cup, finely chopped and well drained)
Maraschino cherries provide the signature cherry flavor and beautiful pink color. Drain them thoroughly and pat them dry with paper towels to prevent excess moisture from affecting the filling.
6. Cherry Extract (½ teaspoon)
Cherry extract enhances the fruity flavor and gives the filling a delicious cherry aroma. Adjust the amount according to your preference.
7. Red or Pink Food Coloring (a few drops, optional)
A little food coloring creates a brighter pink filling that looks especially festive for Christmas.
8. Powdered Sugar (½ cup, if needed)
Powdered sugar can help thicken the filling if it feels too soft to spread.
For the Chocolate Peanut Topping
1. Semi-Sweet Chocolate Chips (2 cups)
Semi-sweet chocolate provides a rich chocolate flavor that balances the sweetness of the cherry filling.
2. Creamy Peanut Butter (½ cup)
Peanut butter adds richness and helps create a smooth, spreadable chocolate topping.
3. Roasted Salted Peanuts (1 cup, roughly chopped)
Chopped roasted peanuts add crunch and a slightly salty flavor that complements the sweet cherry center.
4. Coconut Oil (1 teaspoon, optional)
Coconut oil helps make the chocolate topping smoother and easier to spread.
Preparation
Follow these five simple steps to make your Christmas Cherry Mash Bars.
Step 1: Prepare the Baking Pan
Start by preparing an 8-by-8-inch square baking pan.
Line the pan with parchment paper, leaving some extra paper hanging over the sides. This will make it easier to lift the finished bars out of the pan after chilling.
Lightly grease the parchment paper if desired.
Set the prepared pan aside while you make the cherry filling.
Before starting, drain the maraschino cherries thoroughly. Place them on paper towels and gently pat them dry to remove as much moisture as possible.
This step is important because excess liquid can make the cherry layer too soft.
Step 2: Make the Cherry Filling
In a medium saucepan, combine the butter, granulated sugar, and evaporated milk.
Place the saucepan over medium heat and stir continuously until the butter melts and the sugar dissolves.
Bring the mixture to a gentle boil, stirring frequently to prevent sticking.
For a firmer, traditional candy-style filling, use a candy thermometer and cook to approximately 234–240°F (112–116°C), adjusting for the texture you prefer.
Remove the saucepan from the heat.
Stir in the marshmallow creme until completely melted and smooth.
Add the finely chopped, well-drained maraschino cherries and cherry extract.
Mix everything thoroughly until the cherries are evenly distributed.
If you want a brighter pink color, add a few drops of red or pink food coloring and stir until the color is uniform.
Allow the mixture to cool slightly before spreading.
If the filling seems too soft, gradually add a little powdered sugar until it reaches a thick, spreadable consistency.
Step 3: Spread and Chill the Cherry Layer
Pour the prepared cherry filling into the parchment-lined baking pan.
Use a spatula to spread it evenly across the bottom.
Smooth the surface so the finished bars will have a neat and attractive appearance.
Place the pan in the refrigerator for approximately 30–45 minutes, or until the cherry layer is firm enough to support the chocolate topping.
Chilling is important because it helps keep the cherry and chocolate layers separate and makes the bars easier to cut later.
Step 4: Prepare the Chocolate Peanut Topping
Place the semi-sweet chocolate chips, creamy peanut butter, and optional coconut oil in a microwave-safe bowl.
Microwave in 20–30-second intervals, stirring after each interval until the mixture is completely melted and smooth.
Alternatively, melt everything in a heatproof bowl over a saucepan of gently simmering water.
Once the chocolate mixture is smooth, fold in the chopped roasted peanuts.
Stir until the peanuts are evenly distributed throughout the chocolate.
Pour the chocolate peanut mixture over the chilled cherry filling.
Use a spatula to spread it evenly, making sure the entire surface is covered.
For an extra attractive finish, sprinkle a few additional chopped peanuts over the top.
Step 5: Chill, Slice, and Serve
Return the baking pan to the refrigerator and chill for approximately 2–3 hours, or until the chocolate topping is completely firm.
Once set, use the parchment paper to lift the entire dessert out of the pan.
Place it on a cutting board.
For clean, professional-looking slices, use a sharp knife warmed briefly under hot water and wiped dry before cutting.
Cut into small squares or rectangular bars, depending on your preferred serving size.
Arrange the Christmas Cherry Mash Bars on a festive serving platter or place them in decorative holiday candy boxes.
Serve chilled or slightly softened, and enjoy the delicious combination of sweet cherry filling, rich chocolate, and crunchy peanuts!
Print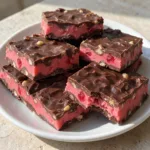
Christmas Cherry Mash Bars – Easy Festive Chocolate Cherry Dessert
- Total Time: 3 hours 20 minutes
Description
Christmas Cherry Mash Bars are a must-try! Combining a sweet and creamy cherry filling with a rich chocolate topping and crunchy roasted peanuts, these homemade dessert bars are inspired by the classic old-fashioned Cherry Mash candy.
Ingredients
For the Cherry Filling
1. Unsalted Butter (½ cup)
Butter creates a rich, smooth texture and helps bring the filling together. Use softened butter so it blends easily with the other ingredients.
2. Granulated Sugar (2 cups)
Sugar provides sweetness and structure to the cherry layer. It helps create the classic candy-like texture of traditional cherry mash bars.
3. Evaporated Milk (⅓ cup)
Evaporated milk adds creaminess and helps create a smooth filling. It is thicker and richer than regular milk, making it a great ingredient for homemade candy.
4. Marshmallow Creme (1 cup)
Marshmallow creme gives the cherry filling a soft, fluffy, and slightly chewy texture. It also helps hold the ingredients together.
5. Maraschino Cherries (½ cup, finely chopped and well drained)
Maraschino cherries provide the signature cherry flavor and beautiful pink color. Drain them thoroughly and pat them dry with paper towels to prevent excess moisture from affecting the filling.
6. Cherry Extract (½ teaspoon)
Cherry extract enhances the fruity flavor and gives the filling a delicious cherry aroma. Adjust the amount according to your preference.
7. Red or Pink Food Coloring (a few drops, optional)
A little food coloring creates a brighter pink filling that looks especially festive for Christmas.
8. Powdered Sugar (½ cup, if needed)
Powdered sugar can help thicken the filling if it feels too soft to spread.
For the Chocolate Peanut Topping
1. Semi-Sweet Chocolate Chips (2 cups)
Semi-sweet chocolate provides a rich chocolate flavor that balances the sweetness of the cherry filling.
2. Creamy Peanut Butter (½ cup)
Peanut butter adds richness and helps create a smooth, spreadable chocolate topping.
3. Roasted Salted Peanuts (1 cup, roughly chopped)
Chopped roasted peanuts add crunch and a slightly salty flavor that complements the sweet cherry center.
4. Coconut Oil (1 teaspoon, optional)
Coconut oil helps make the chocolate topping smoother and easier to spread.
Instructions
Step 1: Prepare the Baking Pan
Start by preparing an 8-by-8-inch square baking pan.
Line the pan with parchment paper, leaving some extra paper hanging over the sides. This will make it easier to lift the finished bars out of the pan after chilling.
Lightly grease the parchment paper if desired.
Set the prepared pan aside while you make the cherry filling.
Before starting, drain the maraschino cherries thoroughly. Place them on paper towels and gently pat them dry to remove as much moisture as possible.
This step is important because excess liquid can make the cherry layer too soft.
Step 2: Make the Cherry Filling
In a medium saucepan, combine the butter, granulated sugar, and evaporated milk.
Place the saucepan over medium heat and stir continuously until the butter melts and the sugar dissolves.
Bring the mixture to a gentle boil, stirring frequently to prevent sticking.
For a firmer, traditional candy-style filling, use a candy thermometer and cook to approximately 234–240°F (112–116°C), adjusting for the texture you prefer.
Remove the saucepan from the heat.
Stir in the marshmallow creme until completely melted and smooth.
Add the finely chopped, well-drained maraschino cherries and cherry extract.
Mix everything thoroughly until the cherries are evenly distributed.
If you want a brighter pink color, add a few drops of red or pink food coloring and stir until the color is uniform.
Allow the mixture to cool slightly before spreading.
If the filling seems too soft, gradually add a little powdered sugar until it reaches a thick, spreadable consistency.
Step 3: Spread and Chill the Cherry Layer
Pour the prepared cherry filling into the parchment-lined baking pan.
Use a spatula to spread it evenly across the bottom.
Smooth the surface so the finished bars will have a neat and attractive appearance.
Place the pan in the refrigerator for approximately 30–45 minutes, or until the cherry layer is firm enough to support the chocolate topping.
Chilling is important because it helps keep the cherry and chocolate layers separate and makes the bars easier to cut later.
Step 4: Prepare the Chocolate Peanut Topping
Place the semi-sweet chocolate chips, creamy peanut butter, and optional coconut oil in a microwave-safe bowl.
Microwave in 20–30-second intervals, stirring after each interval until the mixture is completely melted and smooth.
Alternatively, melt everything in a heatproof bowl over a saucepan of gently simmering water.
Once the chocolate mixture is smooth, fold in the chopped roasted peanuts.
Stir until the peanuts are evenly distributed throughout the chocolate.
Pour the chocolate peanut mixture over the chilled cherry filling.
Use a spatula to spread it evenly, making sure the entire surface is covered.
For an extra attractive finish, sprinkle a few additional chopped peanuts over the top.
Step 5: Chill, Slice, and Serve
Return the baking pan to the refrigerator and chill for approximately 2–3 hours, or until the chocolate topping is completely firm.
Once set, use the parchment paper to lift the entire dessert out of the pan.
Place it on a cutting board.
For clean, professional-looking slices, use a sharp knife warmed briefly under hot water and wiped dry before cutting.
Cut into small squares or rectangular bars, depending on your preferred serving size.
Arrange the Christmas Cherry Mash Bars on a festive serving platter or place them in decorative holiday candy boxes.
Serve chilled or slightly softened, and enjoy the delicious combination of sweet cherry filling, rich chocolate, and crunchy peanuts!
Notes
- Drain the cherries properly: Excess moisture can make the filling too soft and prevent the bars from setting correctly.
- Use room-temperature butter: Softened butter blends more easily with the other filling ingredients.
- Stir continuously: When heating the butter, sugar, and evaporated milk, stir frequently to prevent burning or sticking.
- Use a candy thermometer: If you want a traditional firm candy texture, monitoring the temperature helps achieve more consistent results.
- Allow the cherry layer to chill: Make sure the filling is firm before adding the chocolate topping.
- Melt chocolate slowly: Use short microwave intervals and stir frequently to prevent scorching.
- Use roasted peanuts: Their crunchy texture and salty flavor provide the perfect contrast to the sweet cherry filling.
- Don’t rush the final chilling: The chocolate needs enough time to become completely firm before slicing.
- Warm your knife: A slightly warm, dry knife helps create smooth, clean edges.
- Prep Time: 25 minutes
- Chilling Time: 2–3 hours
- Cook Time: 10 minutes
Nutrition
- Calories: 285 kcal
- Sugar: 29 g
- Sodium: 95 mg
- Fiber: 2 g
- Protein: 4 g
Variations
These Christmas Cherry Mash Bars are easy to customize. Here are some delicious variations to try.
1. White Chocolate Cherry Mash Bars
Replace the semi-sweet chocolate topping with white chocolate chips. The creamy white chocolate creates a beautiful contrast with the pink cherry filling and makes the dessert look extra festive.
2. Dark Chocolate Cherry Bars
Use dark chocolate instead of semi-sweet chocolate for a deeper, richer flavor. Dark chocolate balances the sweetness of the cherry filling beautifully.
3. Almond Cherry Mash Bars
Replace the peanuts with chopped toasted almonds. Add a small amount of almond extract to the cherry filling for a delicious cherry-almond combination.
4. Coconut Cherry Chocolate Bars
Add ½ cup of shredded coconut to the cherry filling or sprinkle coconut over the chocolate topping.
5. Extra Cherry Version
Mix additional finely chopped, well-drained maraschino cherries into the filling for a stronger fruity flavor.
6. Christmas Sprinkle Bars
Add red, green, and white holiday sprinkles over the chocolate layer before it sets. This makes the bars especially beautiful for Christmas dessert trays.
7. Peanut Butter Cherry Bars
Increase the peanut butter slightly for a richer peanut flavor. This variation is perfect for anyone who loves the combination of peanut butter, chocolate, and cherries.
Cooking Notes
- Drain the cherries properly: Excess moisture can make the filling too soft and prevent the bars from setting correctly.
- Use room-temperature butter: Softened butter blends more easily with the other filling ingredients.
- Stir continuously: When heating the butter, sugar, and evaporated milk, stir frequently to prevent burning or sticking.
- Use a candy thermometer: If you want a traditional firm candy texture, monitoring the temperature helps achieve more consistent results.
- Allow the cherry layer to chill: Make sure the filling is firm before adding the chocolate topping.
- Melt chocolate slowly: Use short microwave intervals and stir frequently to prevent scorching.
- Use roasted peanuts: Their crunchy texture and salty flavor provide the perfect contrast to the sweet cherry filling.
- Don’t rush the final chilling: The chocolate needs enough time to become completely firm before slicing.
- Warm your knife: A slightly warm, dry knife helps create smooth, clean edges.
Serving Suggestions
Christmas Cherry Mash Bars are wonderful for holiday entertaining because they can be prepared ahead and served in small, convenient portions.
Here are some delicious ways to enjoy them.
1. Christmas Dessert Platters
Arrange the bars alongside sugar cookies, chocolate truffles, fudge, peppermint bark, and gingerbread cookies for a beautiful holiday dessert spread.
2. Holiday Cookie Exchanges
Cut the bars into small squares and package them individually or arrange them in festive containers. They are a wonderful addition to Christmas cookie exchanges.
3. Homemade Christmas Gifts
Place the bars in decorative holiday tins or clear gift bags tied with red and green ribbons. Homemade candy makes a thoughtful and delicious Christmas gift.
4. With Coffee or Hot Chocolate
Serve these chocolate cherry bars with a warm cup of coffee, cappuccino, or creamy hot chocolate.
5. Christmas Party Dessert Tables
Arrange the bars on a white serving platter with fresh cranberries and festive decorations for an attractive holiday presentation.
6. After-Dinner Treats
Serve one or two small bars after Christmas dinner. Their rich flavor makes them perfect for enjoying in smaller portions.
Tips for the Best Christmas Cherry Mash Bars
- Use good-quality maraschino cherries for the best flavor and color.
- Pat the cherries completely dry before chopping.
- Chop the cherries finely so they distribute evenly throughout the filling.
- Don’t skip the chilling time between layers.
- Use semi-sweet chocolate to balance the sweetness of the cherry center.
- Add the peanuts after melting the chocolate so they retain their crunchy texture.
- Line your baking pan with parchment paper for easy removal.
- Use a sharp, warm knife to cut neat squares.
- Store the bars in an airtight container to maintain their freshness.
- For a beautiful holiday appearance, add festive sprinkles or extra chopped peanuts before the chocolate sets.
Prep Time, Cooking Time, and Total Time
| Category | Time |
|---|---|
| Prep Time | 25 minutes |
| Cooking Time | 10 minutes |
| First Chilling Time | 45 minutes |
| Final Chilling Time | 2–3 hours |
| Total Time | Approximately 3 hours 20 minutes |
| Servings | 16–20 bars |
| Difficulty | Moderate |
The total time includes chilling and setting time.
Nutritional Information
The following nutritional information is an estimate per serving, assuming the recipe makes 20 bars.
| Nutrient | Amount |
|---|---|
| Calories | 285 kcal |
| Protein | 4 g |
| Total Fat | 16 g |
| Carbohydrates | 34 g |
| Sugar | 29 g |
| Fiber | 2 g |
| Sodium | 95 mg |
Nutritional values may vary depending on the brands of chocolate, peanut butter, marshmallow creme, and other ingredients used.
Frequently Asked Questions (FAQs)
1. Can I make Christmas Cherry Mash Bars ahead of time?
Yes! These bars are perfect for preparing ahead, especially during the busy holiday season.
You can prepare them 2–3 days before serving and store them in an airtight container in the refrigerator. This also gives the layers plenty of time to become firm.
2. Do Christmas Cherry Mash Bars need to be refrigerated?
Yes. Because the recipe contains a soft marshmallow-based filling and dairy ingredients, refrigeration is recommended.
Store the bars in an airtight container in the refrigerator to maintain their texture and freshness.
3. Can I use fresh cherries instead of maraschino cherries?
Maraschino cherries are recommended because they provide the traditional sweet cherry flavor and bright pink color.
Fresh cherries contain more moisture and have a different flavor. If you use fresh cherries, cook them briefly to reduce excess moisture, cool completely, and drain well before adding them to the filling.
4. Can I use milk chocolate instead of semi-sweet chocolate?
Absolutely! Milk chocolate creates a sweeter and creamier topping.
If you prefer a less sweet dessert, semi-sweet or dark chocolate is a better choice because it balances the sweet cherry center.
5. Why is my cherry filling too soft?
The most common reason is excess moisture from the maraschino cherries or an undercooked sugar mixture.
Make sure the cherries are thoroughly drained and patted dry. If using the cooked candy-style filling, cook it to the recommended temperature with a candy thermometer.
Allow the filling to chill completely before adding the chocolate layer.
6. How do I get clean slices?
For neat, professional-looking bars, refrigerate the dessert until completely firm.
Run a sharp knife under hot water, wipe it dry, and cut straight down. Repeat the process between cuts for the cleanest edges.
7. Can I freeze Christmas Cherry Mash Bars?
Yes, these bars can be frozen.
Cut them into individual portions and place them in a freezer-safe airtight container with parchment paper between the layers.
Freeze for up to 2 months for the best quality. Thaw in the refrigerator before serving.
8. Can I make these bars without peanuts?
Yes! You can replace peanuts with chopped almonds, pecans, walnuts, or toasted coconut.
If you need a nut-free version, omit the nuts and use additional chocolate or crunchy cereal pieces instead. Always check ingredient labels for potential allergens.
9. Can I use white chocolate for the topping?
Yes! White chocolate creates a sweeter topping and gives the bars a beautiful Christmas appearance.
You can also add red and green sprinkles to make them even more festive.
10. What is the best pan size for this recipe?
An 8-by-8-inch square pan is ideal for making thick, layered bars.
If you use a larger pan, the bars will be thinner and may require less chilling time.
11. Can I make Christmas Cherry Mash Bars without a candy thermometer?
Yes, but a candy thermometer is recommended if you want a consistent traditional candy texture.
Without one, it can be more difficult to judge when the sugar mixture has reached the correct temperature. For the most reliable results, use a thermometer and follow the temperature guidance in the recipe.
12. Are Christmas Cherry Mash Bars good for gifting?
Absolutely! Their beautiful pink cherry center and chocolate peanut topping make them perfect for homemade Christmas gifts.
Cut them into even squares, place them in small paper candy cups, and arrange them in decorative holiday boxes or tins.
Conclusion
These Christmas Cherry Mash Bars are a delicious way to bring a little extra sweetness to your holiday celebrations. With their creamy pink cherry filling, rich chocolate topping, and crunchy roasted peanuts, they offer the perfect combination of flavors and textures in every bite.
Inspired by classic old-fashioned Cherry Mash candy, this homemade version makes a wonderful addition to Christmas dessert tables, cookie exchanges, family gatherings, and homemade holiday gift boxes.
The best part is that you can prepare them ahead of time, chill them until firm, and cut them into beautiful little squares whenever you’re ready to serve.
Whether you’re making them for your family, sharing them with friends, or adding something special to your Christmas candy collection, these festive cherry chocolate bars are sure to become a holiday tradition.
Make a batch this Christmas, share them with the people you love, and enjoy every sweet, chocolatey, cherry-filled bite!
