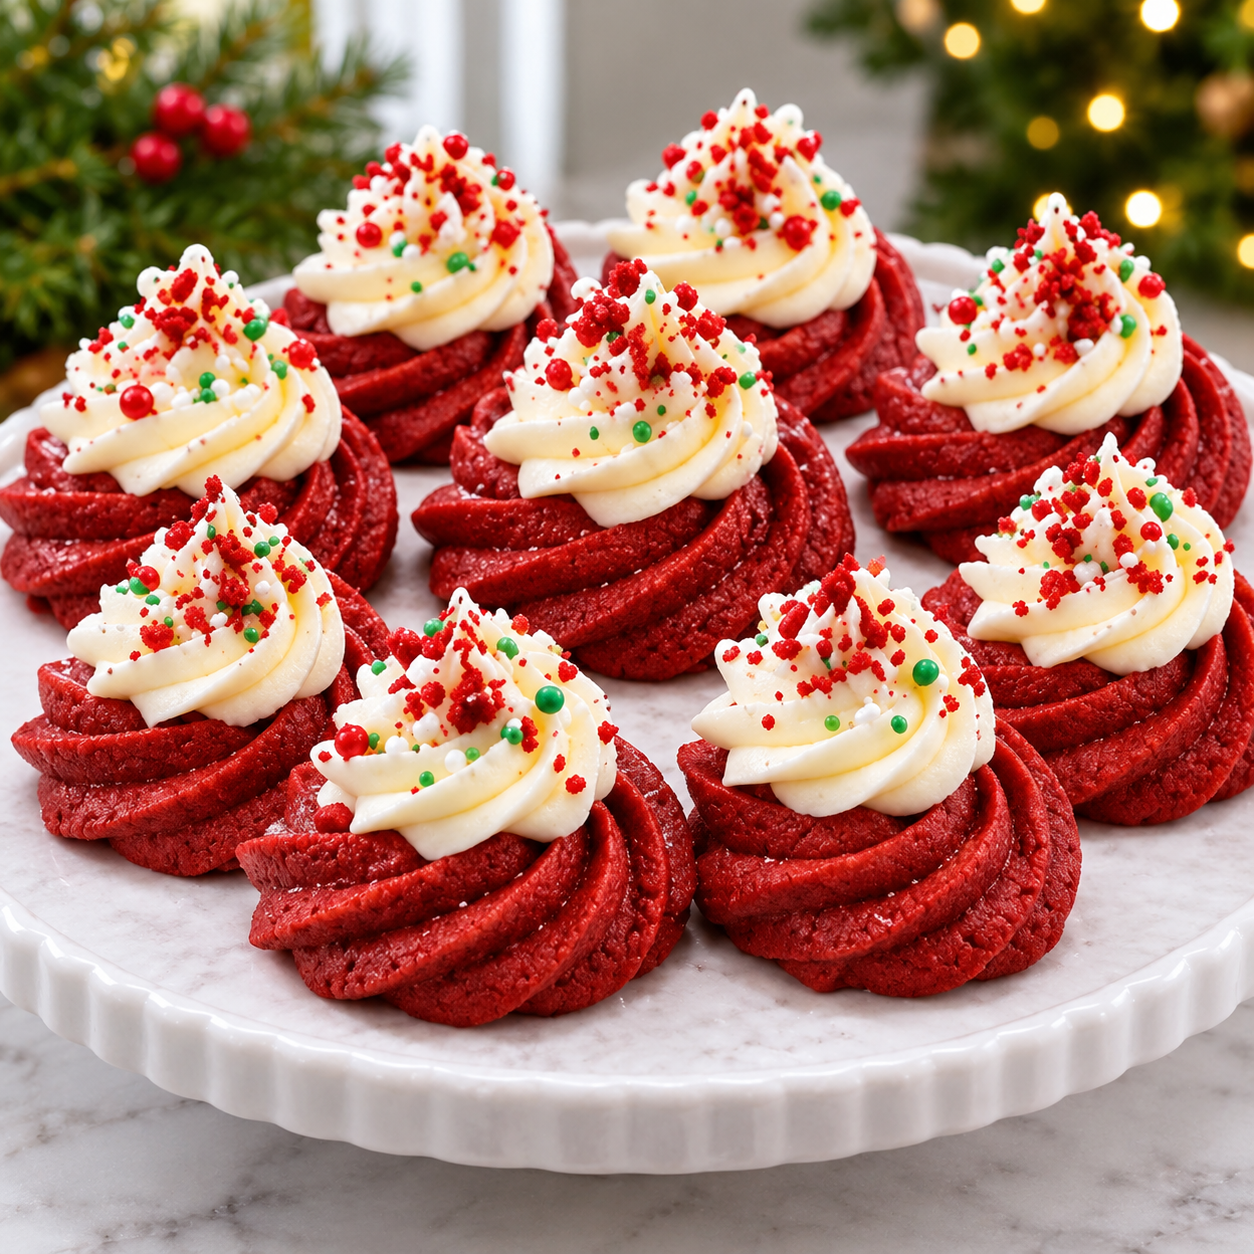
Bring a little extra Christmas magic to your holiday baking with these beautiful Red Velvet Christmas Cookies! Soft, chewy, and wonderfully rich, these festive cookies combine the classic flavor of red velvet with a hint of cocoa, sweet vanilla, and creamy white chocolate chips. Their gorgeous red color and snowy white chocolate pieces make them look absolutely perfect on any Christmas cookie platter.
These cookies have everything you want in a holiday treat: slightly crisp edges, soft centers, a tender texture, and just the right amount of chocolate flavor. The addition of white chocolate chips creates little pockets of sweetness in every bite, while the red velvet flavor gives them a delicious twist on traditional chocolate chip cookies.
The best part is that they’re surprisingly easy to make with simple baking ingredients. You don’t need complicated techniques or special equipment, and the dough can be prepared ahead of time for convenient holiday baking.
Whether you’re making cookies for a Christmas party, a cookie exchange, a family gathering, or a homemade holiday gift box, these Red Velvet Christmas Cookies are sure to become a seasonal favorite!
Why You’ll Love These Red Velvet Christmas Cookies
- Beautiful Christmas color: Their vibrant red appearance makes them perfect for holiday celebrations.
- Soft and chewy texture: Tender centers and lightly crisp edges make every bite delicious.
- Classic red velvet flavor: A combination of cocoa, vanilla, and a subtle tang creates the familiar red velvet taste.
- White chocolate goodness: Sweet white chocolate chips complement the rich cocoa flavor.
- Easy to prepare: Simple ingredients and straightforward instructions make this recipe beginner-friendly.
- Perfect for gifting: They look beautiful in Christmas cookie tins and festive treat bags.
Ingredients
For the Red Velvet Cookies
- 2¼ cups all-purpose flour
- 2 tablespoons unsweetened cocoa powder
- 1 teaspoon baking soda
- ½ teaspoon salt
- ¾ cup unsalted butter, softened
- ¾ cup granulated sugar
- ½ cup packed light brown sugar
- 1 large egg, room temperature
- 1 tablespoon milk
- 2 teaspoons vanilla extract
- 1 teaspoon white vinegar
- 1–2 teaspoons red gel food coloring, as needed
- 1 cup white chocolate chips
Optional Christmas Decorations
- ¼ cup extra white chocolate chips
- Red and green Christmas sprinkles
- White chocolate chunks
- A little powdered sugar for dusting
Ingredient Notes and Substitutions
All-purpose flour: This gives the cookies their structure while keeping the centers tender. Measure carefully by spooning flour into your measuring cup and leveling it off.
Unsweetened cocoa powder: A small amount gives the cookies their signature chocolate flavor without overpowering the red velvet taste. Natural unsweetened cocoa powder works well.
Unsalted butter: Softened butter creates a rich flavor and helps produce a chewy texture. Avoid melting it because that can cause excessive spreading.
Granulated sugar: Helps the cookies develop lightly crisp edges.
Brown sugar: Adds moisture and a subtle caramel flavor, helping keep the centers soft.
Egg: One large egg binds the ingredients and gives the cookies structure.
Milk: A small amount helps bring the dough together and keeps the texture tender.
White vinegar: This adds a subtle tang that complements the cocoa and is part of the classic red velvet flavor profile.
Red gel food coloring: Gel coloring creates a vibrant red shade without adding too much liquid. Start with a small amount and increase gradually.
White chocolate chips: These provide a sweet, creamy contrast to the cocoa-flavored cookie dough. You can substitute chopped white chocolate if desired.
How to Make Red Velvet Christmas Cookies
Step 1: Prepare the Dry Ingredients
In a medium mixing bowl, whisk together the all-purpose flour, cocoa powder, baking soda, and salt.
Make sure the cocoa powder is evenly distributed and there are no large lumps.
Set the bowl aside while you prepare the butter mixture.
Step 2: Cream the Butter and Sugars
In a large mixing bowl, beat the softened butter, granulated sugar, and brown sugar using an electric mixer.
Mix for approximately 2–3 minutes until the mixture looks light, fluffy, and creamy.
Scrape down the sides of the bowl as needed to make sure everything is evenly combined.
Step 3: Add the Wet Ingredients
Add the egg, milk, vanilla extract, and white vinegar to the butter mixture.
Beat until smooth and fully incorporated.
Add the red gel food coloring gradually, mixing after each addition until the dough reaches a beautiful deep red color.
Remember that the color may become slightly darker after baking.
Step 4: Combine the Wet and Dry Ingredients
Gradually add the dry ingredient mixture to the wet ingredients.
Mix on low speed just until a soft cookie dough forms.
Avoid overmixing because too much mixing can make the cookies dense.
Fold in the white chocolate chips using a spatula, reserving a few for decorating the tops.
Step 5: Chill the Cookie Dough
Cover the mixing bowl with plastic wrap and refrigerate the dough for approximately 30–45 minutes.
Chilling helps firm up the butter, reduces excessive spreading, and makes the dough easier to scoop.
If the dough becomes very firm, let it sit at room temperature for a few minutes before shaping.
Step 6: Shape the Cookies
Preheat your oven to 350°F (175°C).
Line two baking sheets with parchment paper.
Use a medium cookie scoop or tablespoon to portion the dough into balls, approximately 1½ tablespoons each.
Arrange the dough balls on the prepared baking sheets, leaving about 2 inches between them.
Gently press a few reserved white chocolate chips onto the top of each dough ball.
For a more festive appearance, add a few red and green sprinkles before baking.
Step 7: Bake Until Soft and Set
Bake the cookies for approximately 9–12 minutes, or until the edges look set and the centers still appear slightly soft.
Do not wait until the cookies are completely firm in the oven. They will continue to set as they cool on the baking sheet.
Remove the baking sheets from the oven and let the cookies rest for 5–10 minutes.
Step 8: Cool and Decorate
Transfer the cookies to a wire cooling rack and allow them to cool completely.
If desired, drizzle a little melted white chocolate over the tops and add extra Christmas sprinkles.
For an elegant holiday finish, dust lightly with powdered sugar once the cookies have cooled.
Arrange them on a festive serving platter and enjoy your beautiful Red Velvet Christmas Cookies!
Helpful Cooking Notes
Use softened butter: Butter should be soft enough to press gently with your finger but not melted.
Measure flour accurately: Too much flour can make the cookies dry and cakey.
Choose gel food coloring: It produces a stronger red color without adding excess moisture.
Don’t skip chilling: Chilling helps control spreading and makes the dough easier to handle.
Avoid overbaking: Remove the cookies while their centers still look slightly soft for the best chewy texture.
Use parchment paper: This helps prevent sticking and makes cleanup easier.
Add extra chocolate chips on top: Pressing a few white chocolate chips into the dough balls creates a prettier finished cookie.
Cool before storing: Warm cookies can create condensation inside a storage container and become sticky.
Variations
Red Velvet Cookies with Cream Cheese Chips
Replace half of the white chocolate chips with cream cheese-flavored baking chips for a creamy twist that complements the red velvet flavor.
Red Velvet Crinkle Christmas Cookies
Roll the chilled dough balls in granulated sugar, followed by a generous coating of powdered sugar. Bake as directed for a festive crinkle appearance.
Red Velvet Chocolate Chip Cookies
Replace the white chocolate chips with semi-sweet chocolate chips or a mixture of milk and dark chocolate chips.
Red Velvet Peppermint Cookies
Add ¼ teaspoon peppermint extract to the dough and sprinkle crushed peppermint candies over the cookies after baking. Use a light hand with the extract so the mint doesn’t overpower the red velvet flavor.
Red Velvet Cookies with Cream Cheese Filling
Prepare a small batch of thick cream cheese filling using 4 ounces softened cream cheese, ¼ cup powdered sugar, and ½ teaspoon vanilla. Chill small portions until firm, then wrap cookie dough around each portion before baking. Make sure the filling is completely enclosed.
Because these cookies contain a dairy-based filling, refrigerate them after cooling.
Red and Green Christmas Cookies
Divide the dough into two portions. Keep one portion red and color the other green with gel food coloring. Bake them separately for a colorful Christmas cookie platter.
Red Velvet White Chocolate Drizzle Cookies
Bake the cookies as directed, cool completely, and drizzle melted white chocolate over the tops. Add red and green sprinkles while the drizzle is still wet.
Serving Suggestions
These Red Velvet Christmas Cookies are delicious on their own, but they also make a beautiful addition to a holiday dessert spread.
- Hot chocolate: Serve with a warm mug of hot chocolate topped with whipped cream.
- Christmas cookie platter: Arrange them alongside sugar cookies, gingerbread cookies, and shortbread.
- Vanilla ice cream: Use two cookies to make a festive ice cream sandwich.
- Holiday dessert table: Display them on a white serving tray with red and green decorations.
- Coffee or tea: Their rich cocoa flavor pairs beautifully with a warm drink.
- Homemade Christmas gifts: Package them in decorative cookie tins or clear treat bags tied with festive ribbon.
For a beautiful presentation, arrange the cookies in a circular pattern on a white platter and sprinkle a few extra Christmas decorations around them.
Tips for the Best Red Velvet Christmas Cookies
- Use room-temperature ingredients: Butter and egg blend more evenly when they aren’t too cold.
- Don’t add too much cocoa: A small amount gives the cookies a classic red velvet flavor while preserving their bright color.
- Use gel food coloring: It creates a rich red shade without thinning the dough.
- Chill the dough: This helps produce thicker cookies with soft centers.
- Space the dough balls properly: Leave enough room for the cookies to spread.
- Watch the baking time: Slightly underbaked centers create a soft and chewy texture.
- Add decorations before baking: Sprinkles and extra chocolate chips will stick more easily.
- Let cookies cool: They need a few minutes on the baking sheet to firm up before transferring.
- Use fresh baking soda: Old baking soda can affect the texture and rise of your cookies.
Storage Instructions
Allow the cookies to cool completely before storing them.
Place them in an airtight container with parchment paper between layers if necessary.
For the best quality, store plain baked cookies at room temperature in a cool, dry place for approximately 3–4 days.
If you make the cream cheese-filled variation, refrigerate those cookies in an airtight container and use within 3–4 days.
Avoid storing warm cookies because trapped steam can make them sticky and affect their texture.
Freezing Instructions
These Red Velvet Christmas Cookies freeze beautifully.
Freezing cookie dough:
- Scoop the dough into individual balls.
- Arrange them on a parchment-lined baking sheet.
- Freeze until firm.
- Transfer the frozen dough balls to a freezer-safe airtight container.
- Freeze for up to 2 months for best quality.
When ready to bake, place the frozen dough balls on a prepared baking sheet and bake at 350°F. They may need an additional 1–2 minutes.
Freezing baked cookies:
Allow the cookies to cool completely. Place them in a freezer-safe container with parchment paper between layers.
Freeze for up to 2 months for best quality.
Thaw at room temperature while covered to help preserve their soft texture.
Make-Ahead Instructions
These cookies are perfect for preparing ahead during the busy holiday season.
One day ahead: Prepare the cookie dough, cover it tightly, and refrigerate overnight. If the dough becomes very firm, let it soften slightly before scooping.
A few weeks ahead: Scoop the dough into balls and freeze them in an airtight container. Bake directly from frozen when needed, adding a little extra baking time.
Before serving: Bake the cookies, allow them to cool, and add any white chocolate drizzle or Christmas decorations.
Preparing the dough ahead makes it easy to bake fresh cookies whenever guests arrive.
Recipe Details
- Prep Time: 20 minutes
- Chilling Time: 30–45 minutes
- Cook Time: 10–12 minutes per batch
- Cooling Time: 10 minutes
- Total Time: Approximately 1 hour 15 minutes
- Yield: 24 cookies
- Serving Size: 1 cookie
Nutritional Information
Estimated nutrition per cookie, based on 24 cookies:
- Calories: 185
- Protein: 2g
- Carbohydrates: 25g
- Fat: 9g
- Saturated Fat: 6g
- Cholesterol: 25mg
- Sodium: 105mg
- Fiber: 1g
- Sugar: 16g
Nutritional values are estimates and may vary depending on the chocolate chips, butter, and food coloring used.
Frequently Asked Questions
Why are my Red Velvet Christmas Cookies spreading too much?
The butter may have been too soft or melted, or the dough may not have been chilled long enough. Refrigerating the dough for 30–45 minutes helps control spreading.
Can I make these cookies without food coloring?
Yes! You can leave out the red coloring. The cookies will still have a delicious cocoa and vanilla flavor, but they will look more like light chocolate cookies rather than traditional red velvet cookies.
Can I use liquid food coloring instead of gel?
Yes, but gel food coloring is recommended because it provides a stronger color with less liquid. If using liquid coloring, add it gradually and avoid adding too much.
Can I use milk chocolate instead of white chocolate chips?
Absolutely! Milk chocolate chips, semi-sweet chocolate chips, or dark chocolate chunks all work well. White chocolate is especially popular because it creates a beautiful contrast with the red cookie dough.
How do I keep the cookies soft and chewy?
Use the correct flour measurement, include the brown sugar, chill the dough, and avoid overbaking. Remove the cookies when their edges are set but the centers still look slightly soft.
Can I make the dough ahead of time?
Yes! The dough can be prepared and refrigerated overnight. You can also scoop it into balls and freeze it for up to 2 months.
Can I make these cookies without a mixer?
Yes. Use a sturdy whisk and a spatula to cream the softened butter and sugars by hand. It may take a little longer, but the recipe will still work.
What gives red velvet cookies their flavor?
Red velvet flavor comes from a combination of cocoa powder, vanilla, a slight tang from an acidic ingredient, and a buttery cookie base. The cocoa is intentionally kept modest so the red color remains prominent.
Can I add cream cheese frosting?
Yes! A small swirl of cream cheese frosting makes a delicious topping. However, cookies topped with cream cheese frosting should be refrigerated because the frosting contains dairy.
How do I make the cookies look more festive?
Add white chocolate chips, red and green sprinkles, crushed peppermint, or a drizzle of melted white chocolate. These decorations create a beautiful Christmas appearance.
Can I make smaller cookies?
Yes! Use a teaspoon-sized portion of dough for mini cookies. Reduce the baking time and begin checking them early because smaller cookies bake faster.
Conclusion
These Red Velvet Christmas Cookies are the perfect combination of soft, chewy texture, rich cocoa flavor, creamy white chocolate, and beautiful festive color. They’re easy to prepare, wonderful for holiday baking, and guaranteed to brighten any Christmas dessert table.
Whether you’re making them for a cookie exchange, a family celebration, or homemade holiday gifts, these delicious red velvet treats are sure to impress. Bake a batch, add plenty of white chocolate chips, and enjoy a little extra Christmas sweetness with every bite!
Print
Red Velvet Christmas Cookies – Soft, Chewy & Festive Holiday Cookies
Ingredients
For the Red Velvet Cookies
- 2¼ cups all-purpose flour
- 2 tablespoons unsweetened cocoa powder
- 1 teaspoon baking soda
- ½ teaspoon salt
- ¾ cup unsalted butter, softened
- ¾ cup granulated sugar
- ½ cup packed light brown sugar
- 1 large egg, room temperature
- 1 tablespoon milk
- 2 teaspoons vanilla extract
- 1 teaspoon white vinegar
- 1–2 teaspoons red gel food coloring, as needed
- 1 cup white chocolate chips
Optional Christmas Decorations
- ¼ cup extra white chocolate chips
- Red and green Christmas sprinkles
- White chocolate chunks
- A little powdered sugar for dusting
Instructions
In a medium mixing bowl, whisk together the all-purpose flour, cocoa powder, baking soda, and salt.
Make sure the cocoa powder is evenly distributed and there are no large lumps.
Set the bowl aside while you prepare the butter mixture.
Step 2: Cream the Butter and Sugars
In a large mixing bowl, beat the softened butter, granulated sugar, and brown sugar using an electric mixer.
Mix for approximately 2–3 minutes until the mixture looks light, fluffy, and creamy.
Scrape down the sides of the bowl as needed to make sure everything is evenly combined.
Step 3: Add the Wet Ingredients
Add the egg, milk, vanilla extract, and white vinegar to the butter mixture.
Beat until smooth and fully incorporated.
Add the red gel food coloring gradually, mixing after each addition until the dough reaches a beautiful deep red color.
Remember that the color may become slightly darker after baking.
Step 4: Combine the Wet and Dry Ingredients
Gradually add the dry ingredient mixture to the wet ingredients.
Mix on low speed just until a soft cookie dough forms.
Avoid overmixing because too much mixing can make the cookies dense.
Fold in the white chocolate chips using a spatula, reserving a few for decorating the tops.
Step 5: Chill the Cookie Dough
Cover the mixing bowl with plastic wrap and refrigerate the dough for approximately 30–45 minutes.
Chilling helps firm up the butter, reduces excessive spreading, and makes the dough easier to scoop.
If the dough becomes very firm, let it sit at room temperature for a few minutes before shaping.
Step 6: Shape the Cookies
Preheat your oven to 350°F (175°C).
Line two baking sheets with parchment paper.
Use a medium cookie scoop or tablespoon to portion the dough into balls, approximately 1½ tablespoons each.
Arrange the dough balls on the prepared baking sheets, leaving about 2 inches between them.
Gently press a few reserved white chocolate chips onto the top of each dough ball.
For a more festive appearance, add a few red and green sprinkles before baking.
Step 7: Bake Until Soft and Set
Bake the cookies for approximately 9–12 minutes, or until the edges look set and the centers still appear slightly soft.
Do not wait until the cookies are completely firm in the oven. They will continue to set as they cool on the baking sheet.
Remove the baking sheets from the oven and let the cookies rest for 5–10 minutes.
Step 8: Cool and Decorate
Transfer the cookies to a wire cooling rack and allow them to cool completely.
If desired, drizzle a little melted white chocolate over the tops and add extra Christmas sprinkles.
For an elegant holiday finish, dust lightly with powdered sugar once the cookies have cooled.
Arrange them on a festive serving platter and enjoy your beautiful Red Velvet Christmas Cookies!
Notes
Use softened butter: Butter should be soft enough to press gently with your finger but not melted.
Measure flour accurately: Too much flour can make the cookies dry and cakey.
Choose gel food coloring: It produces a stronger red color without adding excess moisture.
Don’t skip chilling: Chilling helps control spreading and makes the dough easier to handle.
Avoid overbaking: Remove the cookies while their centers still look slightly soft for the best chewy texture.
Use parchment paper: This helps prevent sticking and makes cleanup easier.
Add extra chocolate chips on top: Pressing a few white chocolate chips into the dough balls creates a prettier finished cookie.
Cool before storing: Warm cookies can create condensation inside a storage container and become sticky.
