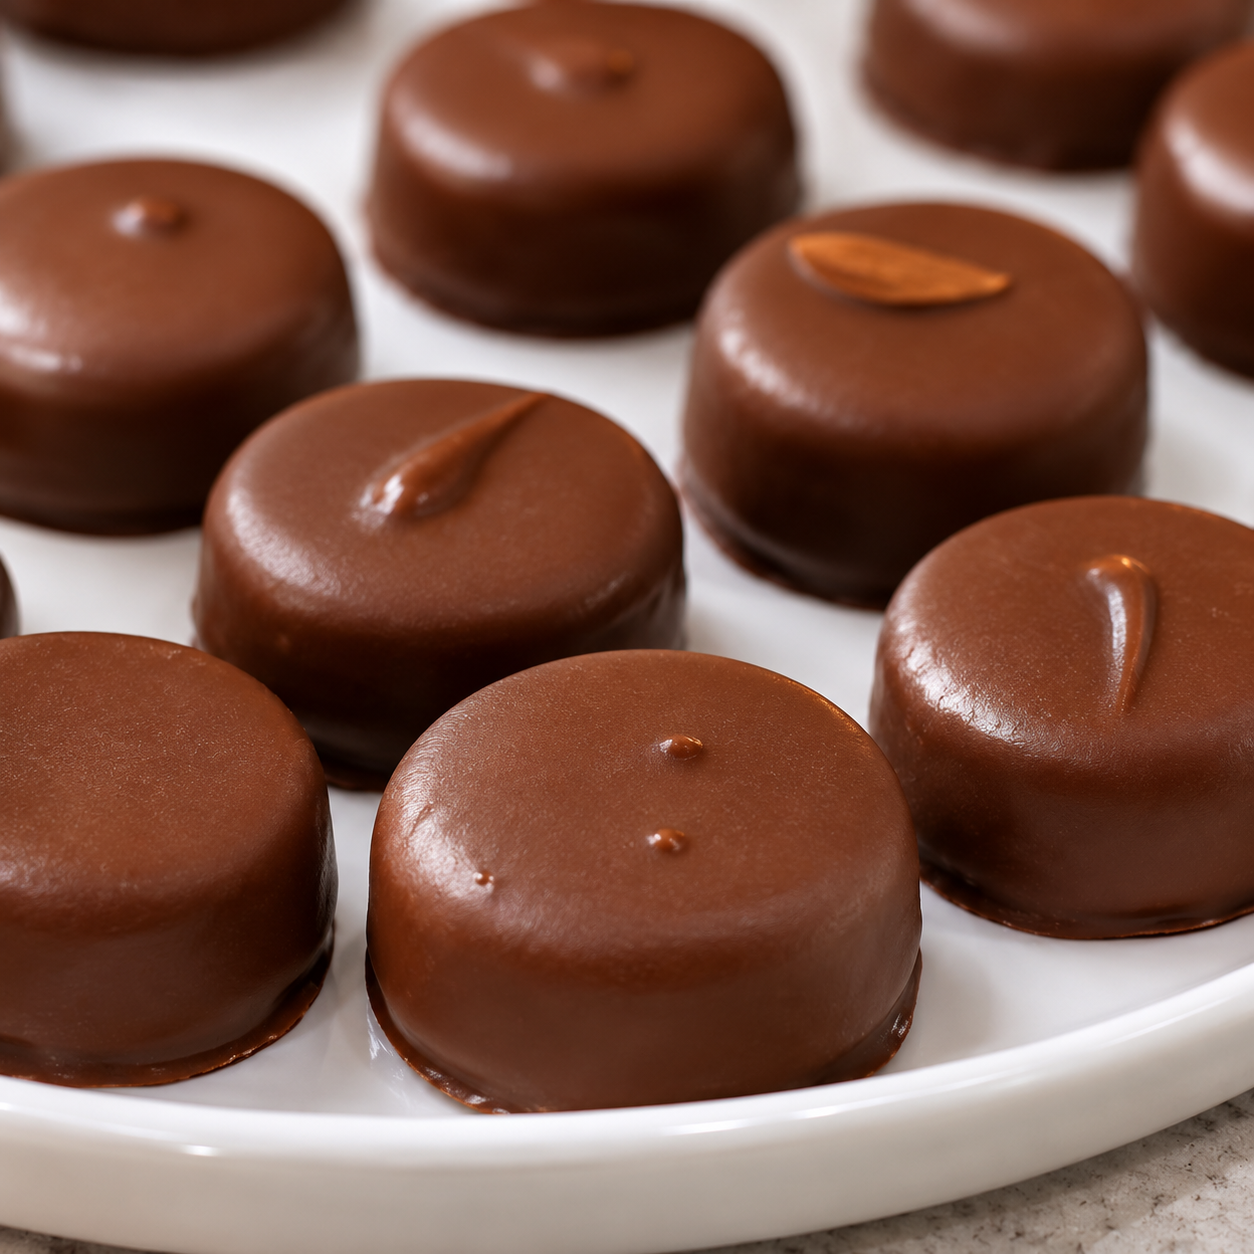
Dark Chocolate Covered Cherries are a beautiful homemade treat that combines sweet, juicy maraschino cherries with a rich, slightly bittersweet chocolate coating. Each cherry is dipped in smooth dark chocolate, creating a delicious contrast between the fruity center and the crisp chocolate shell. They look elegant enough for holiday dessert trays and homemade gifts, but they’re surprisingly simple to prepare in your own kitchen.
If you love the combination of chocolate and cherries, this recipe is a must-try. You only need a handful of ingredients, a little patience while the chocolate sets, and a few simple kitchen tools. These chocolate-covered cherries are perfect for Christmas candy boxes, Valentine’s Day treats, party platters, or whenever you’re craving something sweet.
Unlike complicated filled chocolate candies, this version keeps things simple by using whole maraschino cherries. The cherries are thoroughly dried before dipping, helping the chocolate adhere properly and set into a beautiful coating. A little flaky sea salt or a decorative chocolate drizzle can make them look even more special.
Why You’ll Love These Dark Chocolate Covered Cherries
- Simple ingredients: You only need a few everyday ingredients to make this delicious candy.
- Rich chocolate flavor: Dark chocolate balances the sweetness of the cherries beautifully.
- Perfect for gifting: Arrange them in mini candy cups or a decorative gift box for a homemade present.
- No oven required: This is an easy no-bake dessert that comes together with minimal preparation.
- Beautiful presentation: Their glossy chocolate coating makes them look like something from a specialty candy shop.
- Easy to customize: Add chopped nuts, coconut, or a drizzle of white chocolate for a different finish.
Ingredients You’ll Need
Here is everything you need to make homemade Dark Chocolate Covered Cherries.
- 1 jar (16 ounces) maraschino cherries with stems: Choose whole cherries with firm fruit and intact stems. Stemmed cherries are easier to dip and handle.
- 12 ounces dark chocolate melting wafers: Use good-quality melting wafers designed for dipping. They create a smooth coating that sets firmly.
- 1 teaspoon coconut oil, optional: Use only if recommended for your chosen chocolate and needed to slightly loosen its consistency. Follow the manufacturer’s melting instructions.
- Flaky sea salt, optional: A tiny pinch on each cherry adds a delicious contrast to the sweet fruit and rich chocolate.
- White chocolate, optional: Melt a small amount separately for a decorative drizzle.
Ingredient Notes and Substitutions
Maraschino cherries: Stemmed maraschino cherries are ideal because the stems make dipping easier. If you only have cherries without stems, use a dipping fork or toothpick to handle them.
Dark chocolate melting wafers: Choose a product specifically designed for dipping and coating. These usually melt smoothly and set without complicated tempering. You can also use chopped dark chocolate, but some varieties require tempering for a firm, glossy finish.
Coconut oil: This ingredient is optional. Too much oil can prevent the chocolate from setting firmly, so avoid adding it unless necessary. If your melting wafers are already smooth, you may not need it at all.
White chocolate: A little melted white chocolate creates an attractive decorative finish. Make sure the dark chocolate coating has already set before adding the drizzle.
How to Make Dark Chocolate Covered Cherries
Making these homemade chocolate-covered cherries is easy. The most important step is drying the cherries thoroughly before dipping them.
Step 1: Drain and Dry the Cherries
Place a fine-mesh strainer over a bowl and drain the maraschino cherries thoroughly. Transfer them to a plate lined with paper towels.
Gently pat each cherry dry, including the area around the stem. Let them air-dry for approximately 20–30 minutes, turning them occasionally if needed.
The cherries must be as dry as possible. Any excess moisture can prevent the chocolate from sticking properly or cause the coating to become uneven.
Step 2: Prepare the Chocolate
Place the dark chocolate melting wafers in a microwave-safe bowl.
Microwave in 20-second intervals, stirring thoroughly after each interval. Continue until the chocolate is completely melted and smooth.
Be careful not to overheat the chocolate. If the mixture becomes too thick for dipping, follow the manufacturer’s recommendations for adjusting its consistency. Add the optional coconut oil only if appropriate for the chocolate you are using.
You can also melt the chocolate using a double boiler over gently simmering water. Make sure no water or steam gets into the chocolate.
Step 3: Dip the Cherries
Hold each cherry by its stem and dip it into the melted dark chocolate. Rotate it gently until the cherry is coated.
Lift it out and allow the excess chocolate to drip back into the bowl.
Place each coated cherry on a parchment-lined baking sheet. Leave a little space between them so they do not stick together.
If you’re using stemless cherries, dip them with a fork, gently tapping off excess chocolate before placing them on the parchment.
Step 4: Add the Decorations
While the chocolate is still wet, sprinkle a tiny amount of flaky sea salt over each cherry if desired.
For a decorative finish, allow the dark chocolate coating to set first. Then drizzle melted white chocolate over the cherries using a spoon or a small piping bag.
You can also add finely chopped pistachios or toasted almonds while the chocolate is still wet.
Step 5: Chill Until Set
Transfer the baking sheet to the refrigerator and chill the cherries for approximately 20–30 minutes, or until the chocolate coating is firm.
Once set, carefully remove the cherries from the parchment paper.
Arrange them in mini candy cups or place them in an airtight container. Keep refrigerated until ready to serve.
Helpful Cooking Notes
- Dry the cherries completely: Moisture is the biggest challenge when making chocolate-covered fruit. Take your time with this step.
- Use firm cherries: Very soft or damaged cherries may break apart during dipping.
- Avoid overheating chocolate: Heat it gradually and stir frequently to maintain a smooth texture.
- Keep water away from chocolate: Even a small amount of water can cause melted chocolate to seize.
- Work in small batches: If your kitchen is warm, dip a few cherries at a time and keep the remaining cherries cool and dry.
- Use parchment paper: This prevents sticking and makes cleanup much easier.
- Let excess chocolate drip off: This creates a neater coating and prevents large chocolate puddles around the cherries.
Delicious Variations
Dark Chocolate and Sea Salt Cherries: Sprinkle a little flaky sea salt over the freshly dipped cherries. The salty finish complements the dark chocolate beautifully.
Chocolate Cherry Almond Candy: Add finely chopped toasted almonds to the chocolate coating or sprinkle them over the cherries before the chocolate sets.
Dark and White Chocolate Drizzle: Dip the cherries in dark chocolate, allow the coating to set, and finish with thin white chocolate lines.
Chocolate Coconut Cherries: Sprinkle unsweetened shredded coconut over the wet chocolate for a tropical-inspired variation.
Extra Dark Chocolate Cherries: Use dark chocolate with a higher cocoa percentage for a deeper, less sweet flavor.
Holiday Chocolate Covered Cherries: Add festive red and green sprinkles while the chocolate is still wet. Arrange the finished candies in decorative holiday candy cups.
Serving Suggestions
These Dark Chocolate Covered Cherries are delicious on their own, but they also make a lovely addition to a dessert spread.
- Serve them on a Christmas cookie platter alongside fudge, truffles, and sugar cookies.
- Arrange them in mini paper candy cups for a beautiful homemade candy box.
- Add them to a Valentine’s Day dessert board with strawberries and chocolate-covered pretzels.
- Serve them after dinner with coffee or hot chocolate.
- Place a few on top of brownies, chocolate cupcakes, or a dessert cheesecake.
- Package them in small gift boxes for friends, family, teachers, and neighbors.
For an especially attractive presentation, arrange the cherries in a single layer with their stems pointing upward.
Tips for the Best Chocolate Covered Cherries
- Choose quality chocolate: Better-quality chocolate gives the finished candy a richer flavor.
- Do not skip drying: Thoroughly dried cherries help the coating adhere and reduce the risk of moisture-related problems.
- Keep the chocolate smooth: Melt slowly and stir often.
- Use a dipping fork if needed: This is especially helpful when working with stemless cherries.
- Avoid overcrowding: Leave enough room between the cherries so their coatings remain neat.
- Chill until completely firm: This makes the candies easier to remove and package.
- Decorate before the chocolate sets: Add salt, nuts, or sprinkles while the coating is still wet.
Storage Instructions
Because these candies contain fruit, store them in an airtight container in the refrigerator.
They are best enjoyed within 3–4 days for freshness and quality. Place parchment paper between layers if stacking them, and avoid crushing the cherries.
Before serving, let them stand at room temperature for approximately 5–10 minutes if desired. This can soften the chocolate slightly and make the flavor more noticeable.
Do not leave them at room temperature for extended periods. Discard any cherries that develop an unusual smell, appearance, or texture.
Can You Freeze Dark Chocolate Covered Cherries?
Freezing is possible, but the texture of the cherries may change after thawing. They can become softer and release moisture, which may affect the chocolate coating.
For the best results, enjoy these candies fresh from the refrigerator rather than freezing them.
If you choose to freeze them, arrange them in a single layer in a freezer-safe airtight container. Thaw them in the refrigerator while still covered to help reduce condensation on the chocolate.
Make-Ahead Instructions
You can prepare these cherries a day before serving. Drain and dry them thoroughly, dip them in melted dark chocolate, and allow the coating to set.
Transfer the finished candies to an airtight container and refrigerate until needed.
For parties and holiday gatherings, making them the night before is a convenient option. Keep them chilled until shortly before arranging them on your dessert platter.
Recipe Details
- Prep Time: 35 minutes
- Cook Time: 5 minutes
- Chilling Time: 30 minutes
- Total Time: 1 hour 10 minutes
- Yield: Approximately 30–36 cherries
- Serving Size: 2 chocolate-covered cherries
Nutritional Information
Estimated nutrition per serving of 2 cherries:
- Calories: 125
- Protein: 1 g
- Carbohydrates: 19 g
- Fat: 6 g
- Saturated Fat: 4 g
- Sugar: 16 g
- Sodium: 15 mg
Nutrition values are estimates and will vary depending on the chocolate brand, cherry size, and amount of chocolate used.
Frequently Asked Questions
Can I use regular dark chocolate instead of melting wafers?
Yes. You can use chopped dark chocolate or dark chocolate chips. However, chocolate chips often melt into a thicker consistency and may not set as firmly as dipping wafers. For a glossy, crisp finish with regular couverture chocolate, tempering may be necessary.
Why isn’t the chocolate sticking to my cherries?
The cherries may still have moisture on their surfaces. Drain them well, pat them dry with paper towels, and allow them to air-dry before dipping. Moisture can also cause the chocolate to seize or create an uneven coating.
Do I need to remove the cherry stems?
No. Keeping the stems makes the cherries easier to dip and gives them a beautiful finished appearance. If you prefer stemless cherries, use a dipping fork.
Can I use fresh cherries?
Fresh cherries can be used, but they contain more natural moisture and have a shorter storage life once coated. Wash them carefully, dry them completely, and keep them refrigerated. For the easiest and most consistent results, maraschino cherries are recommended.
Can I make these with milk chocolate?
Absolutely! Milk chocolate creates a sweeter, creamier coating. You can also use semi-sweet chocolate if you prefer a flavor between milk and dark chocolate.
How do I keep the chocolate coating from cracking?
Avoid extreme temperature changes and handle the cherries gently once the coating has set. Use chocolate intended for dipping, follow its melting instructions, and allow the candies to chill gradually.
Can I add sprinkles?
Yes! Add sprinkles immediately after dipping while the chocolate is still wet. This helps them stick securely to the coating.
How long do homemade Dark Chocolate Covered Cherries last?
For the best quality, keep them in an airtight container in the refrigerator and enjoy them within 3–4 days. Since the recipe uses maraschino cherries, moisture and storage conditions can affect the coating over time.
Are these cherries suitable for Christmas gifts?
Yes! They make a lovely homemade holiday candy. Place each cherry in a small candy cup and arrange them in a decorative box. Keep them refrigerated until gifting and let the recipient know they should be stored in the refrigerator.
Conclusion
These Dark Chocolate Covered Cherries are an easy, elegant homemade candy that brings together juicy maraschino cherries and rich dark chocolate in every bite. With just a few ingredients and simple preparation steps, you can create a beautiful treat for Christmas, Valentine’s Day, parties, or everyday dessert cravings.
Whether you finish them with flaky sea salt, chopped nuts, or a delicate white chocolate drizzle, these homemade chocolate-covered cherries are sure to make any dessert platter feel extra special. Make a batch, keep them chilled, and enjoy this delicious combination of chocolate and cherries!
Print
Dark Chocolate Covered Cherries – Easy Homemade Chocolate Cherry Candy
Ingredients
Here is everything you need to make homemade Dark Chocolate Covered Cherries.
- 1 jar (16 ounces) maraschino cherries with stems: Choose whole cherries with firm fruit and intact stems. Stemmed cherries are easier to dip and handle.
- 12 ounces dark chocolate melting wafers: Use good-quality melting wafers designed for dipping. They create a smooth coating that sets firmly.
- 1 teaspoon coconut oil, optional: Use only if recommended for your chosen chocolate and needed to slightly loosen its consistency. Follow the manufacturer’s melting instructions.
- Flaky sea salt, optional: A tiny pinch on each cherry adds a delicious contrast to the sweet fruit and rich chocolate.
- White chocolate, optional: Melt a small amount separately for a decorative drizzle.
Instructions
Place a fine-mesh strainer over a bowl and drain the maraschino cherries thoroughly. Transfer them to a plate lined with paper towels.
Gently pat each cherry dry, including the area around the stem. Let them air-dry for approximately 20–30 minutes, turning them occasionally if needed.
The cherries must be as dry as possible. Any excess moisture can prevent the chocolate from sticking properly or cause the coating to become uneven.
Step 2: Prepare the Chocolate
Place the dark chocolate melting wafers in a microwave-safe bowl.
Microwave in 20-second intervals, stirring thoroughly after each interval. Continue until the chocolate is completely melted and smooth.
Be careful not to overheat the chocolate. If the mixture becomes too thick for dipping, follow the manufacturer’s recommendations for adjusting its consistency. Add the optional coconut oil only if appropriate for the chocolate you are using.
You can also melt the chocolate using a double boiler over gently simmering water. Make sure no water or steam gets into the chocolate.
Step 3: Dip the Cherries
Hold each cherry by its stem and dip it into the melted dark chocolate. Rotate it gently until the cherry is coated.
Lift it out and allow the excess chocolate to drip back into the bowl.
Place each coated cherry on a parchment-lined baking sheet. Leave a little space between them so they do not stick together.
If you’re using stemless cherries, dip them with a fork, gently tapping off excess chocolate before placing them on the parchment.
Step 4: Add the Decorations
While the chocolate is still wet, sprinkle a tiny amount of flaky sea salt over each cherry if desired.
For a decorative finish, allow the dark chocolate coating to set first. Then drizzle melted white chocolate over the cherries using a spoon or a small piping bag.
You can also add finely chopped pistachios or toasted almonds while the chocolate is still wet.
Step 5: Chill Until Set
Transfer the baking sheet to the refrigerator and chill the cherries for approximately 20–30 minutes, or until the chocolate coating is firm.
Once set, carefully remove the cherries from the parchment paper.
Arrange them in mini candy cups or place them in an airtight container. Keep refrigerated until ready to serve.
Notes
- Dry the cherries completely: Moisture is the biggest challenge when making chocolate-covered fruit. Take your time with this step.
- Use firm cherries: Very soft or damaged cherries may break apart during dipping.
- Avoid overheating chocolate: Heat it gradually and stir frequently to maintain a smooth texture.
- Keep water away from chocolate: Even a small amount of water can cause melted chocolate to seize.
- Work in small batches: If your kitchen is warm, dip a few cherries at a time and keep the remaining cherries cool and dry.
- Use parchment paper: This prevents sticking and makes cleanup much easier.
- Let excess chocolate drip off: This creates a neater coating and prevents large chocolate puddles around the cherries.
