Introduction
Strawberry Cheesecake Dump Cake is one of the easiest yet most irresistible desserts you can make. It takes the classic idea of a dump cake—where you literally “dump” ingredients into a baking dish—and elevates it by adding a rich, creamy cheesecake layer that melts into the fruit beneath and the buttery cake mix on top. The result? A warm, gooey, comforting dessert with bold strawberry flavor and creamy pockets of cheesecake that make every bite unforgettable.
What makes this recipe so beloved is how fast and forgiving it is. There’s no mixing bowl needed, no complicated steps, and no fuss. You simply layer strawberry filling, a quick cheesecake mixture, and dry cake mix, then top with butter and bake. The oven does the rest, creating a bubbling, golden dessert with a perfect mix of soft, creamy, and slightly crisp textures. Whether you’re serving it at a potluck, holiday gathering, family dinner, or even as a quick weekday treat, this strawberry cheesecake dump cake always gets rave reviews.
This recipe is perfect for beginners, busy home cooks, or anyone who loves the flavors of cheesecake but doesn’t want the hassle of baking one from scratch. Rich, fruity, sweet, and beautifully simple—let’s get into the ingredients, preparation steps, variations, and everything else you need to make this amazing dessert.
Table of Contents
Ingredients:
For the Strawberry Layer
- 2 cans strawberry pie filling (or 4 cups homemade strawberry filling)
- 1 cup fresh sliced strawberries (optional, for extra fruitiness)
For the Cheesecake Layer
- 8 oz cream cheese, softened
- ½ cup granulated sugar
- 1 teaspoon vanilla extract
- 1 large egg
For the Cake Layer
- 1 box vanilla, white, or yellow cake mix
- 1 stick (½ cup) unsalted butter, melted (or cut into thin slices)
Optional Toppings
- Whipped cream
- Fresh strawberries
- Powdered sugar
- Vanilla ice cream
Preparation:
Step 1: Prepare the Baking Dish
Preheat your oven to 350°F (175°C). Grease a 9×13-inch baking dish lightly with butter or non-stick spray. Since dump cakes can bubble during baking, place a sheet pan underneath if desired for easy cleanup.
Step 2: Add the Strawberry Layer
Spread both cans of strawberry pie filling evenly across the bottom of the dish. If you want a stronger fresh strawberry flavor and a more textured bite, sprinkle in the fresh sliced strawberries. This creates the juicy, vibrant base of the dessert.
Step 3: Make the Cheesecake Filling
In a medium bowl, beat the softened cream cheese until smooth. Add sugar, vanilla extract, and the egg, mixing until creamy and fully combined. This mixture will bake into soft, rich pockets throughout the cake, giving you that classic cheesecake flavor.
Step 4: Spoon the Cheesecake Mixture Over the Strawberries
Drop spoonfuls of the cheesecake mixture directly on top of the strawberry filling. You do not need to spread it perfectly; it will naturally melt and swirl as it bakes. Uneven pockets give the cake more texture.
Step 5: Add the Cake Mix
Sprinkle the dry cake mix evenly across the whole surface. Do not mix or stir. Keeping it dry on top helps create the signature buttery, crumbly topping dump cakes are famous for.
Step 6: Add the Butter
Pour melted butter evenly over the cake mix, trying to cover as much surface as possible. Alternatively, place thin slices of butter all over the top. The butter helps the cake mix bake into a crisp, golden topping.
Step 7: Bake the Dump Cake
Place the dish in the oven and bake for 45–55 minutes. The top should be golden and slightly crisp, with the strawberry filling bubbling around the edges. The center may still look slightly soft—that’s normal and part of the creamy dump cake texture.
Step 8: Cool Slightly and Serve
Allow the cake to cool for at least 15 minutes before serving. This helps the layers settle and makes scooping easier. Serve warm or at room temperature with your favorite toppings.
Variation:
1. Strawberry Lemon Cheesecake Dump Cake
Add the zest of one lemon to the cheesecake filling and use lemon cake mix for a bright, tangy twist.
2. Strawberry Shortcake Dump Cake
Use white cake mix and top the baked cake with whipped cream and shortcake crumbs.
3. Chocolate Strawberry Cheesecake Dump Cake
Use chocolate cake mix for a flavor combination reminiscent of chocolate-covered strawberries.
4. Strawberry Cream Cheese Crumble Cake
Mix ½ cup oats and ¼ cup brown sugar into the cake mix for a more textured, crumble-style topping.
5. Fresh Strawberry Version
Replace pie filling with 4 cups fresh chopped strawberries mixed with ½ cup sugar and 2 tablespoons cornstarch.
COOKING Note:
Dump cakes are meant to be rustic and gooey. The center will not slice like a traditional cake—it scoops like a cobbler. If the top looks dry during baking, drizzle 2–4 tablespoons melted butter over the dry spots. This ensures even browning and prevents powdery patches.
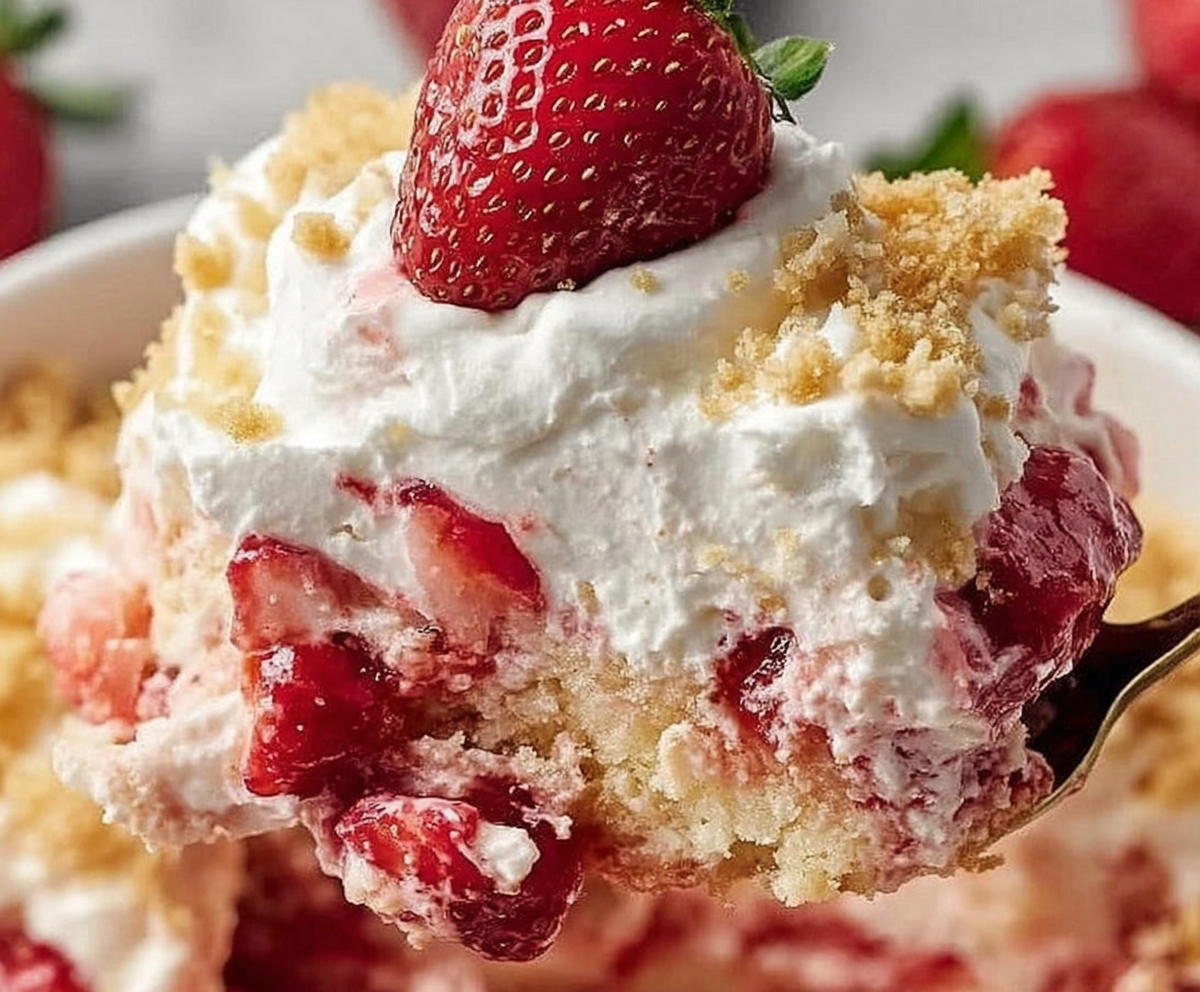
Serving Suggestions:
- Serve warm with a big scoop of vanilla ice cream.
- Add whipped cream and fresh berries for a classic strawberry cheesecake vibe.
- Dust with powdered sugar for a simple presentation.
- Pair with fresh mint leaves for color.
- Serve chilled for a firmer, more cheesecake-like texture.
Tips:
- Soften the cream cheese fully to avoid lumps.
- Don’t mix the layers—keeping them separate is what creates the dump cake texture.
- For extra richness, add 2 oz mascarpone to the cheesecake mixture.
- If using salted butter, reduce added salt in any variation.
- Store leftovers covered in the refrigerator for up to 4 days.
Prep Time:
10 minutes
Cooking Time:
45–55 minutes
Total Time:
55–65 minutes
Nutritional Information (Approx. per serving):
Calories: 360
Protein: 4g
Sodium: 310mg
FAQs
1. Can I make this dump cake without cream cheese?
Yes, but it will lose the classic cheesecake flavor. The dessert will still be delicious and fruity.
2. Can I use frozen strawberries?
Yes, thaw them first and mix with sugar and a little cornstarch to thicken the juices.
3. Why is my cake mix still powdery on top?
You may need more butter. Add 2–3 tablespoons melted butter and return to the oven for 10 minutes.
4. Can I make this recipe ahead of time?
Absolutely. Refrigerate the baked cake and reheat portions in the microwave or oven.
5. Can I use gluten-free cake mix?
Yes, gluten-free cake mix works perfectly with no additional changes.
Conclusion
Strawberry Cheesecake Dump Cake is one of the easiest, most crowd-pleasing desserts you can make. With just a few simple ingredients layered together and baked into warm, creamy perfection, it delivers big flavor with almost zero effort. The combination of sweet strawberries, silky cheesecake filling, and buttery cake topping creates a dessert that tastes like it took hours—even though it’s done in under an hour. Whether you’re hosting a party, feeding your family, or craving something sweet and comforting, this dump cake is guaranteed to become a favorite.
Print
Strawberry Cheesecake Dump Cake – Easy, Creamy, and Bursting with Berry Flavor
Ingredients
For the Strawberry Layer
-
2 cans strawberry pie filling (or 4 cups homemade strawberry filling)
-
1 cup fresh sliced strawberries (optional, for extra fruitiness)
For the Cheesecake Layer
-
8 oz cream cheese, softened
-
½ cup granulated sugar
-
1 teaspoon vanilla extract
-
1 large egg
For the Cake Layer
-
1 box vanilla, white, or yellow cake mix
-
1 stick (½ cup) unsalted butter, melted (or cut into thin slices)
Optional Toppings
-
Whipped cream
-
Fresh strawberries
-
Powdered sugar
-
Vanilla ice cream
Instructions
Preheat your oven to 350°F (175°C). Grease a 9×13-inch baking dish lightly with butter or non-stick spray. Since dump cakes can bubble during baking, place a sheet pan underneath if desired for easy cleanup.
Spread both cans of strawberry pie filling evenly across the bottom of the dish. If you want a stronger fresh strawberry flavor and a more textured bite, sprinkle in the fresh sliced strawberries. This creates the juicy, vibrant base of the dessert.
In a medium bowl, beat the softened cream cheese until smooth. Add sugar, vanilla extract, and the egg, mixing until creamy and fully combined. This mixture will bake into soft, rich pockets throughout the cake, giving you that classic cheesecake flavor.
Drop spoonfuls of the cheesecake mixture directly on top of the strawberry filling. You do not need to spread it perfectly; it will naturally melt and swirl as it bakes. Uneven pockets give the cake more texture.
Sprinkle the dry cake mix evenly across the whole surface. Do not mix or stir. Keeping it dry on top helps create the signature buttery, crumbly topping dump cakes are famous for.
Pour melted butter evenly over the cake mix, trying to cover as much surface as possible. Alternatively, place thin slices of butter all over the top. The butter helps the cake mix bake into a crisp, golden topping.
Place the dish in the oven and bake for 45–55 minutes. The top should be golden and slightly crisp, with the strawberry filling bubbling around the edges. The center may still look slightly soft—that’s normal and part of the creamy dump cake texture.
Allow the cake to cool for at least 15 minutes before serving. This helps the layers settle and makes scooping easier. Serve warm or at room temperature with your favorite toppings.
Notes
Dump cakes are meant to be rustic and gooey. The center will not slice like a traditional cake—it scoops like a cobbler. If the top looks dry during baking, drizzle 2–4 tablespoons melted butter over the dry spots. This ensures even browning and prevents powdery patches.