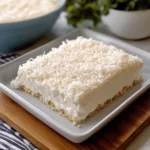
Description
This dreamy layered dessert combines a buttery cookie crust, creamy coconut pudding, sweetened coconut, and a light whipped topping into one incredibly delicious treat. Every spoonful is soft, creamy, fluffy, and packed with that sweet coconut flavor that makes coconut desserts so irresistible.
Ingredients
For the Crust
- 2½ cups crushed vanilla wafer cookies or shortbread cookies
- ½ cup unsalted butter, melted
- 2 tablespoons granulated sugar
- Pinch of salt
For the Coconut Cream Layer
- 2 packages instant coconut cream pudding mix, 3.4 ounces each
- 3 cups cold whole milk
- 1 teaspoon vanilla extract
- 1 cup sweetened shredded coconut
- 1 cup whipped topping
For the Cream Cheese Layer
- 8 ounces cream cheese, softened
- ½ cup powdered sugar
- 1 teaspoon vanilla extract
- 1 cup whipped topping
For the Top
- 2 cups whipped topping
- 1 cup sweetened shredded coconut
- ½ cup chopped pecans or almonds, optional
- Toasted coconut flakes, optional
Instructions
Place the vanilla wafers or shortbread cookies into a food processor.
Pulse until they become fine crumbs.
You can also place the cookies inside a sealed bag and crush them with a rolling pin.
Transfer the crumbs to a bowl.
Add the melted butter, sugar, and a small pinch of salt.
Stir until all the crumbs are evenly coated with butter.
The mixture should resemble wet sand.
Lightly grease a 9×13-inch baking dish.
Pour the cookie crumb mixture into the bottom.
Press it firmly into an even layer using the bottom of a measuring cup or glass.
Make sure the crust reaches all the corners.
Place the dish in the refrigerator while you prepare the filling.
Chilling the crust helps it firm up and makes the dessert easier to cut later.
Place the shredded coconut in a dry skillet over medium-low heat.
Stir frequently.
Toast for approximately 3–5 minutes, or until lightly golden and fragrant.
Remove it from the heat immediately.
Allow it to cool completely.
Be careful because coconut can burn quickly.
Toasted coconut adds a much deeper flavor than untoasted coconut.
Pour the cold milk into a large mixing bowl.
Add the instant coconut cream pudding mix.
Whisk for approximately 2 minutes, or according to the pudding package directions.
The mixture should become thick and creamy.
Add the vanilla extract.
Fold in 1 cup of shredded coconut and 1 cup whipped topping.
Mix gently until everything is evenly combined.
Place the softened cream cheese into a clean mixing bowl.
Beat until smooth.
Add the powdered sugar and vanilla extract.
Continue beating until creamy and free of lumps.
Fold in 1 cup whipped topping.
Mix gently until light and fluffy.
The cream cheese layer adds a slight tanginess that balances the sweetness of the coconut pudding.
Remove the chilled crust from the refrigerator.
Spread the cream cheese mixture evenly over the crust.
Use a spatula to smooth the surface.
Take your time with this layer because a smooth surface will make the finished dessert look beautiful.
Spoon the coconut pudding mixture over the cream cheese layer.
Spread gently into an even layer.
Try not to press too hard because you don’t want to disturb the cream cheese layer underneath.
Spread the remaining whipped topping evenly over the coconut pudding.
Use an offset spatula or the back of a spoon to create a smooth surface.
Sprinkle the toasted coconut evenly over the top.
For extra texture, add chopped pecans or almonds.
You can also add a few larger toasted coconut flakes for a beautiful presentation.
Cover the baking dish tightly with plastic wrap.
Refrigerate for at least 4 hours.
For the best texture, chill it overnight.
The longer chilling time allows the layers to firm up and makes the dessert easier to slice.
Once thoroughly chilled, cut the dessert into squares.
Use a sharp knife and wipe it clean between cuts for neat layers.
Serve cold.
For an extra-special presentation, garnish each serving with a little toasted coconut and a small spoonful of whipped cream.
Notes
The most important step is allowing the dessert to chill completely.
Because this is a layered no-bake dessert, the refrigerator does most of the work.
If you try to slice it too soon, the layers may be loose and difficult to serve neatly.
For the best results, chill for at least four hours, although overnight is even better.
Another important detail is draining any fruit completely if you add pineapple or another juicy ingredient. Excess liquid can prevent the layers from setting properly.
- Prep Time: 25 minutes
- Chill Time: 4 hours
Nutrition
- Serving Size: 12–16 squares
- Calories: 385
- Sugar: 31g
- Carbohydrates: 45g
- Protein: 5g