Description
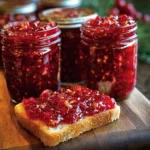
This Merry Christmas Jam is a festive homemade preserve that brings together the bright tartness of cranberries, the sweetness of strawberries, and the cheerful flavors of the holiday season. Its beautiful ruby-red color, fruity aroma, and sweet-tart taste make it a wonderful addition to Christmas breakfasts, holiday brunches, homemade gift baskets, and festive dessert tables.
Ingredients
Main ingredients
- 2 cups (approximately 200 g) fresh or frozen cranberries: Cranberries provide the signature tart flavor and rich red color that make this Christmas jam so attractive.
- 2 cups (approximately 300 g) strawberries, hulled and chopped: Strawberries contribute natural sweetness and a classic berry flavor that balances the tart cranberries.
- 3 cups (600 g) granulated sugar: Sugar sweetens the fruit, contributes to the jam’s consistency, and helps preserve quality. Do not substantially reduce it without using a recipe formulated for reduced-sugar jam.
- 1/4 cup (60 ml) fresh orange juice: Orange juice adds a bright citrus flavor that complements both berries.
- 1 tablespoon finely grated orange zest: Optional, but highly recommended for a more pronounced Christmas flavor.
- 2 tablespoons lemon juice: Adds brightness and helps balance the sweetness. Because this recipe is not a validated shelf-stable canning formula, the lemon juice should not be treated as a guarantee of safe room-temperature storage.
- 1/2 teaspoon ground cinnamon: Optional, for a gentle warming spice.
- 1/4 teaspoon ground ginger: Optional, for a subtle festive kick.
- 1 teaspoon vanilla extract: Optional, for a rounded, sweet aroma.
Optional ingredients
- A small pinch of ground cloves for a stronger holiday spice flavor
- 1 small finely diced apple for additional fruit texture
- 1–2 tablespoons water if the fruit mixture needs a little help starting to simmer
- Commercial powdered pectin, if using a tested recipe that specifies the appropriate amount and preparation method
Instructions
Begin by washing the fresh cranberries and strawberries under cool running water. Remove any damaged cranberries and discard any berries that appear spoiled.
Hull the strawberries by removing the green tops, then chop them into small pieces. Smaller pieces break down more easily during cooking and create a smoother jam.
If you are using frozen fruit, you can add it directly to the saucepan. Allow a little extra cooking time if the frozen fruit releases additional liquid.
Grate the orange zest carefully, avoiding the bitter white pith beneath the orange peel. Squeeze the orange juice and measure the lemon juice.
Preparing all the ingredients before heating the saucepan makes the cooking process easier and helps prevent overcooking.
Step 2: Combine the cranberries, strawberries, and citrus
Place the cranberries, chopped strawberries, orange juice, orange zest, and lemon juice in a large, heavy-bottomed saucepan.
Set the pan over medium heat and stir gently as the fruit begins to warm. If the mixture looks unusually dry, add a small amount of water to help it begin simmering.
As the cranberries heat, many will begin to soften and pop. The strawberries will release their juices, creating a colorful red mixture.
Continue cooking for approximately 5–10 minutes, stirring occasionally, until the fruit has softened.
Avoid using a very high temperature. Gentle, controlled heating helps the fruit cook evenly and reduces the risk of scorching.
Step 3: Break down the fruit
Use a wooden spoon or heat-resistant spatula to crush some of the softened cranberries and strawberries against the side of the saucepan.
For a chunky Christmas berry jam, leave some fruit pieces intact. For a smoother preserve, mash the mixture more thoroughly with a potato masher.
If you prefer a very smooth consistency, you can carefully blend the softened fruit using an immersion blender. Take care when blending hot fruit, as splashes can cause burns.
The texture at this stage will be thinner than the finished jam. It will continue to thicken as the mixture simmers and cools.
Step 4: Add the sugar and spices
Reduce the heat slightly and gradually stir in the granulated sugar until it dissolves.
Add the cinnamon and ground ginger if using them. Stir thoroughly to distribute the spices evenly throughout the fruit.
Continue heating until the mixture reaches a gentle boil. Stir regularly, making sure to scrape the bottom and corners of the pan to prevent sticking.
Once the sugar has dissolved, avoid making untested ingredient substitutions. Sugar plays an important role in traditional jam texture and preservation, and simply reducing the quantity can change the final result.
Taste a small amount only after cooling it sufficiently. If you prefer a more pronounced citrus flavor, additional zest may be used, but major changes to the proportions should be avoided if you intend to use a tested jam-setting method.
Step 5: Simmer the jam until it thickens
Allow the mixture to simmer gently for approximately 15–25 minutes, stirring frequently.
The exact cooking time depends on the saucepan’s width, the amount of liquid in the fruit, and whether you use fresh or frozen berries.
As the mixture cooks, the cranberries will soften further, the strawberries will break down, and the liquid will gradually reduce. The color should remain bright and festive, although it may deepen slightly during cooking.
Do not leave the saucepan unattended. Fruit and sugar mixtures can scorch if they are not stirred regularly, especially as the jam becomes thicker.
Remember that hot jam often looks thinner than it will after cooling. Avoid cooking it excessively in an attempt to make it extremely thick while still hot.
Step 6: Check the consistency
There are several ways to assess the consistency of homemade jam.
One simple method is to place a small plate in the refrigerator before cooking. Spoon a little jam onto the chilled plate and allow it to cool for a minute. Push the edge gently with your finger or a spoon. If the mixture wrinkles slightly and does not run freely, it may be sufficiently thick for your preference.
This test provides a useful indication, but it does not replace the instructions for a tested pectin-based recipe when a specific set is required.
If the jam is still very runny, continue simmering briefly and test again. If it already looks thick, remember that cooling will make it firmer.
Avoid adding large amounts of extra sugar or lemon juice to correct the texture without following a reliable recipe, because these changes can affect both consistency and flavor.
Step 7: Add the vanilla
When the fruit mixture has reached your preferred consistency, remove the saucepan from the heat.
Stir in the vanilla extract, if using. Adding vanilla near the end helps preserve its delicate aroma.
Taste a small cooled sample and assess the balance between tart cranberries, sweet strawberries, citrus, and spices.
If you prefer a stronger holiday aroma, you can add a little extra orange zest in a future batch. Keep warming spices modest so that they enhance the berries instead of overpowering them.
Step 8: Cool and transfer the jam
Allow the mixture to cool briefly, keeping in mind that hot jam can cause serious burns.
Transfer the jam into clean, heat-appropriate containers using a clean spoon or ladle. Follow appropriate handling guidance for the containers you choose.
Do not assume that filling jars with hot jam makes the product shelf-stable. Without a validated canning recipe and the correct processing method, this homemade preserve should be refrigerated or frozen.
Leave enough headspace in freezer-safe containers to allow for expansion if you intend to freeze the jam.
Step 9: Refrigerate and allow the flavors to develop
Once the jam has cooled appropriately, cover the containers and refrigerate them promptly.
The mixture will generally thicken further as it cools. The flavors also become more blended after resting for several hours.
For the best quality, use the jam within approximately 1–2 weeks when refrigerated, unless a tested recipe provides different storage guidance. Always use clean utensils and discard the jam if you notice mold, fermentation, an unusual smell, or other signs of spoilage.
For longer storage, freeze the jam in suitable freezer-safe containers.
Step 10: Serve or prepare as a Christmas gift
Once chilled, your Merry Christmas Jam is ready to enjoy.
Spoon it into small serving bowls for a holiday breakfast or transfer it to decorative gift containers for friends and family. Add festive ribbons and ingredient labels for an attractive presentation.
If you are giving the jam as a gift, clearly label it as a refrigerator preserve and include storage instructions. Do not present it as shelf-stable unless it has been prepared using a validated canning process.
Notes
The quality of homemade Merry Christmas Jam depends on fruit preparation, cooking time, sweetness, and storage.
Use ripe, good-quality fruit. Fresh or frozen berries are both suitable, but avoid fruit that is spoiled or moldy.
Choose a wide saucepan. A wider cooking surface allows moisture to evaporate more efficiently, helping the jam thicken without unnecessarily prolonged cooking.
Stir frequently. Sugar-rich mixtures can stick to the bottom of the pan, especially toward the end of cooking.
Balance the fruit flavors. Cranberries are naturally tart, while strawberries are sweeter. The combination creates a pleasant sweet-and-tart flavor, but the exact balance depends on the fruit.
Be careful with added spices. Cinnamon and ginger can make the jam taste festive, but too much spice may overpower the berry flavor.
Do not judge the final thickness while hot. The jam will become thicker as it cools.
Use clean containers. Properly cleaned containers and utensils reduce the risk of contamination, although they do not make an unprocessed jam shelf-stable.
Refrigerate promptly. This recipe is intended for refrigerated or frozen storage unless prepared according to a validated canning process.
Do not rely on acidity alone. Adding lemon juice does not automatically make a homemade jam safe for storage at room temperature. Shelf-stable canning requires an appropriate tested formulation and processing method.
- Prep Time: 15 minutes
- Cooling Time: 45–60 minutes
- Cook Time: 25–35 minutes
Nutrition
- Calories: 35–45 per tablespoon
- Sodium: 0–5 mg per tablespoon
- Protein: 0–0.2 g per tablespoon