Ingredients
For the Bread
- 3 cups all-purpose flour
- 1 packet active dry yeast, about 2¼ teaspoons
- 2 tablespoons granulated sugar
- 1 teaspoon salt
- 1 cup warm water
- 2 tablespoons vegetable oil or melted butter
- 1 tablespoon additional butter for brushing
Recommended Kitchenware:
- Large sturdy resealable food-safe bag
- 9x5-inch loaf pan
- Measuring cups and spoons
- Kitchen towel
- Rolling pin, optional
- Silicone spatula
- Cooling rack
- Premium cookware sets
Instructions
Begin by warming the water to approximately 105–110°F.
The water should feel comfortably warm rather than hot.
Pour the warm water into a bowl and stir in the sugar and yeast.
Let the mixture sit for about 5–10 minutes.
When the yeast becomes foamy, it is ready to use.
This step is important because active yeast is what gives the bread its light, airy texture.
If you’re using ingredients from organic food brands, check the yeast expiration date before beginning.
Open a large sturdy food-safe resealable bag.
Add the flour and salt.
Pour in the activated yeast mixture followed by the vegetable oil or melted butter.
Seal the bag carefully, leaving a little air inside.
Gently squeeze and knead the bag with your hands until the ingredients begin forming a dough.
The bag keeps the flour contained, making this method much cleaner than traditional countertop kneading.
Using reliable cooking tools and durable kitchenware makes the process even easier.
Continue kneading the dough inside the sealed bag for approximately 5–7 minutes.
Turn and squeeze the bag repeatedly until the dough becomes smooth and elastic.
If the dough feels extremely sticky, add a tablespoon of flour at a time.
If it feels dry or crumbly, add a teaspoon of warm water at a time.
The dough should eventually form a soft ball.
This hands-on technique is one of the most appealing parts of bread in a bag because there’s almost no messy cleanup.
Lightly grease a 9×5-inch loaf pan.
Remove the dough from the bag and place it into the pan.
Cover it loosely with a clean kitchen towel.
Let it rise in a warm, draft-free location for approximately 45–60 minutes.
The dough should become noticeably larger and approximately double in size.
Avoid placing the dough somewhere extremely hot because excessive heat can damage the yeast.
Quality loaf pans and dependable cookware sets help create evenly shaped bread with a beautiful golden crust.
Preheat the oven to 375°F.
Once the dough has finished rising, brush the top lightly with melted butter.
Place the loaf pan in the oven and bake for approximately 25–30 minutes.
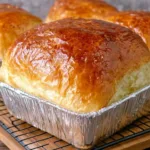
The bread should become golden brown and sound hollow when gently tapped.
Remove it from the oven and allow it to cool in the pan for about 10 minutes.
Transfer the loaf to a cooling rack and let it cool before slicing.
For the softest texture, brush the warm crust with a little additional butter.
Notes
The temperature of the water is important. Water that is too hot can damage the yeast, while water that is too cool may slow activation.
Don’t add too much flour. A slightly soft dough generally produces a more tender loaf.
When kneading inside the bag, make sure the bag is strong enough to withstand repeated squeezing and is specifically intended for food storage.
Allow enough time for the dough to rise. The exact rising time depends on the temperature of your kitchen.
Avoid slicing the bread immediately after removing it from the oven. Allowing it to cool helps the interior finish setting and makes slicing easier.
A quality loaf pan creates a more evenly shaped loaf, while dependable kitchenware makes measuring and preparation easier.
If you bake regularly, investing in premium cookware sets, sturdy baking pans, and reliable cooking tools can make homemade bread and other recipes more consistent.